 Maestro
Bamboo Watch Tower
Last Updated: 2026-07-09
Using little more than bamboo and a lot of rope, I built a 25-ft tall tower. This article records the why and how.
Table of Contents
- Table of Contents
- Why a Watch Tower?
- Day Zero: Planning the Build
- Day One: Building the Tripod
- Day Two: The Floor and Rope Ladder
- Day Three: Fixing the Ladder
- Day Four: Handrails and Sun Shade
- Photo Collection of the Finished Tower
- Lessons Learned
- Acknowledgements
- Month and a Half Later
Why a Watch Tower?
I used to be big into scouting here in the USA and participated from the ages of seven, observing the cub scouts, to twenty one, as an assistant scout master. For years, I would idling flip through the pages on pioneering projects in my handbook, day dreaming of making the various bridges and towers they outlined. My favorite structure was the hourglass tower which used two tripods lashed together; it’s triangular frame was a fun contrast to the other more rectangular projects and the creative use of an inverted tripod is a style I would never have come up with on my own. Below is a diagram of the tower from the South African Scout Wiki; I don’t know how it compares to my long-lost handbook, but it gets the idea across.
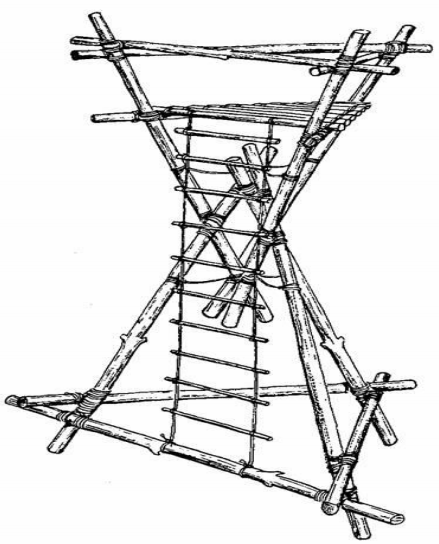
For insurance reasons, the BSA required structures that would put a scout more than 6ft off the ground to get special permissions. I never attended a camp that had arranged for that approval, so I never built the tower while I was in scouting. Jump to present day, and I find myself in Brazil with my father-in-law(FIL) showing me his cousin’s farm. When he showed me the bamboo grove with an open license to build whatever I’d like, I knew immediately what to do! It was finally time to build my tower.
Day Zero: Planning the Build
I speak enough Portuguese to get by, but there’s still a language barrier, so I started with building a model. Not only did it serve to immediately communicate what I was trying to do to my FIL and cousin, it also helped me to estimate the lengths of bamboo and rope I would need. I made the model with wooden skewers and yarn.
I estimated how tall I would be relative to the handrails and used that to calculate the lengths of bamboo I would need. From the bamboo I saw in the grove, I estimated 6- and 2-in diameters for the bamboo poles (there’s the thick yellow bamboo and the thinner green bamboo; I don’t know if they’re different species or different ages of the same species) Using those diameters, I estimated how much rope would be needed in each lashing and multiplied that number by the total number of lashings to estimate how much rope I would need. I came up with 246 meters (807 ft) of rope. My estimate was almost dead, but later design changes required additional rope.
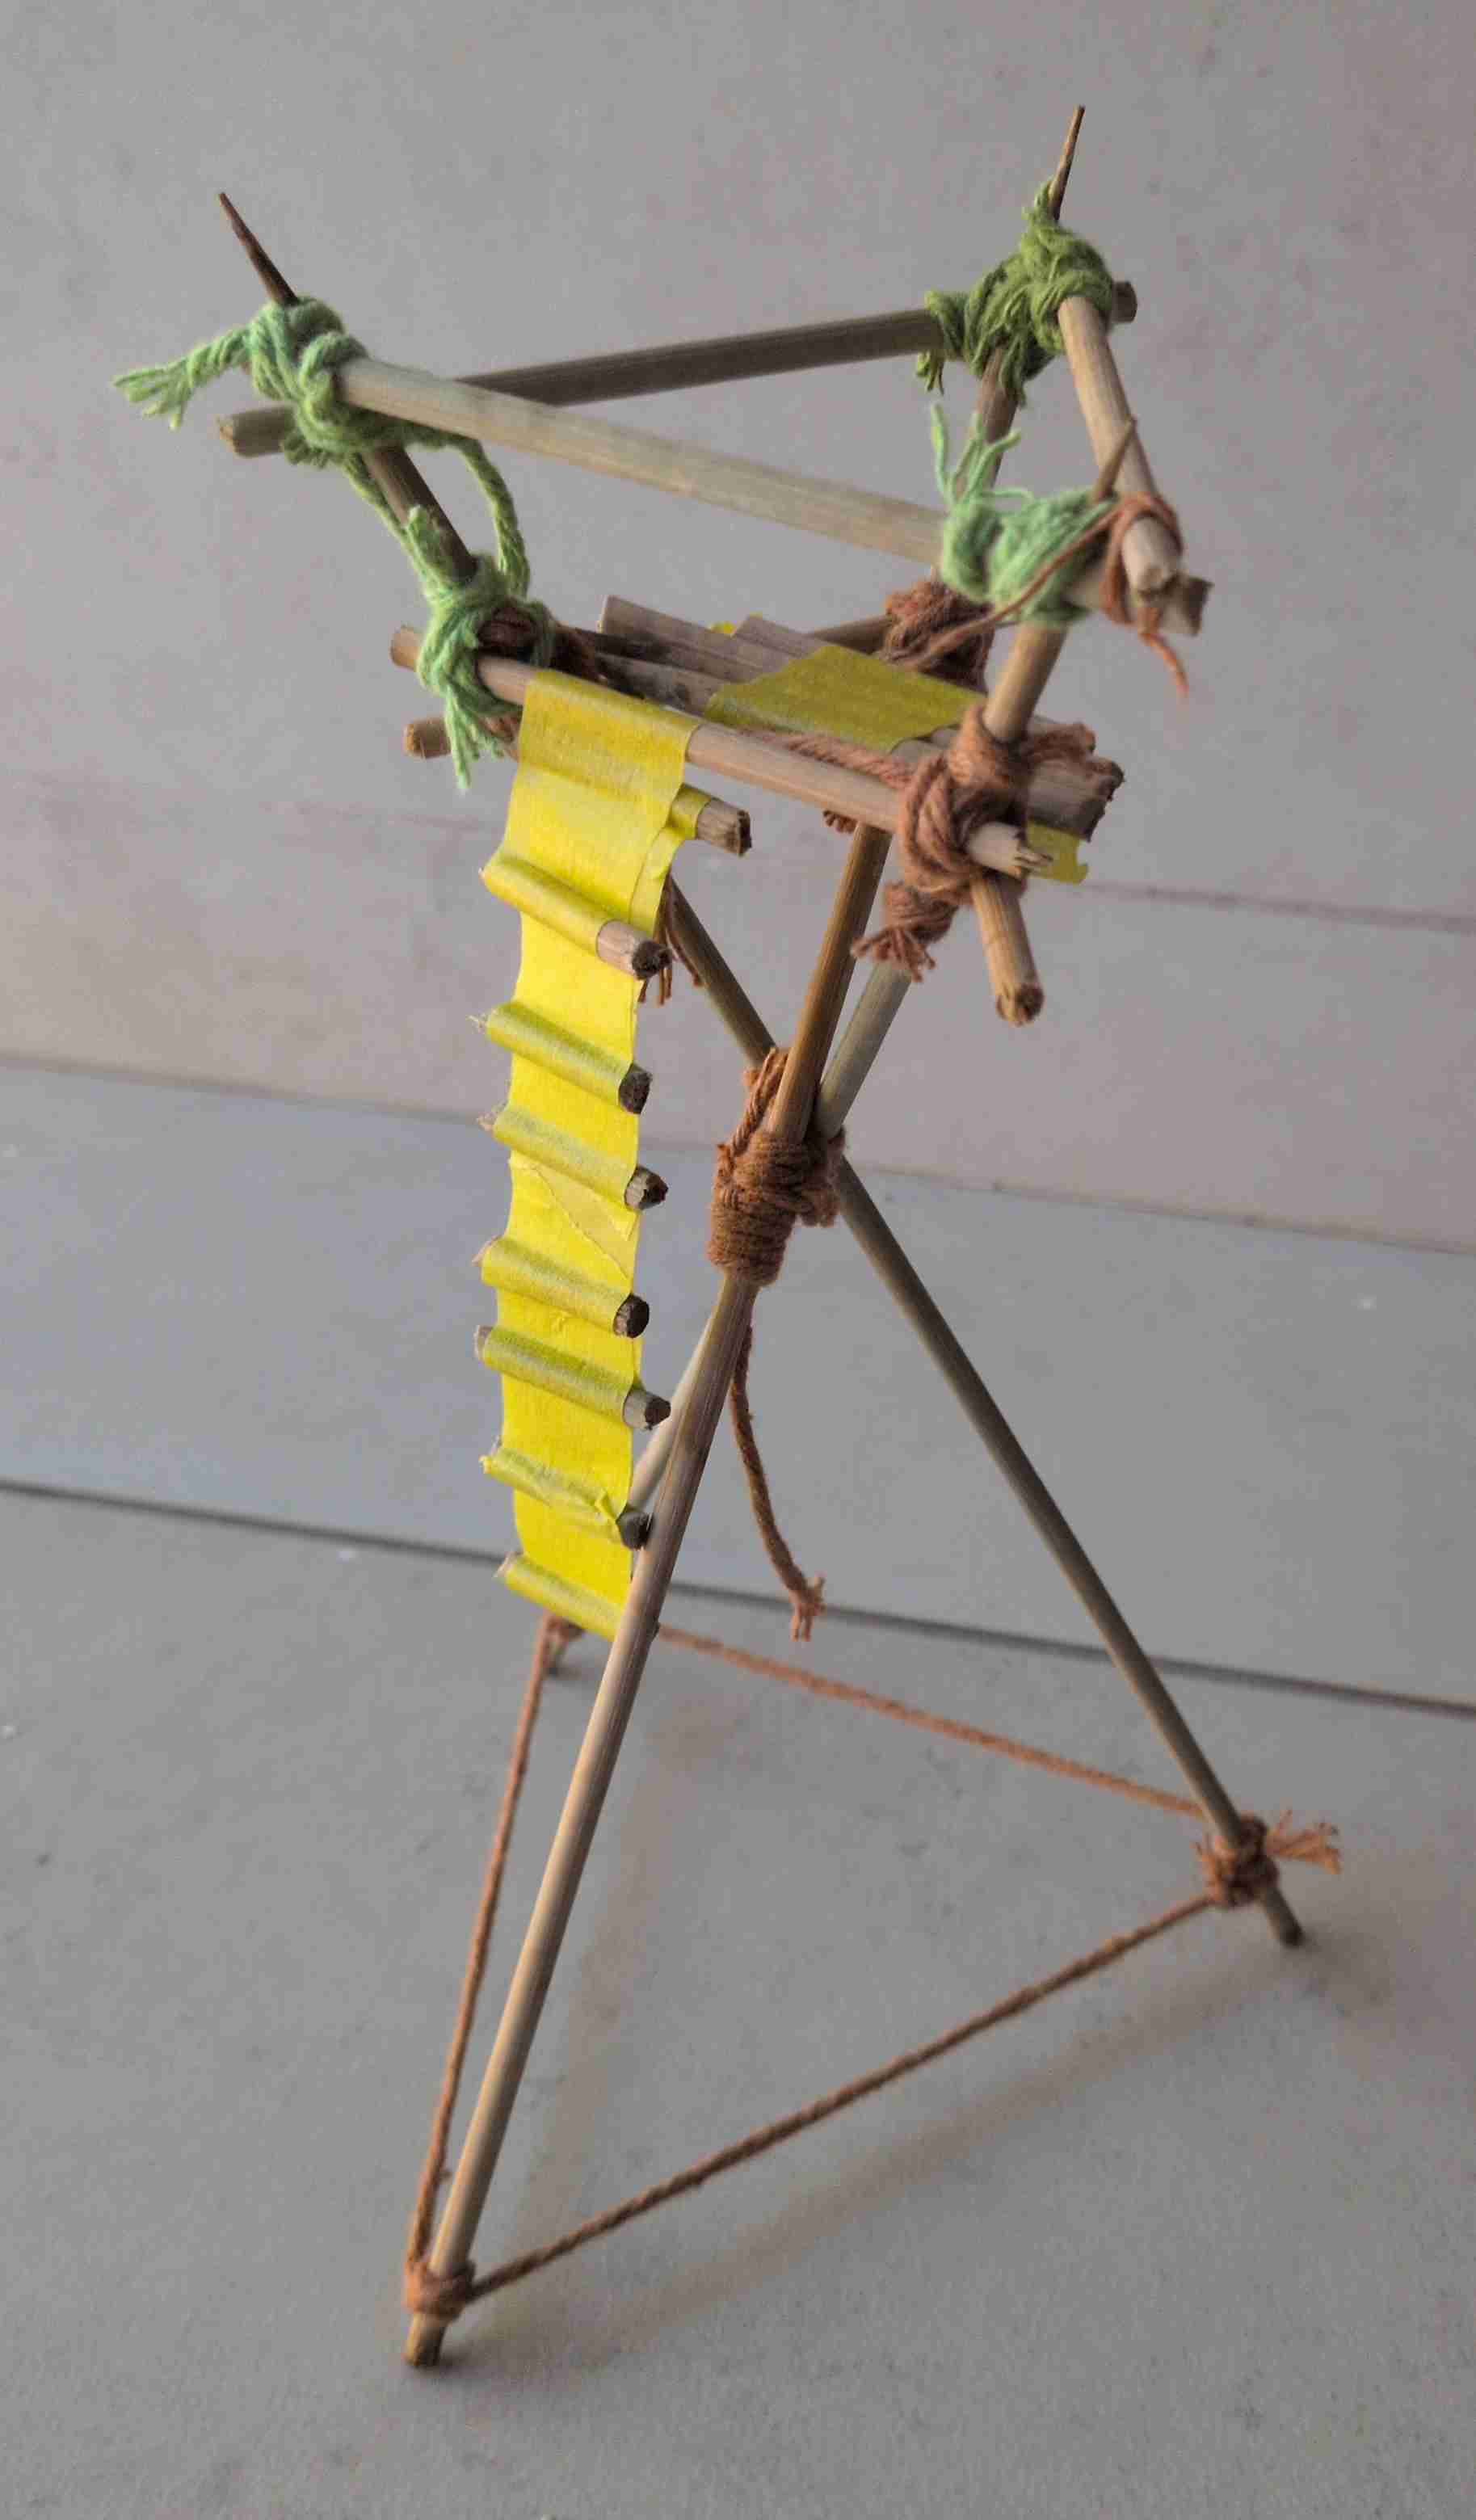
You’ll notice that my design does not use dual tripods, but rather attaches the floor and handrails to the top ends of a singular tripod. As a kid, I had always been confused as to why the tower shown in my handbook prescribed two tripods instead of one. As designed the tower, I assumed it was due to practical limitations to sourcing and transporting long wooden poles and possibly to complicate a project to encourage teamwork. Now that the tower is done, I suspect it worked to strengthen the structure.
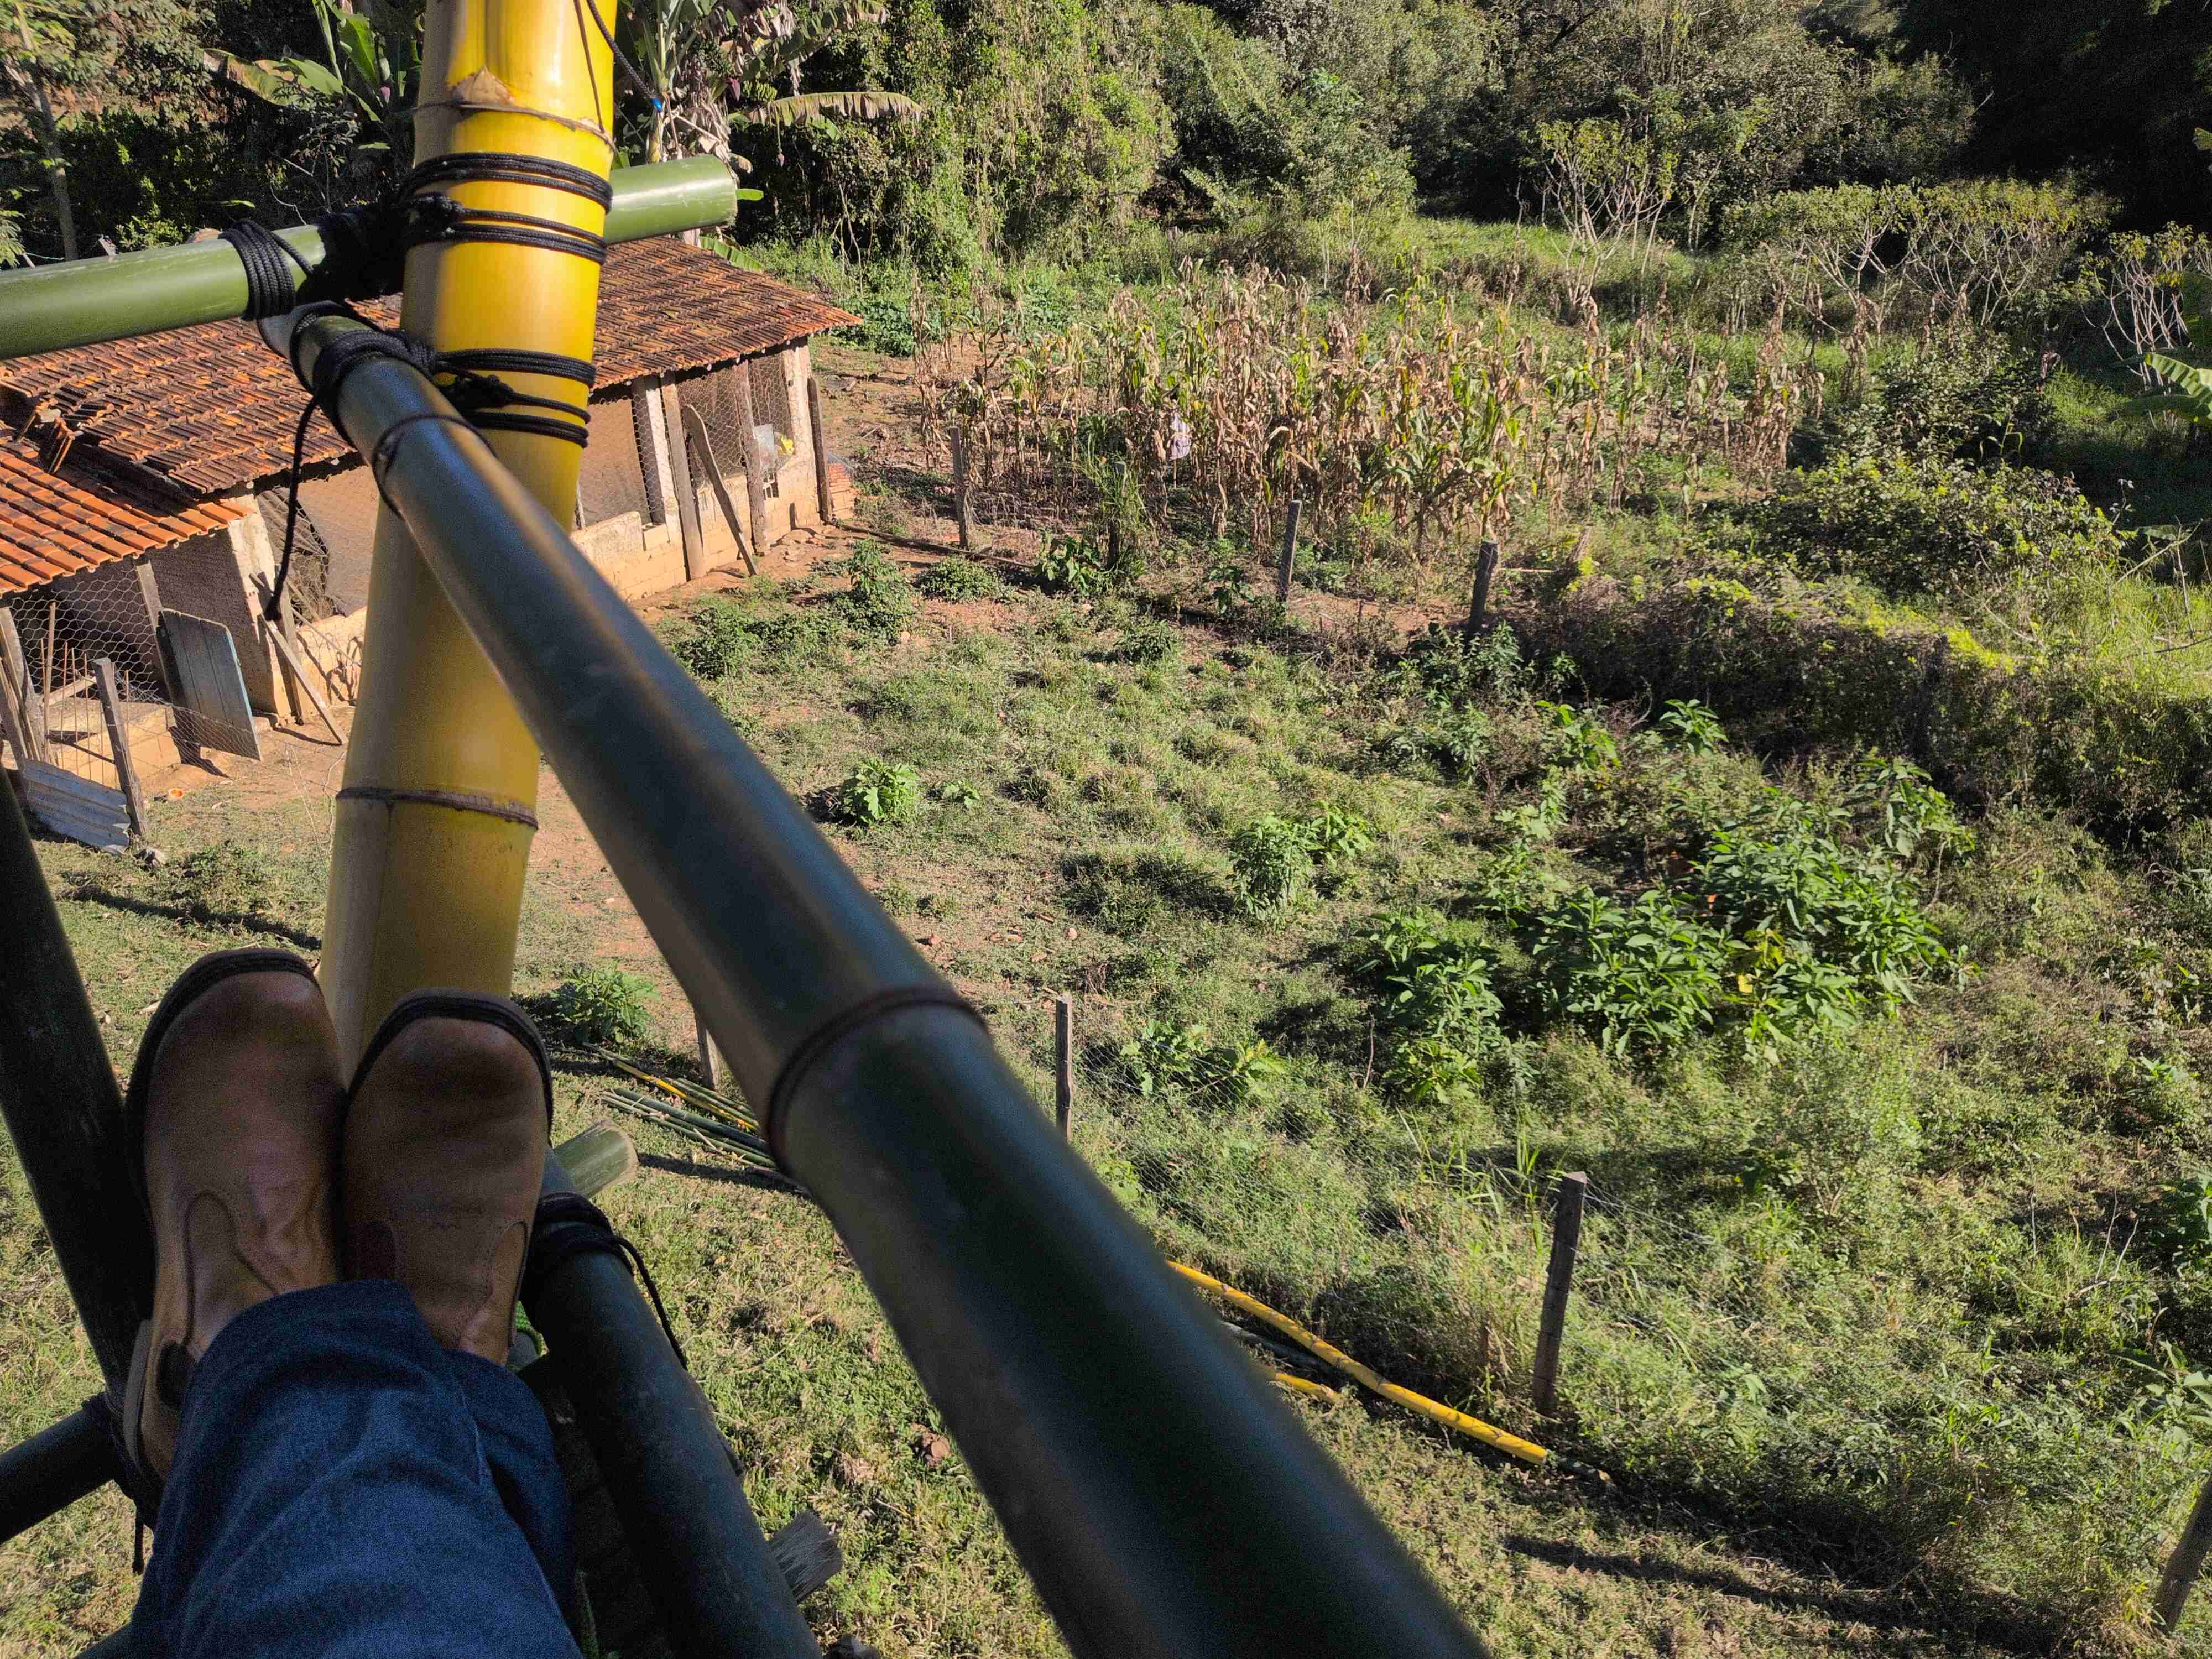
My FIL, cousin, and I chose to put the tower on part of the farm that was close to the bamboo grove and overlooked the chicken coup. My cousin had had issues with various pests attacking his chickens, and thought the tower would make a good shooting platform. It was on a slight hill rather than flat ground which made leveling the tower a challenge.
Day One: Building the Tripod
Collecting the Bamboo
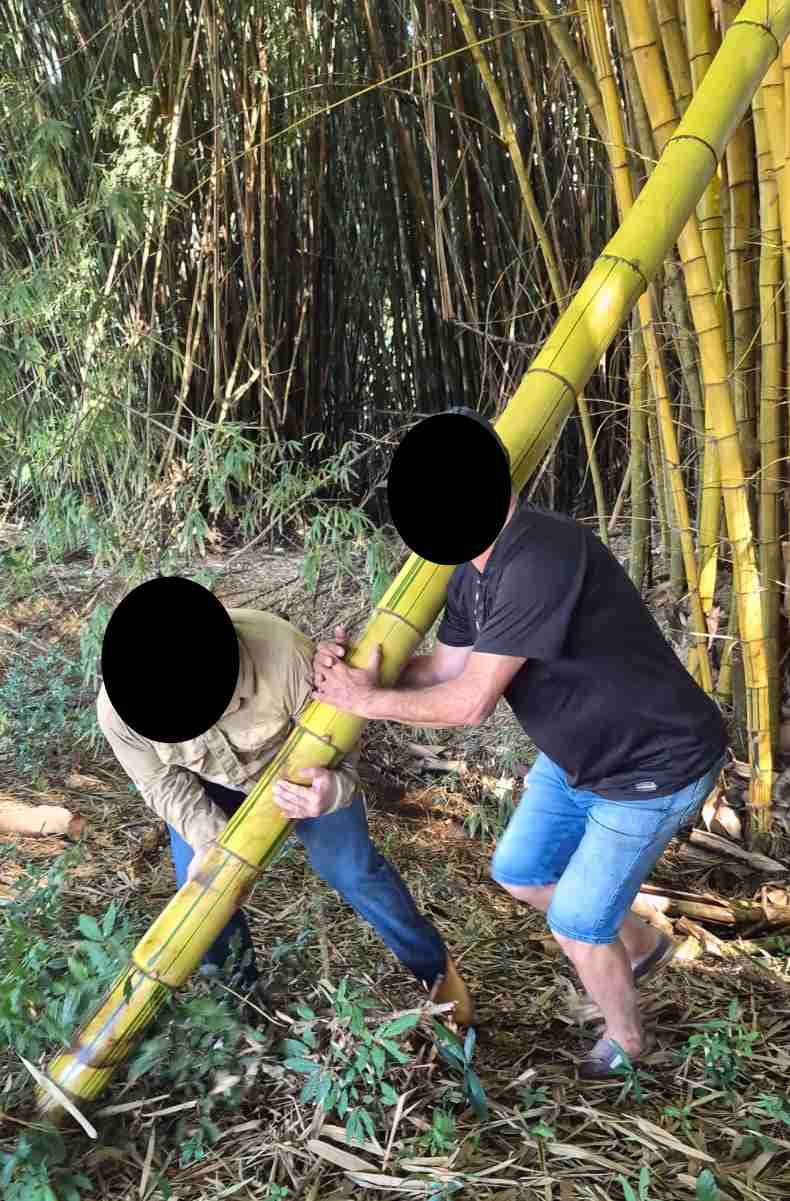
There were two challenges in collecting the bamboo: location and weight. The primary tripod legs were to be made of the thicker, yellow bamboo. But the grove had a small stream winding through it with steep, muddy sides covered with leaf litter. Naturally, the straightest, healthiest-looking bamboo were right on the bank of this stream. We ended up throwing in downed bamboo, brittle with age and rot, into the stream trying to make any sort of dry foothold. We had to switch to a small one-handed hatchet rather than a two-handed axe to maintain our balance. Thankfully, bamboo is hollow which made cutting a little easier.
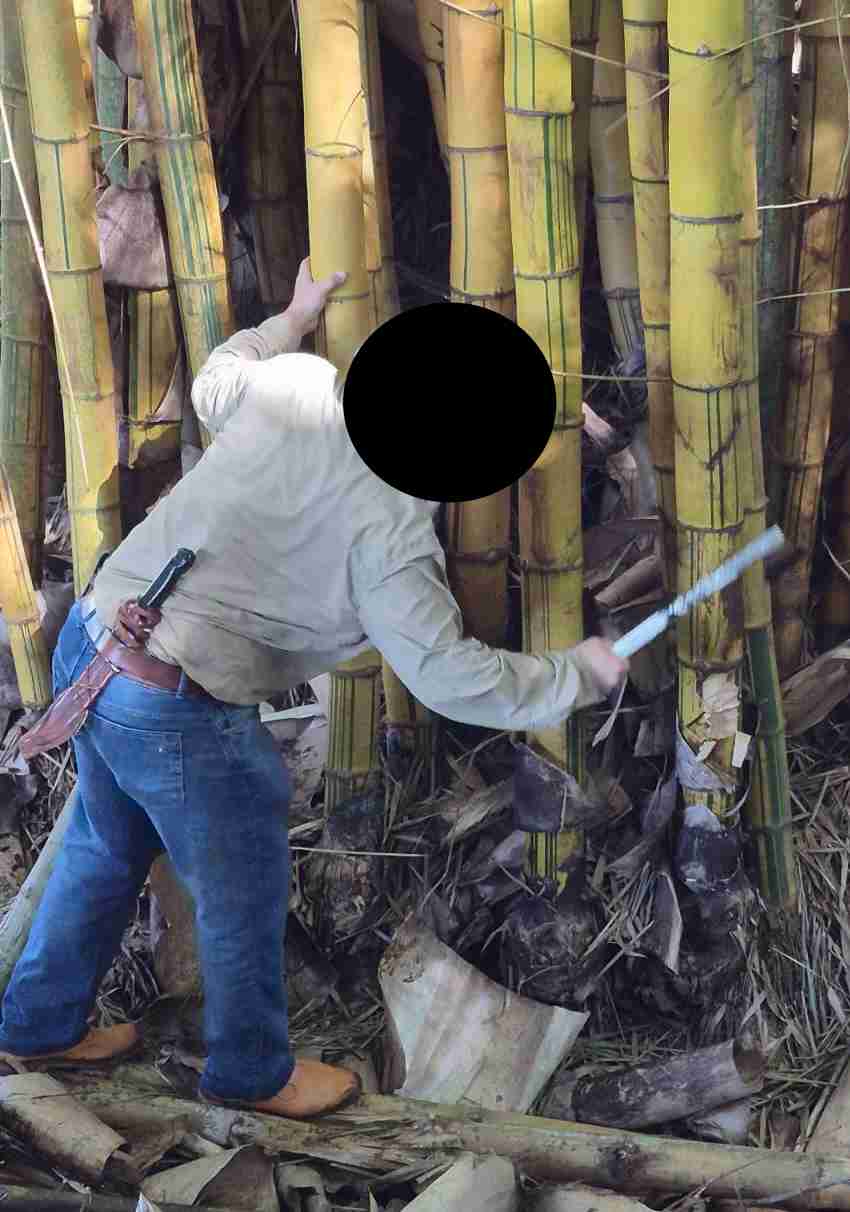
Second, the thicker bamboo was shockingly heavy. Smaller pieces of bamboo, especially old and dried pieces, are feather light compared to a comparable size of wood which led to underestimating the weight of the larger fresh pieces. Bamboo is also super smooth; it’s closer in texture to plastic than any natural piece of wood. Between the weight, the texture, bamboo’s tendency to get tangled amongst the other tightly packed poles, and the awkward footing, my FIL and I couldn’t lift the bamboo away. Worse yet, the end of the bamboo, cut at an angle, would bury itself into the soft dirt every time we set it down. For a moment, we were concerned we wouldn’t be able to complete the project.
While my FIL decided to wait for my cousin to finish his farm work and help us lift, I sat down and made a tool to help us grip the bamboo. I took a short length of cord and tied both ends to a small piece of green bamboo. By wrapping the resultant bight around the yellow bamboo and passing the green bamboo through the bight, I made a self-tightening lifting handle.
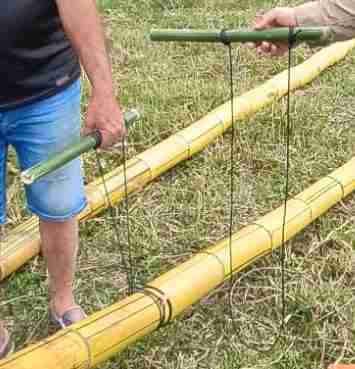
I have spoken previously on the importance of just starting in order to be creative and this is a good example. I had no idea how to make this lifting handle when I sat down with a cord and a stick. I had originally envisioned putting a handle on both ends. But has I tried to make it, and imagined how it would be used, the final device fell into my lap as if it was meant to be. This is also a great example of taking time to prepare your tools. It felt like I was wasting time exploring this oddball idea that I wasn’t sure would even work, but my FIL saw how much easier it was to lift the yellow bamboo, he hooped and hollered like it was some sort of miracle.
Raising the Tripod
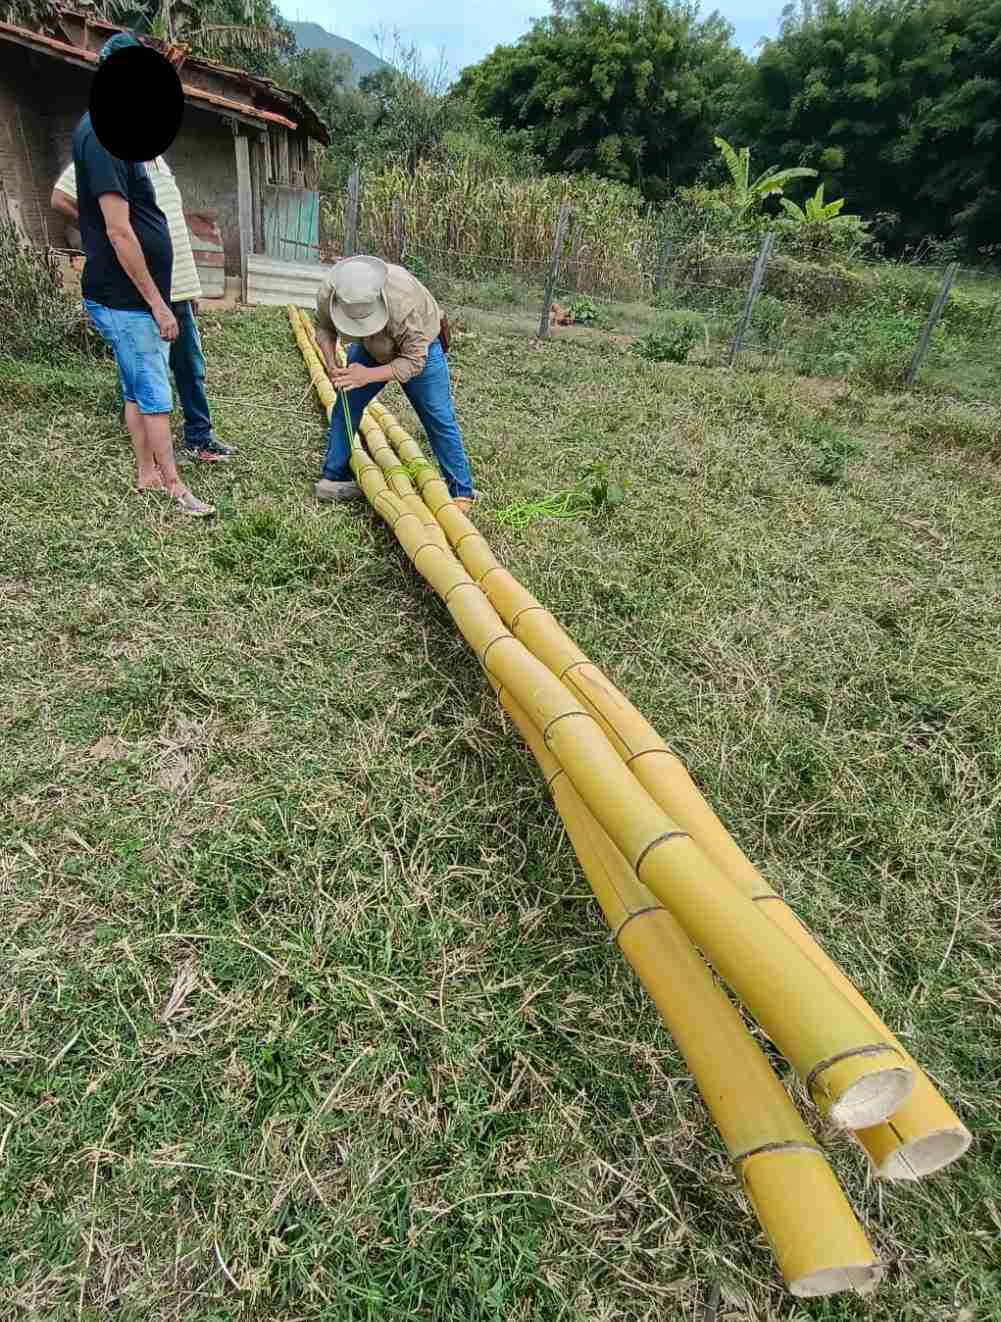
Encouraged with our success in moving the bamboo, we moved on to the next step in my plan: assembling the primary tripod. We cut three 20 meter (64 ft) bamboo poles down to 9 meters and set the excess to the side. I eye-balled a third of the way from one end and lashed the three poles together. The plan was to put two legs down hill, and one leg up hill. Using a long piece of clear tubing filled with water, we estimated the elevation gain of the hill and cut the middle leg an equal amount shorter. I tied a rope at the end of each pole and at the lashing to act as both plumb lines and future guy lines.
Rotating and lifting the tripod legs into position took the wind right out of our sails. We were again confronted with the shear weight of the bamboo poles, even cut down to half their original length. There was just the three of us to maneuver the legs and nothing would stay were we placed it. Every time we pushed, a foot would slide. Every time we pulled, a leg would swing. Again, we questioned the feasibility of our chosen endeavor. Obviously, by some miracle, we were able to get it up.
My wife wants me to add that she did try to help during this process. She did not stay long. FIL, cousin, and I, despite the language barrier, had a pretty good system of pointing, waving, and simple verb-based commands to facilitate communications. My lovely wife understood absolutely none of it. She also had a knack for standing in the most dangerous place possible or right in front of where we were trying to move something. Her lack of situational awareness combined with not being strong enough to actually move anything led to my FIL and I simultaneously yelling at her to leave while still struggling under the awkward weight of the tripod. My wife and I laugh at the memory now as it parodied beat for beat scenes of Rick and Morty yelling at Summer, which we recently started binging together.
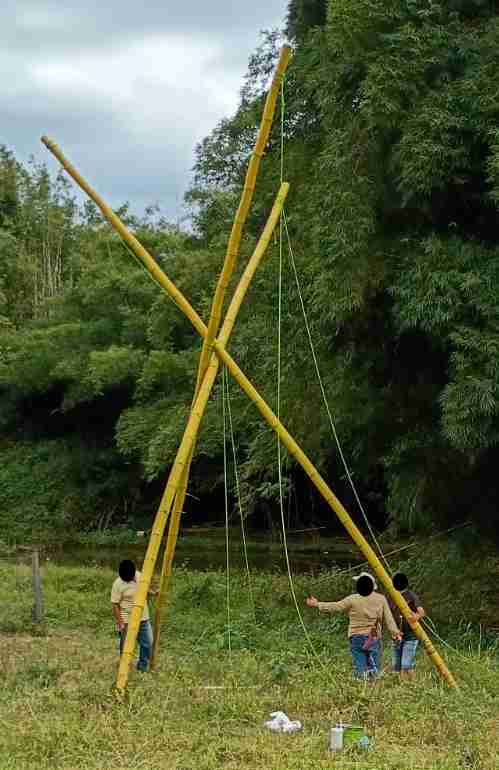
In hindsight, I think my wife would have made a good spotter. While stewing in our mix of frustration and excitement, us men did a poor job of leveling the tripod. The tripod ended up rotated clockwise compared to the original plan, so the downhill legs were not level each other. This in turn invalidated our efforts to cut the uphill leg a little short and the whole thing leaned down hill. Our initial efforts to level the tripod was focused on moving legs in and out rather than adjusting their length, and we ended up with an asymmetrical tripod. It wasn’t until after we had already cut up the remaining yellow bamboo to lock everything together that we realized the plumb lines weren’t centered and we had to cut one of the feet shorter. We did eventually get the tripod level, but its asymmetry became a problem towards the end. Having someone several yards back to notice those asymmetries would have avoided these problems.
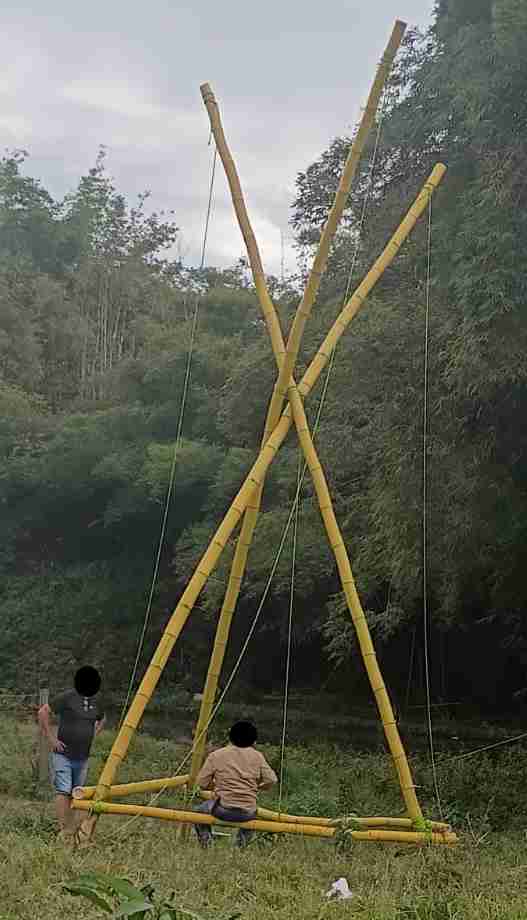
The original plan had called for guy lines, as is standard practice for these kind of pioneering projects in the BSA. However, my cousin fully expected this structure to last two or three years (which is insane. Usually these structures are taken down for safety reasons after a few days. With untreated bamboo and rope exposed to sun and rain, who know how long it will last). My FIL thought that piles would be sufficient to secure the structure and longer lasting than guy lines and stakes. Using a post hole digger, we planted bamboo piles about 1 meter (3 ft) into the ground and used another tool to tamp down the back fill. I was skeptical at first on how sturdy the piles would be, but a week later now and they seem to be fine.
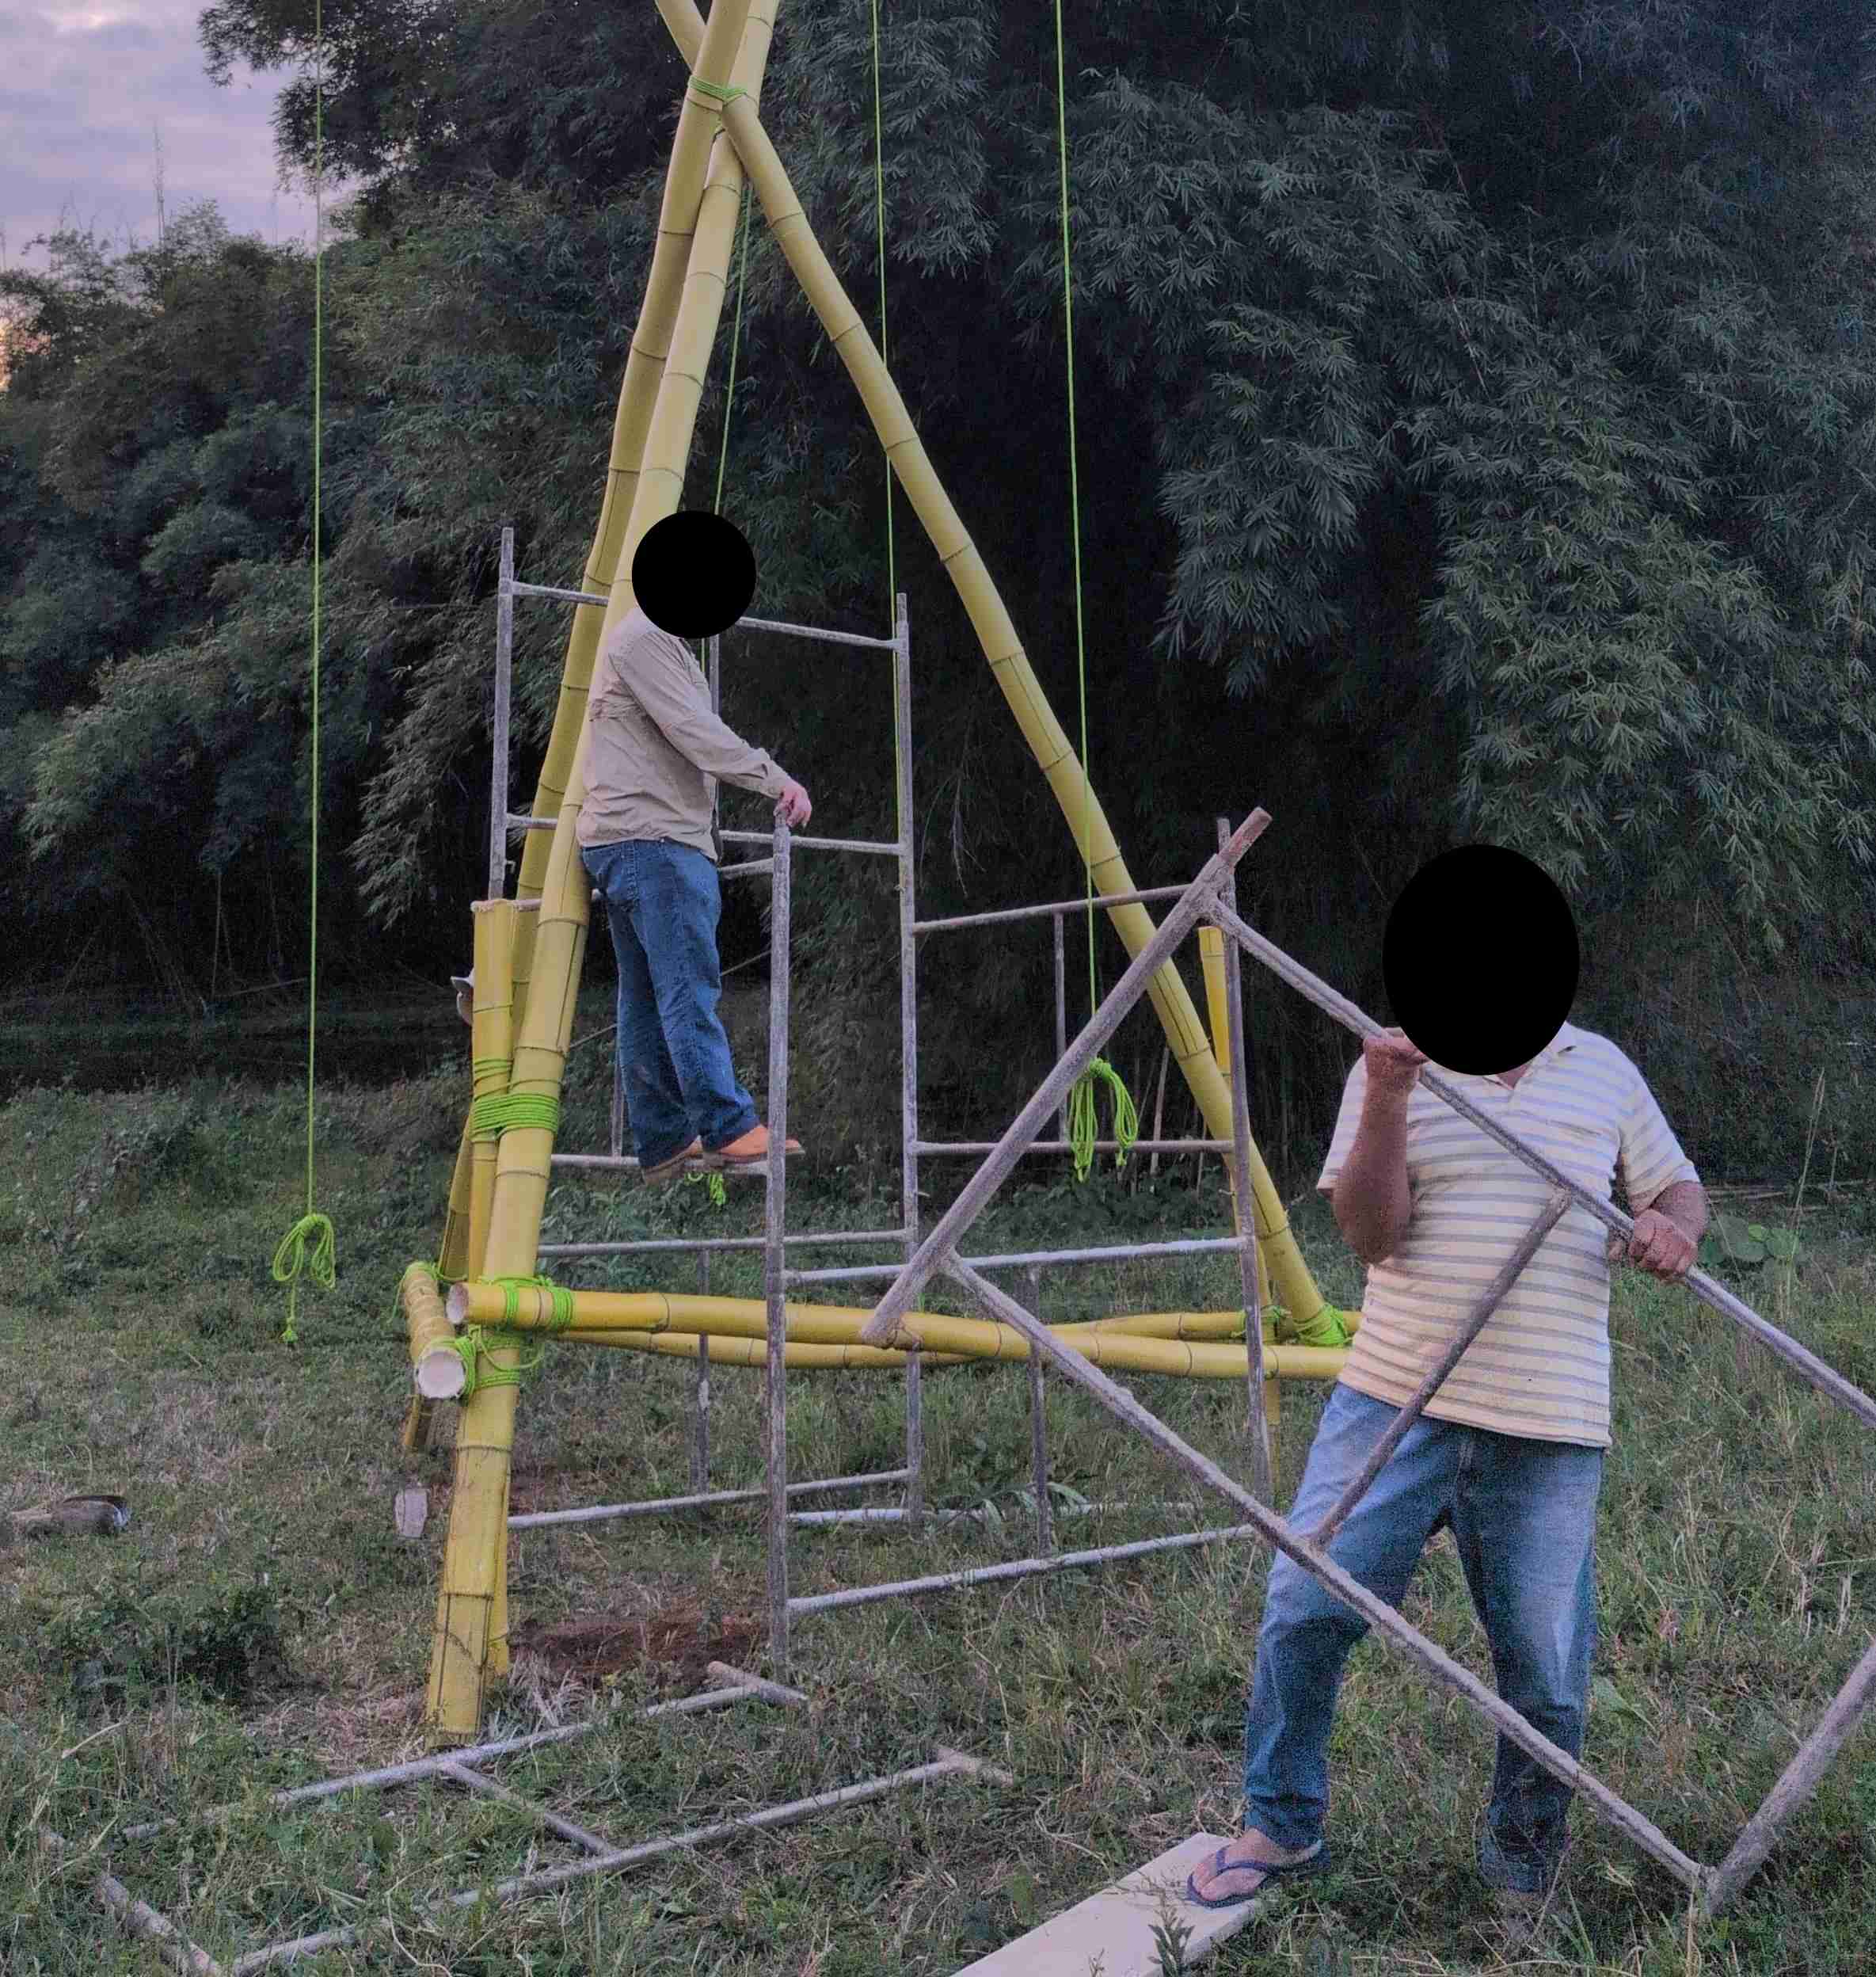
With the piles in place, and realizing the tripod was too heavy to tip over for additional assembly (the traditional method for assembly scout towers), we set up some scaffolding. The scaffolding was tall enough for me to reach the crutch of the tripod and a couple meters (5-6 ft) above it. By then it was getting late, so we called it a day.
Day Two: The Floor and Rope Ladder
Due to rain, we had to wait a couple days to pick up construction again. Once we got to the farm, I got to work. It was my first time ever working on scaffolding which was nerve wracking. The bamboo tripod felt more stable than the steel scaffolding, but I got accustomed quickly. I did make a climbing harness and tied myself to the tripod as some rudimentary fall protection. I’ve known how to tie a harness for years, but I never thought I would ever have need for it. The rope was not rated for climbing or falls, so I tried to keep my safety lines as short as possible to minimize the shock of actually falling. Thankfully, there were no incidents.
The initial 4-frap tripod lashing I made to hold the tripod legs together looked small and inadequate once the tripod was up in the air, so my first step was reinforcing the crutch of the tripod. The legs met at a sharp enough angle, I ended up using three shear lashings to attach each leg to the other two legs. I didn’t know what the breaking strength of the rope was, nor did I attempt calculating the amount of force the joint would need to support, but the additional three lashings looked right, so I called it good. My in-laws expressed a lot of faith in my design since they know I’m an engineering student, but this structure was guided more by vibes, experimentation, and a basic understanding of lashings than anything I’ve learned in class. The only math done was that original rope estimate in the planning stage. I did not care to mention that detail to my mother-in-law.
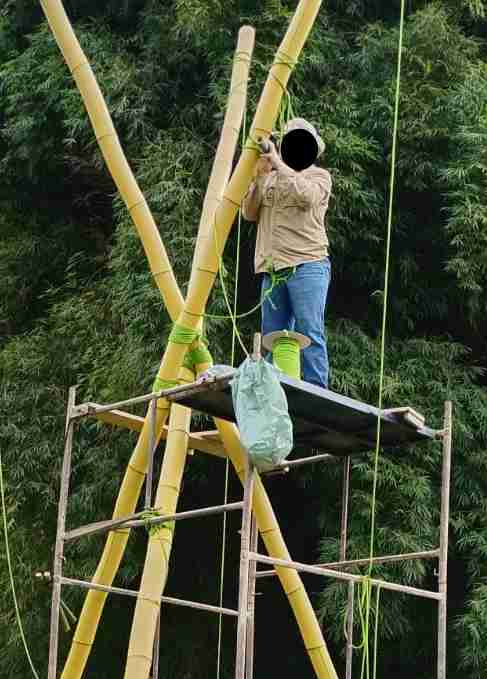
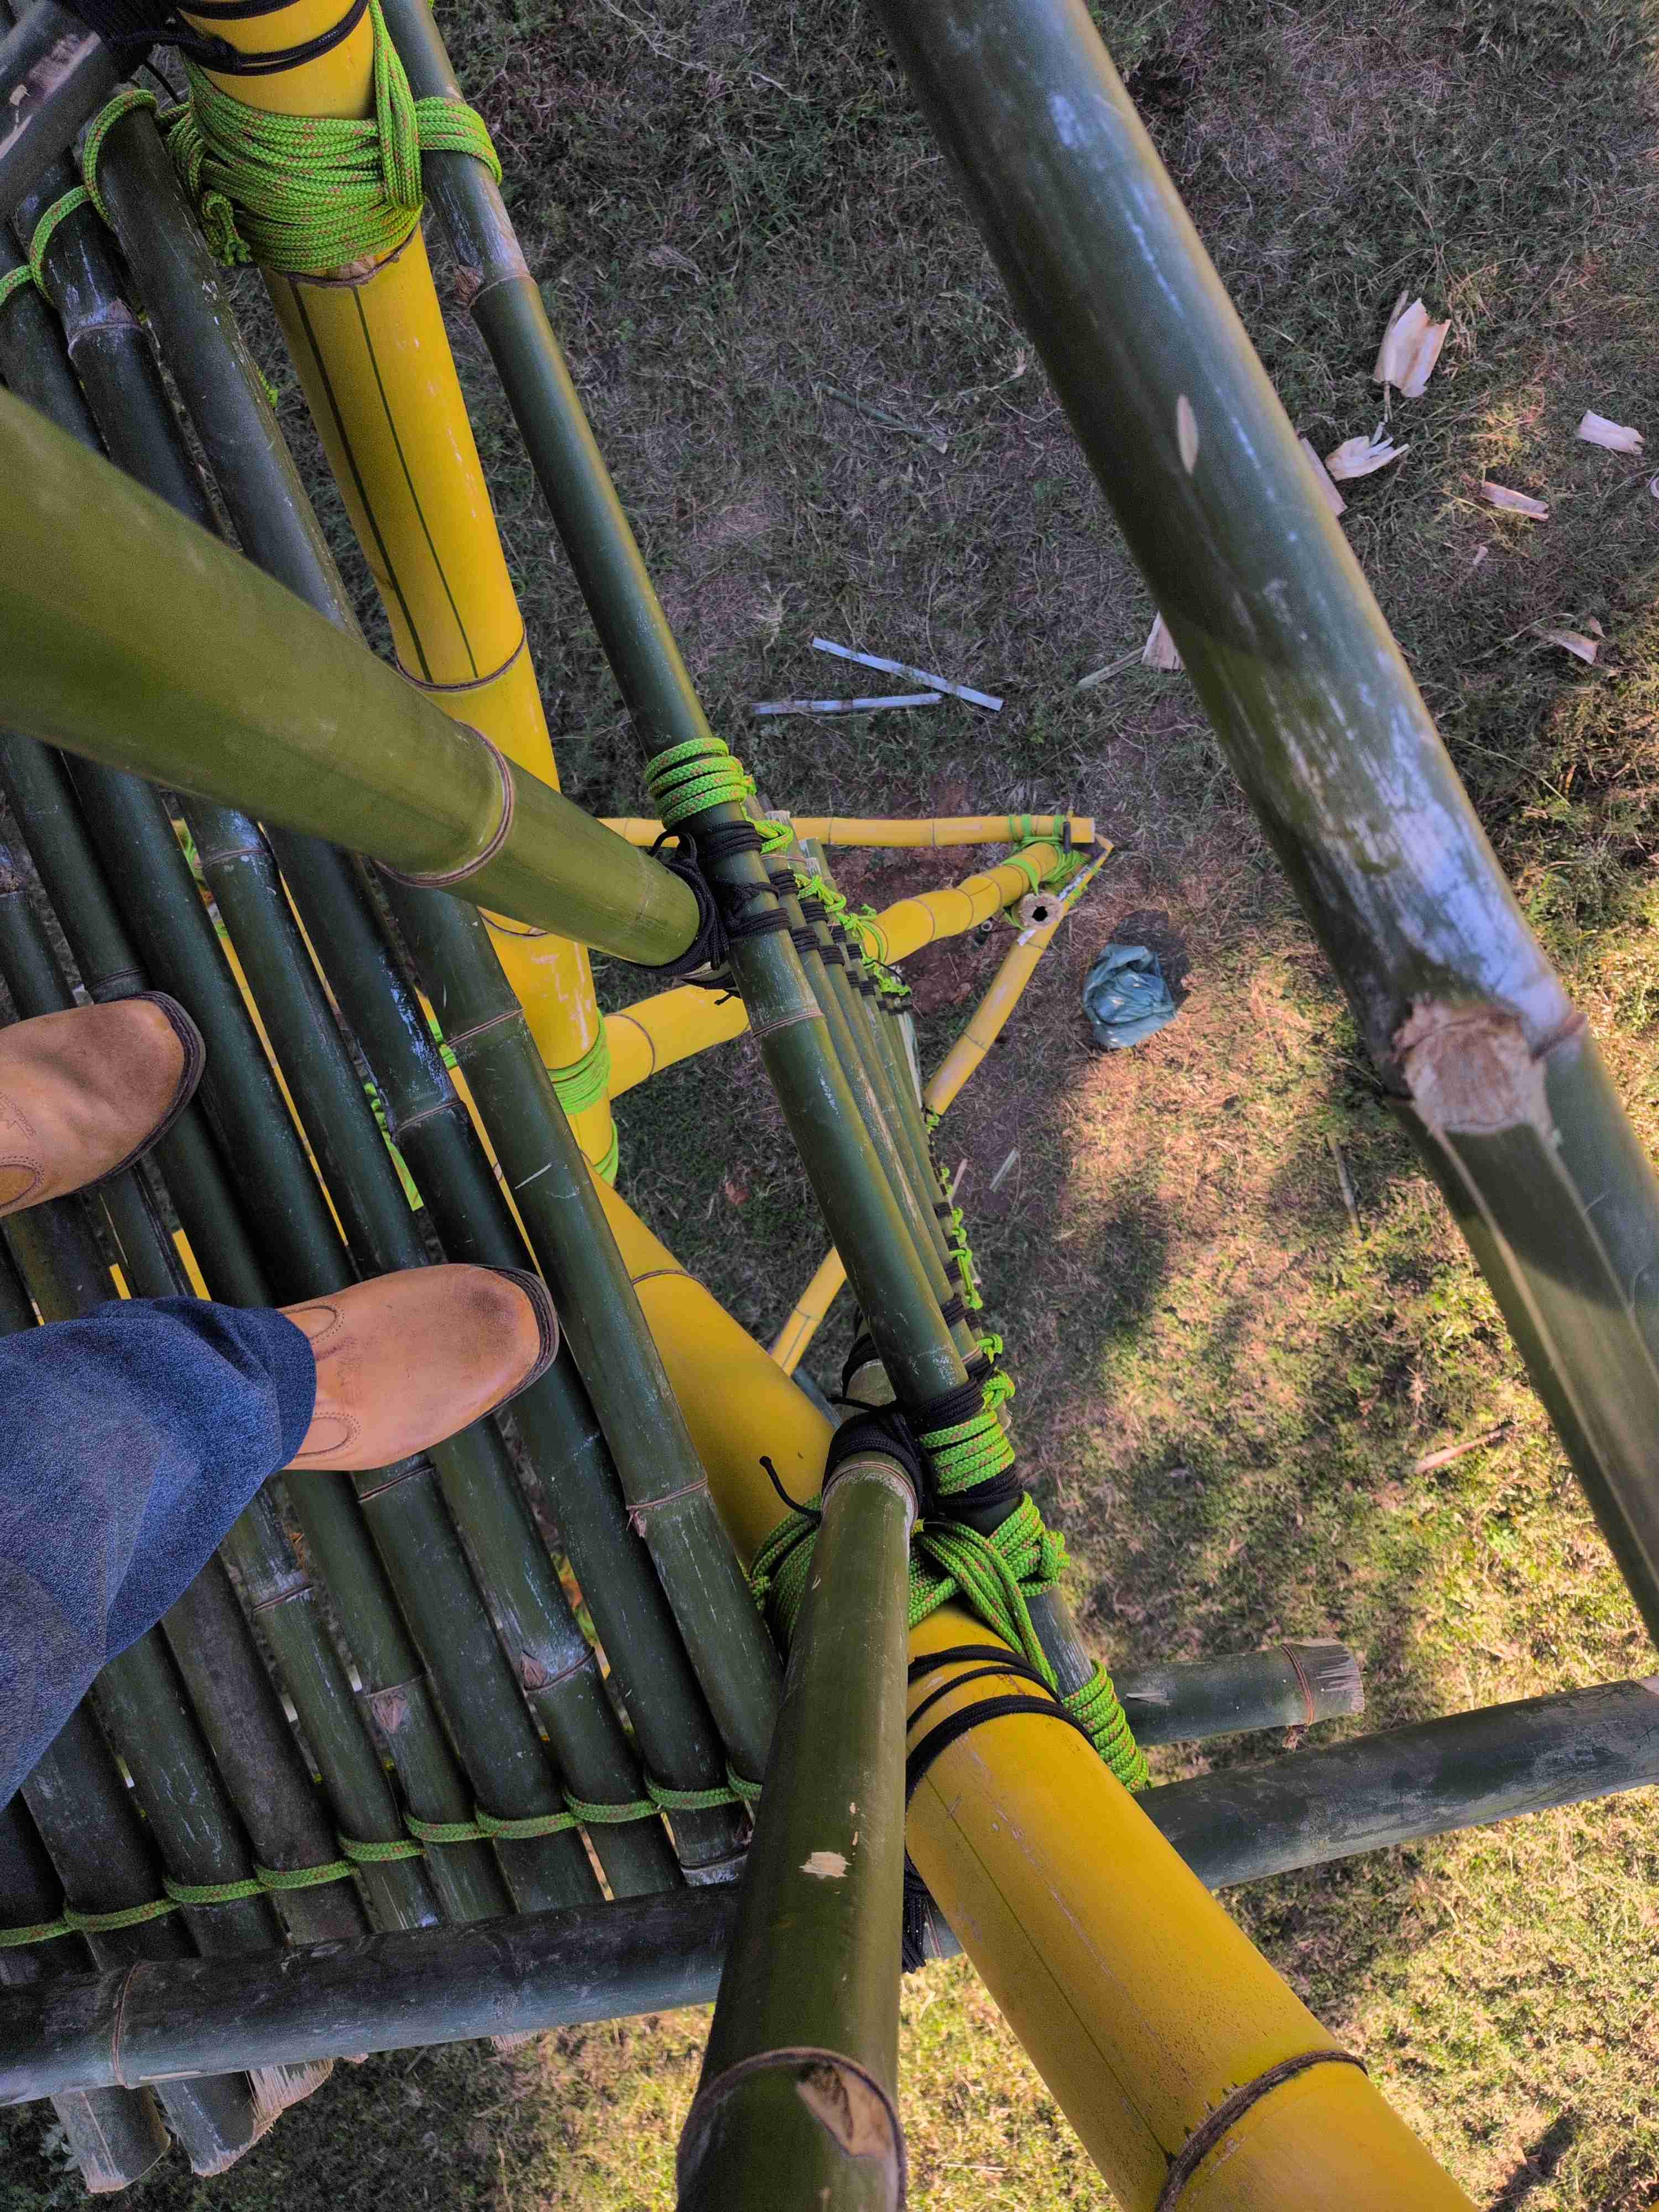
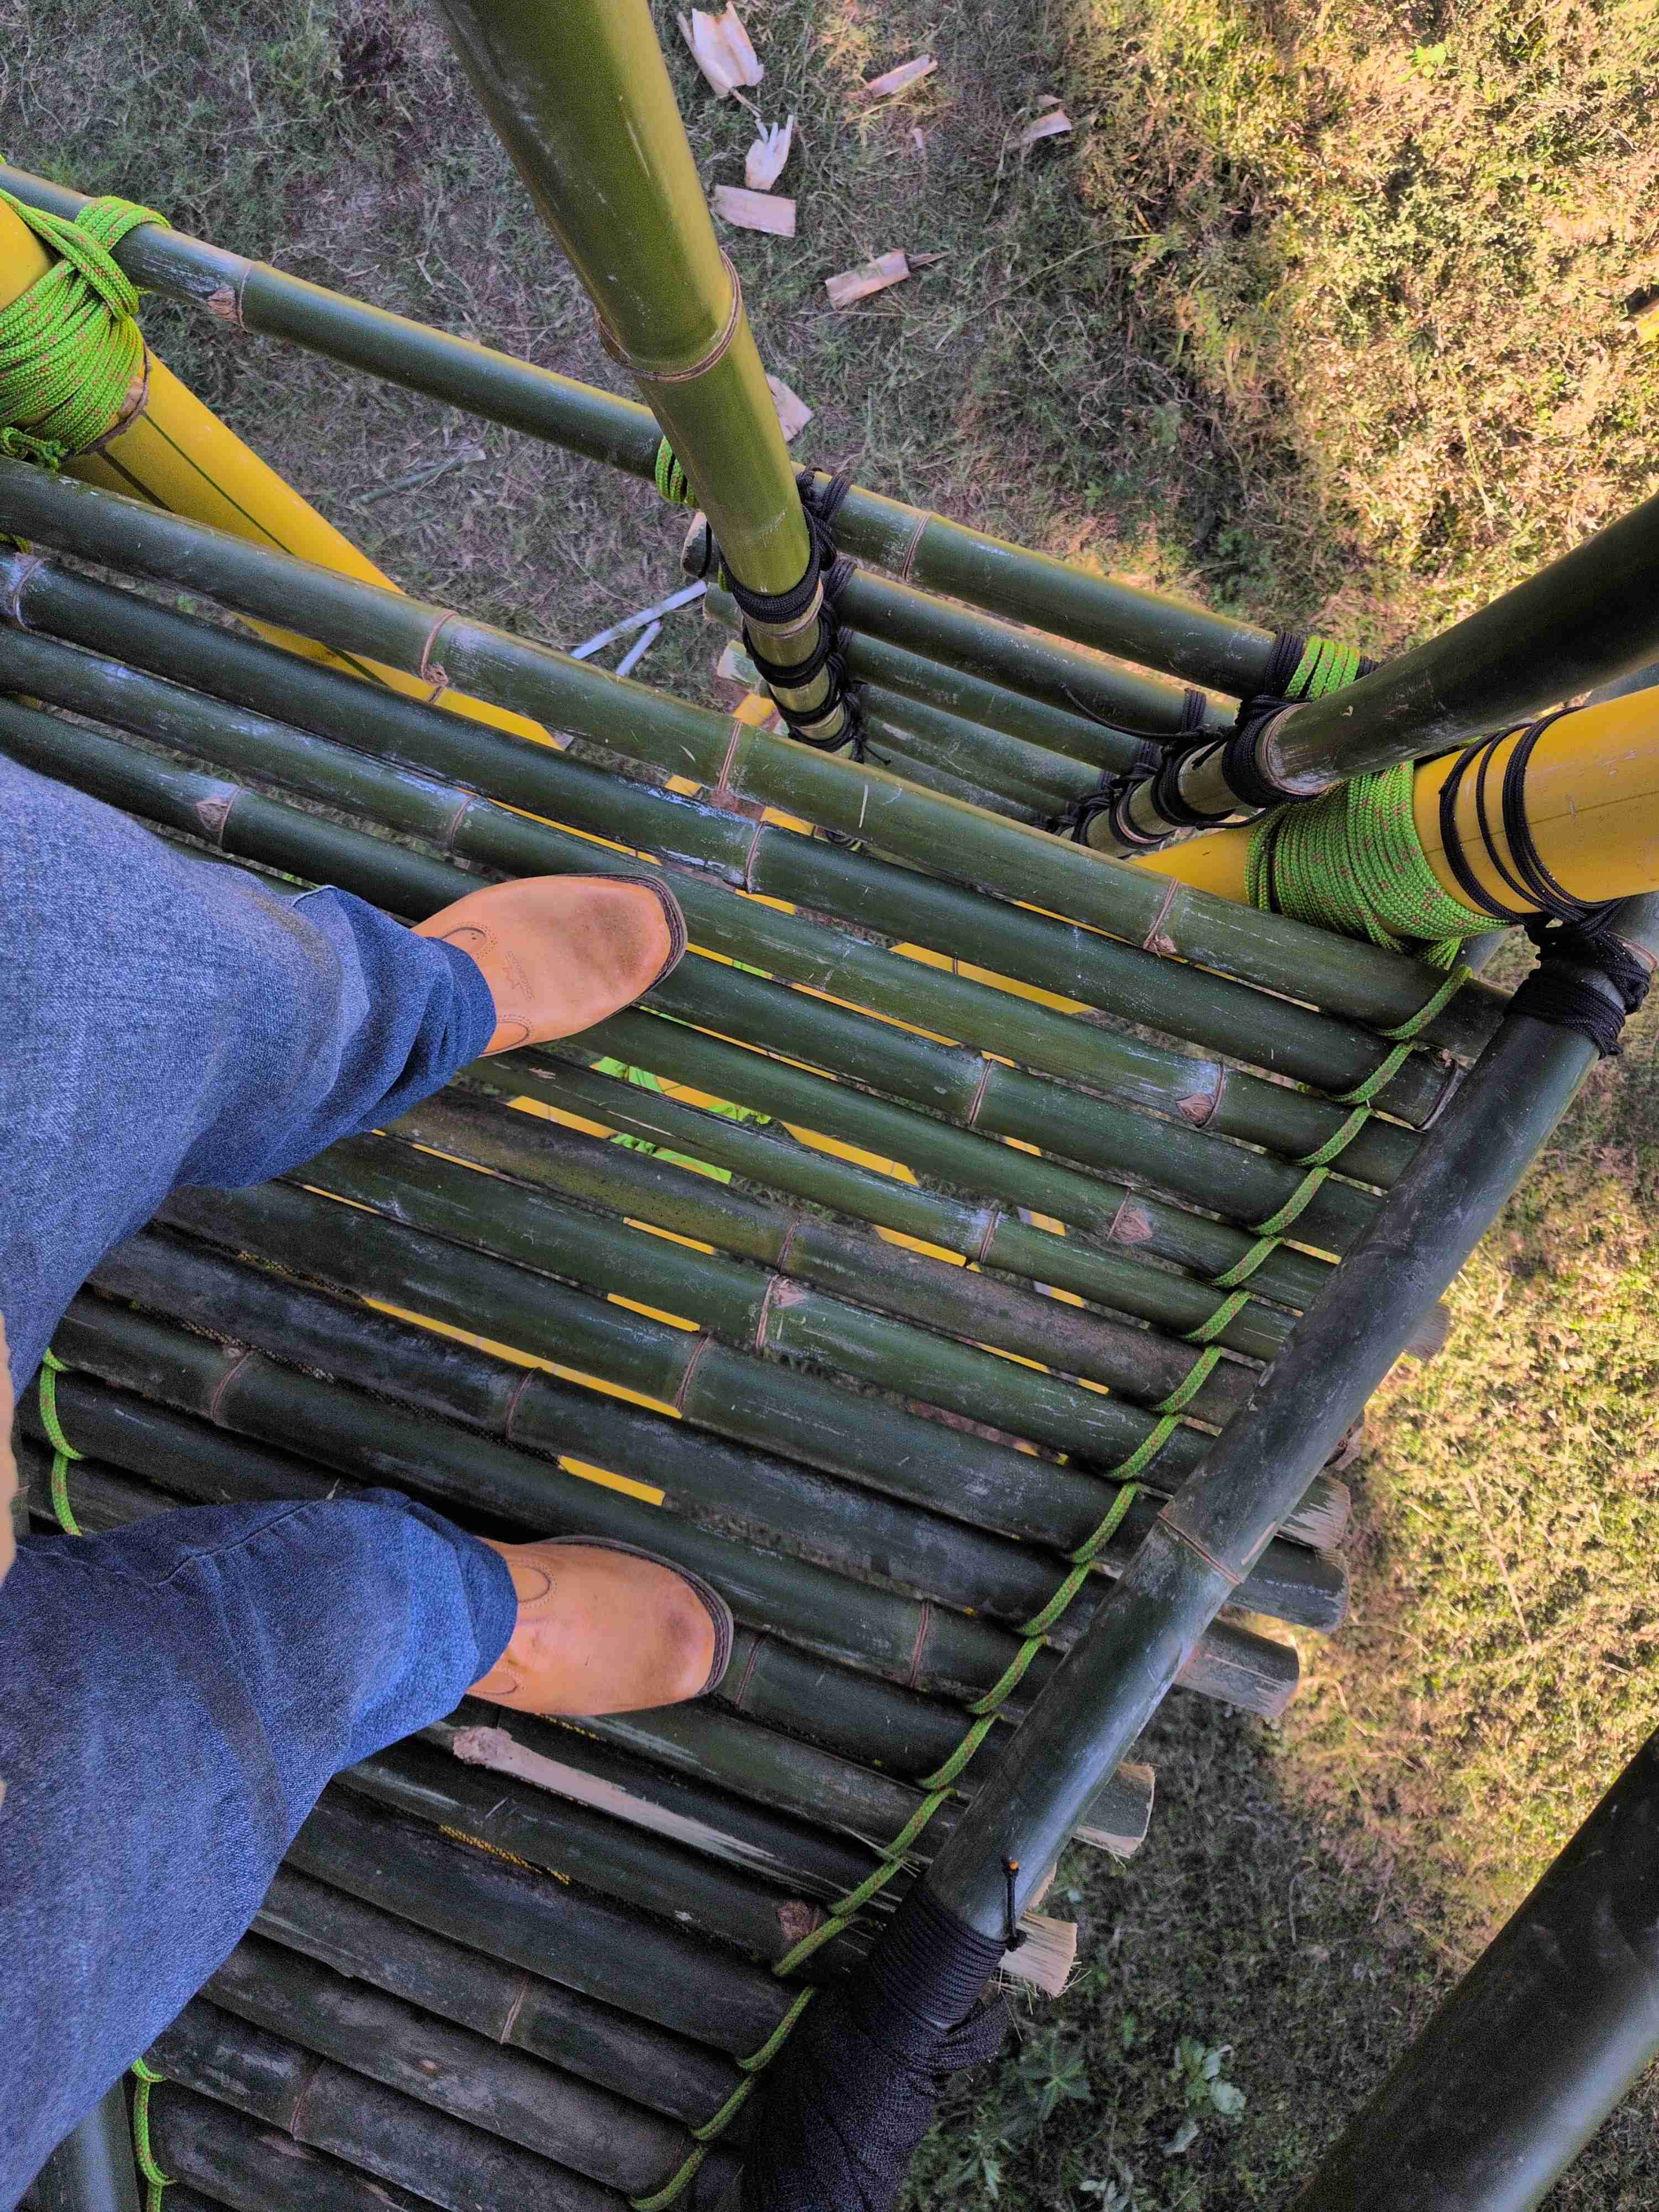
At the end of Day One, I had planned to make some sort of temporary floor at around hip level so I could reach higher up to make the actual floor of the tower. Once I was on top of the scaffolding though, I was quickly dissuaded of that idea and the final floor joists were placed at shoulder level relative to the scaffolding. At this point, FIL and cousin took on the role of harvesting and cutting lengths of green bamboo as required (The green bamboo was much more accessible and lighter than the yellow bamboo, so there were no issues collecting it). The floor was made of two joists lashed directly to the tripod arms with floor board pieces lashed down to the joists. A third piece of bamboo was lashed to the tripod arms above both joists to support the rope ladder.
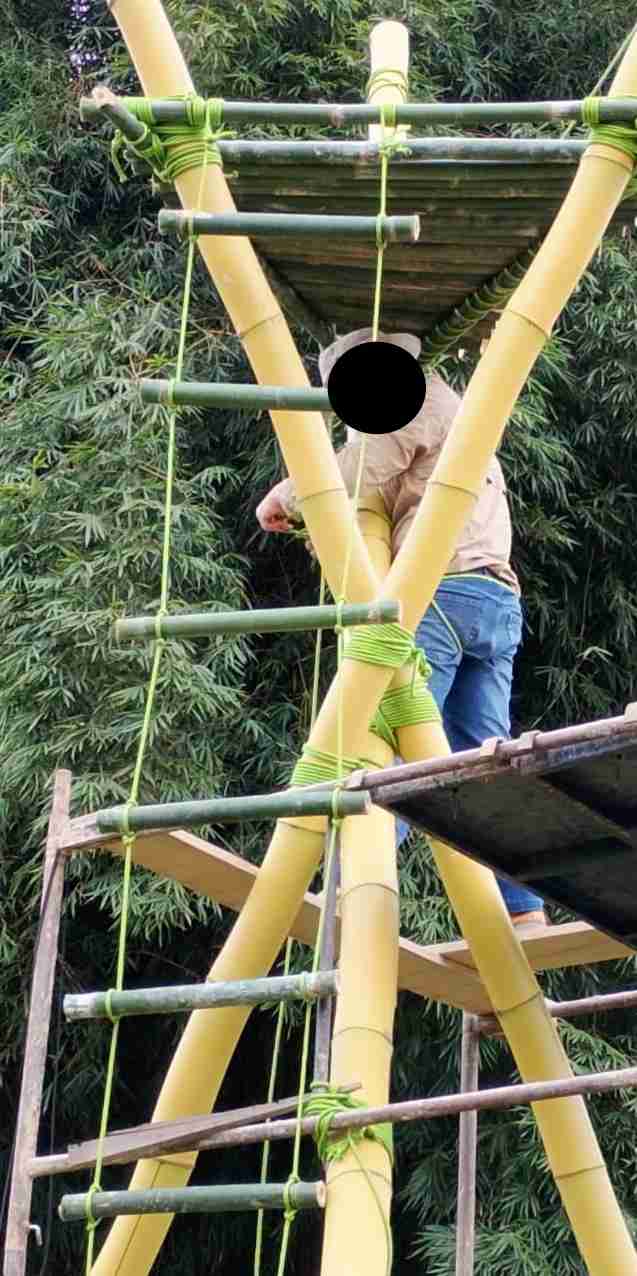
The rope ladder was assembled on the ground, rolled up, attached to the aforementioned third joist, and unfurled. There was an attempt to lower it gradually, but it slipped out of the rope and free falled. Thankfully, it was unharmed. Once the floor was done, we disassembled the scaffolding. It wasn’t tall enough to reach above the floor; all future work would have to be done from newly built platform.
Back on the ground, I tried to use the rope ladder and immediately realized it was not going to work. The rungs were way to far apart and the rope stretched more than I had anticipated. Rope ladders also pitch the user backwards shifting their weight to the hands and angling the feet on the rungs. The slick bamboo rungs made holding on to the moving ladder difficult. It was getting late again, so fixing the rope ladder would be a Day Three problem.
Day Three: Fixing the Ladder
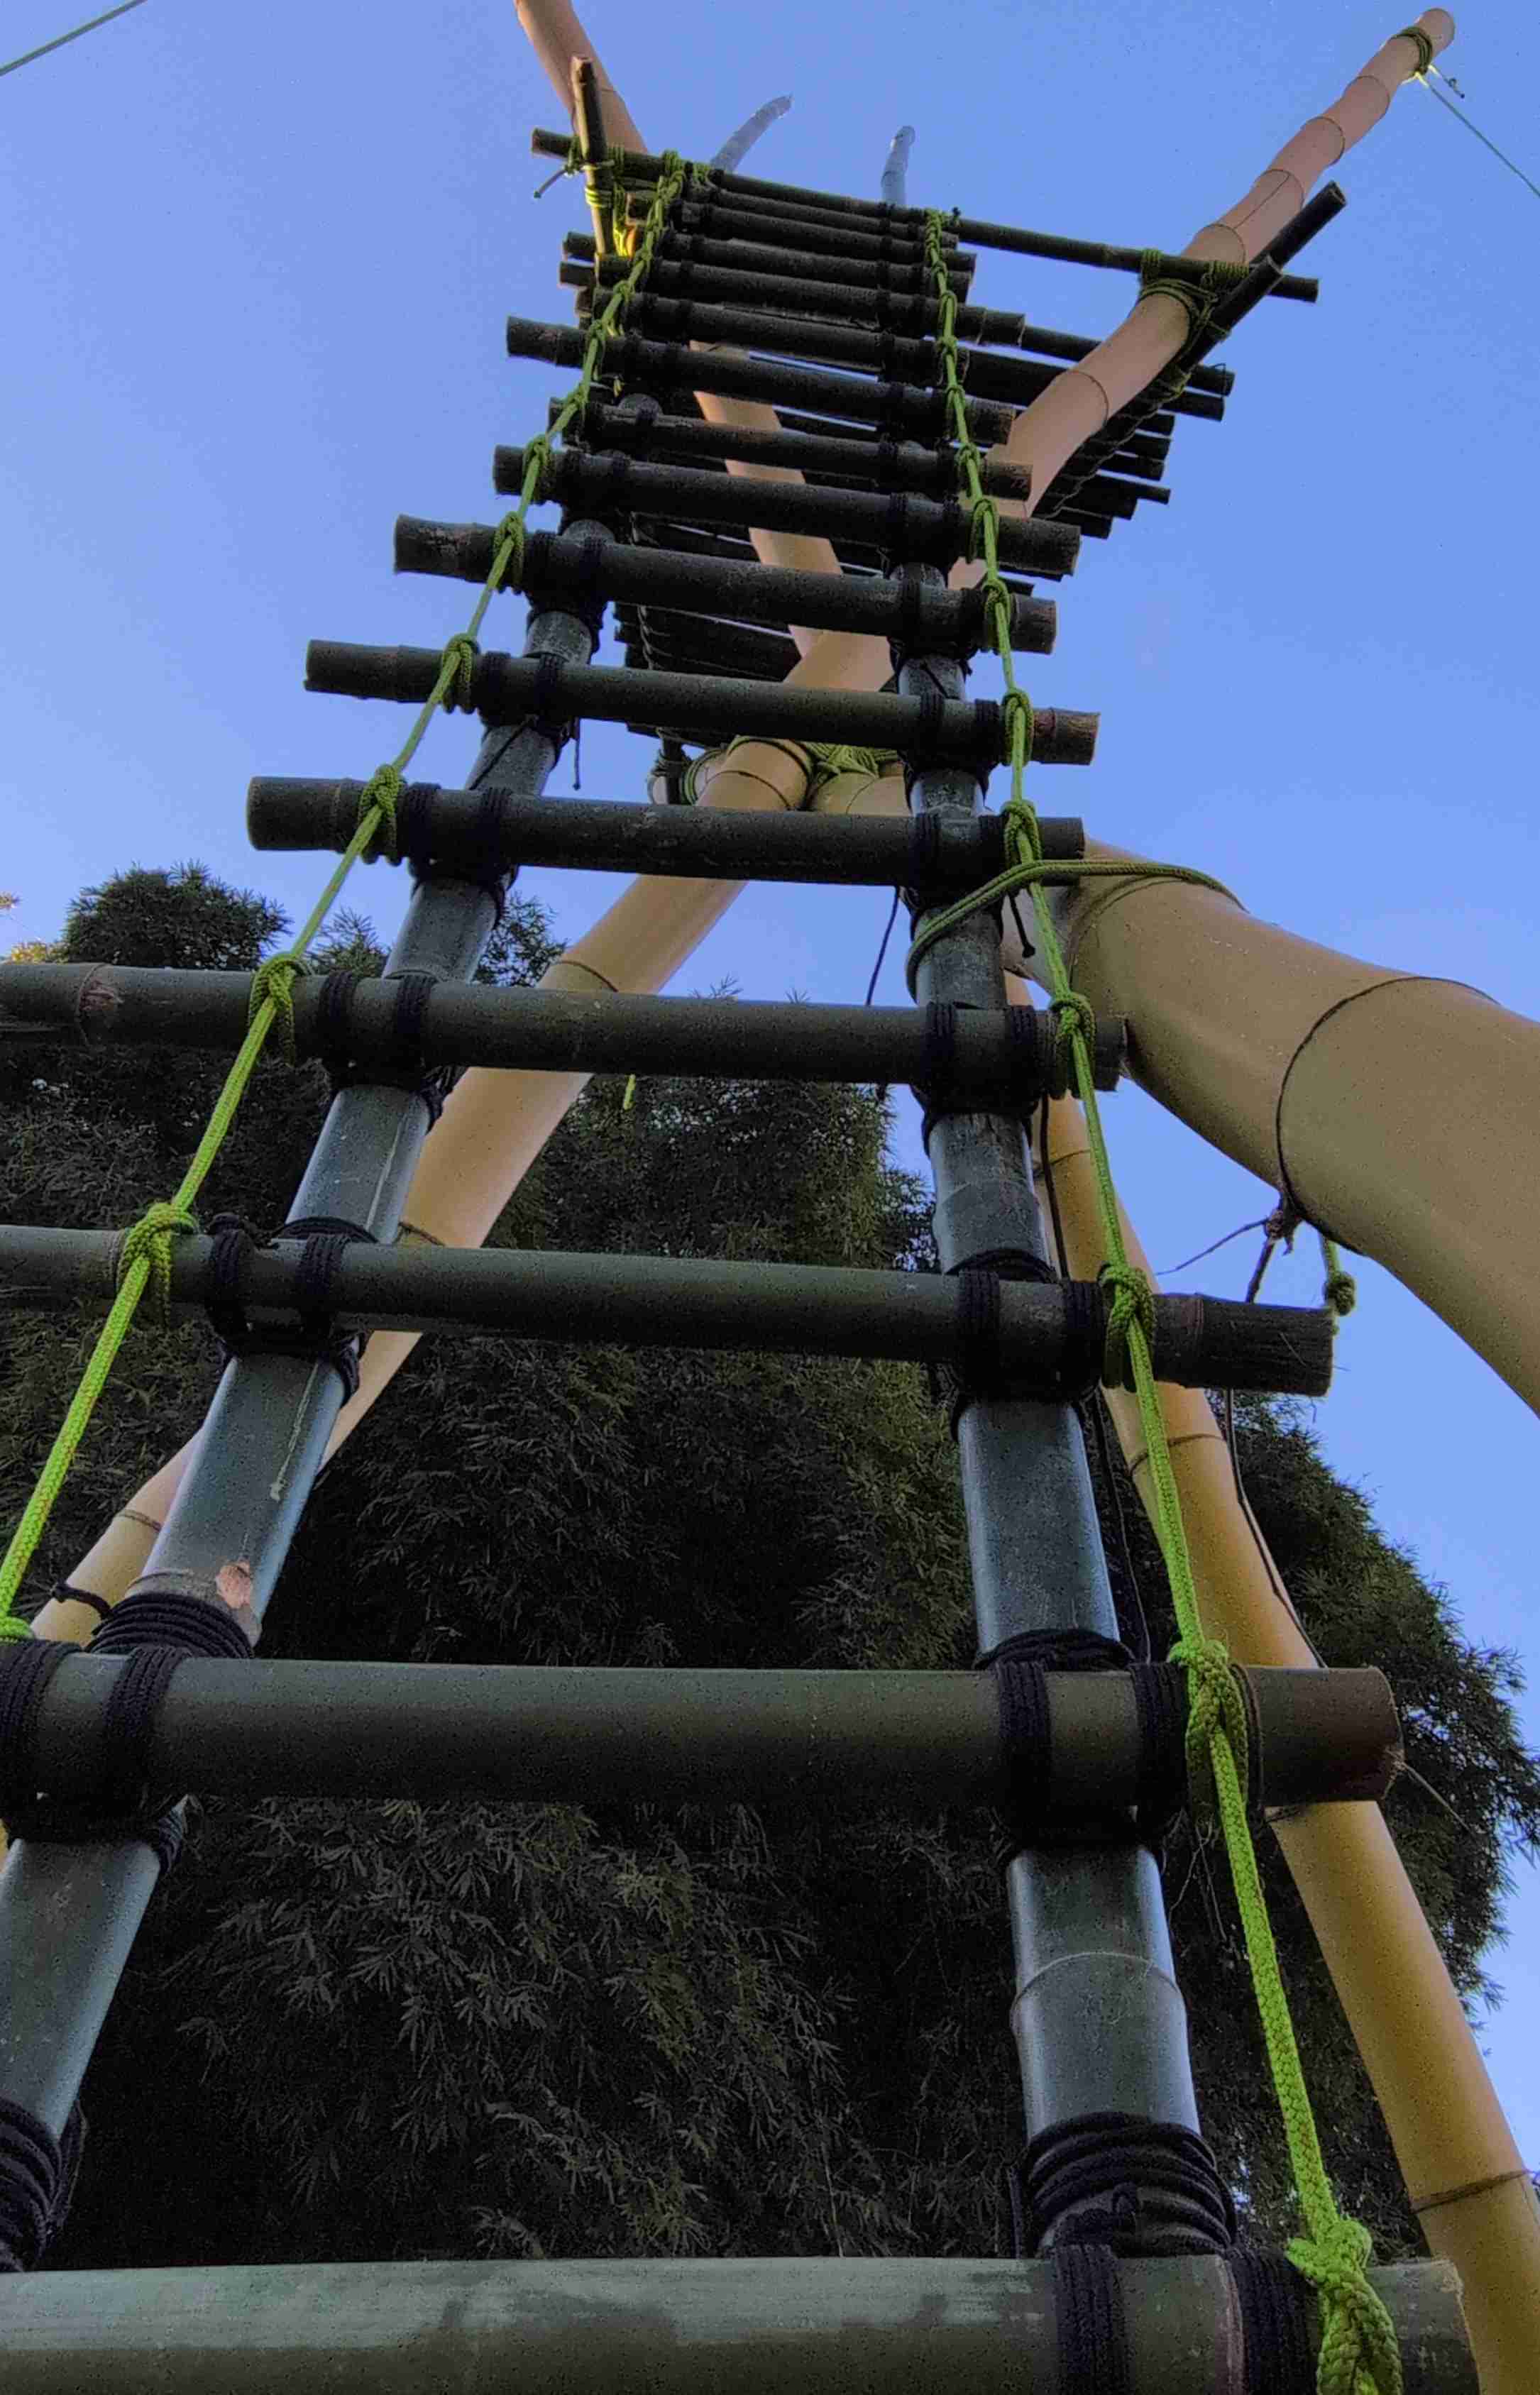
I had hoped that I would be able to fix the ladder and finish the handrails, but the ladder took all day. We had initially hoped that we could run a couple pieces of bamboo under the rope ladder just for stability, and let the rope take all the load, but that proved impractical due to the rope stretching issue. I ended up building the ladder in place, working up one rung at a time.
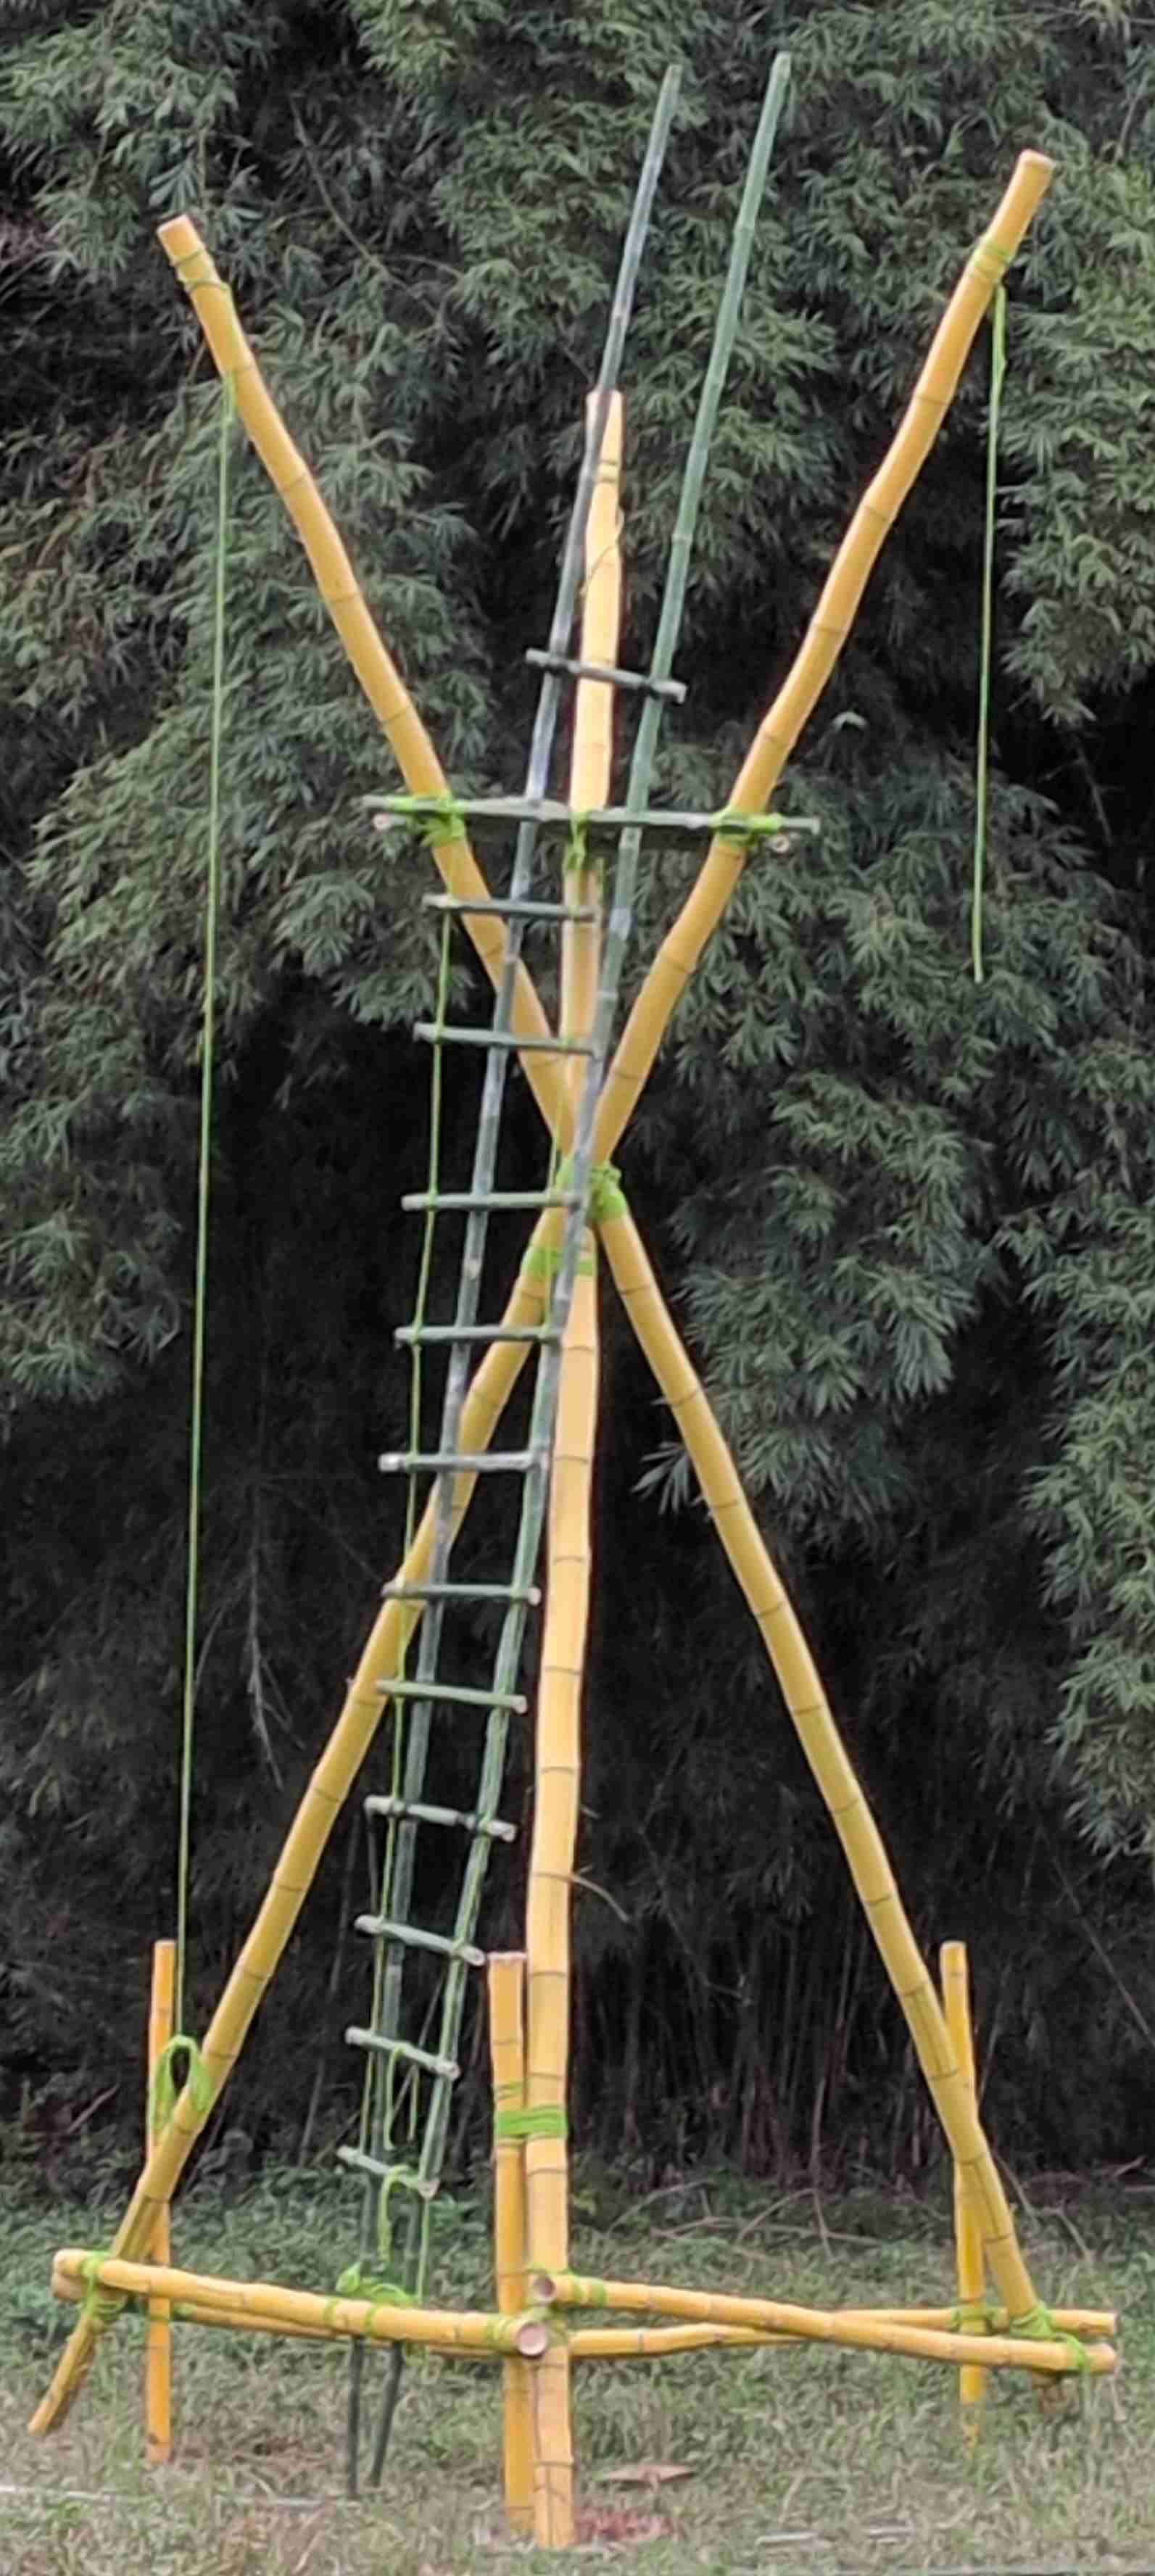
Each of the twenty rungs requires two lashings. Lashings are inherently a two-handed operation, so I ended up spending most of the day literally hanging out in my rope harness. My cousin helped me cut a length of bamboo to 20 cm and put it on a lanyard to space the rungs consistently. I decided to experiment with a japanese square lashing hoping that the tying process would be faster and that the final square knot would hold tension better than the clove hitch I had been using up to that point. I proved myself wrong on both accounts. I tied the original rope-ladder ropes to the outside of the rungs as redundant support and to hopefully limit any sliding.
Day Four: Handrails and Sun Shade
Putting on the handrails was the worst part. Remember the asymmetry in the tripod? This is when I noticed it. The floor was not centered over the crutch of the tripod and the corner opposite of the ladder liked to dip down whenever I moved towards it. Bamboo is strong and flexible, but I couldn’t quantify how much, so any amount of bending at that height made for a significant pucker factor. The tripod arms lean outwards more as they go upwards. The higher I placed the handrails, the more I had to lean over the edge to lash things properly. It was here I started to question the series of decisions that got me to that point.
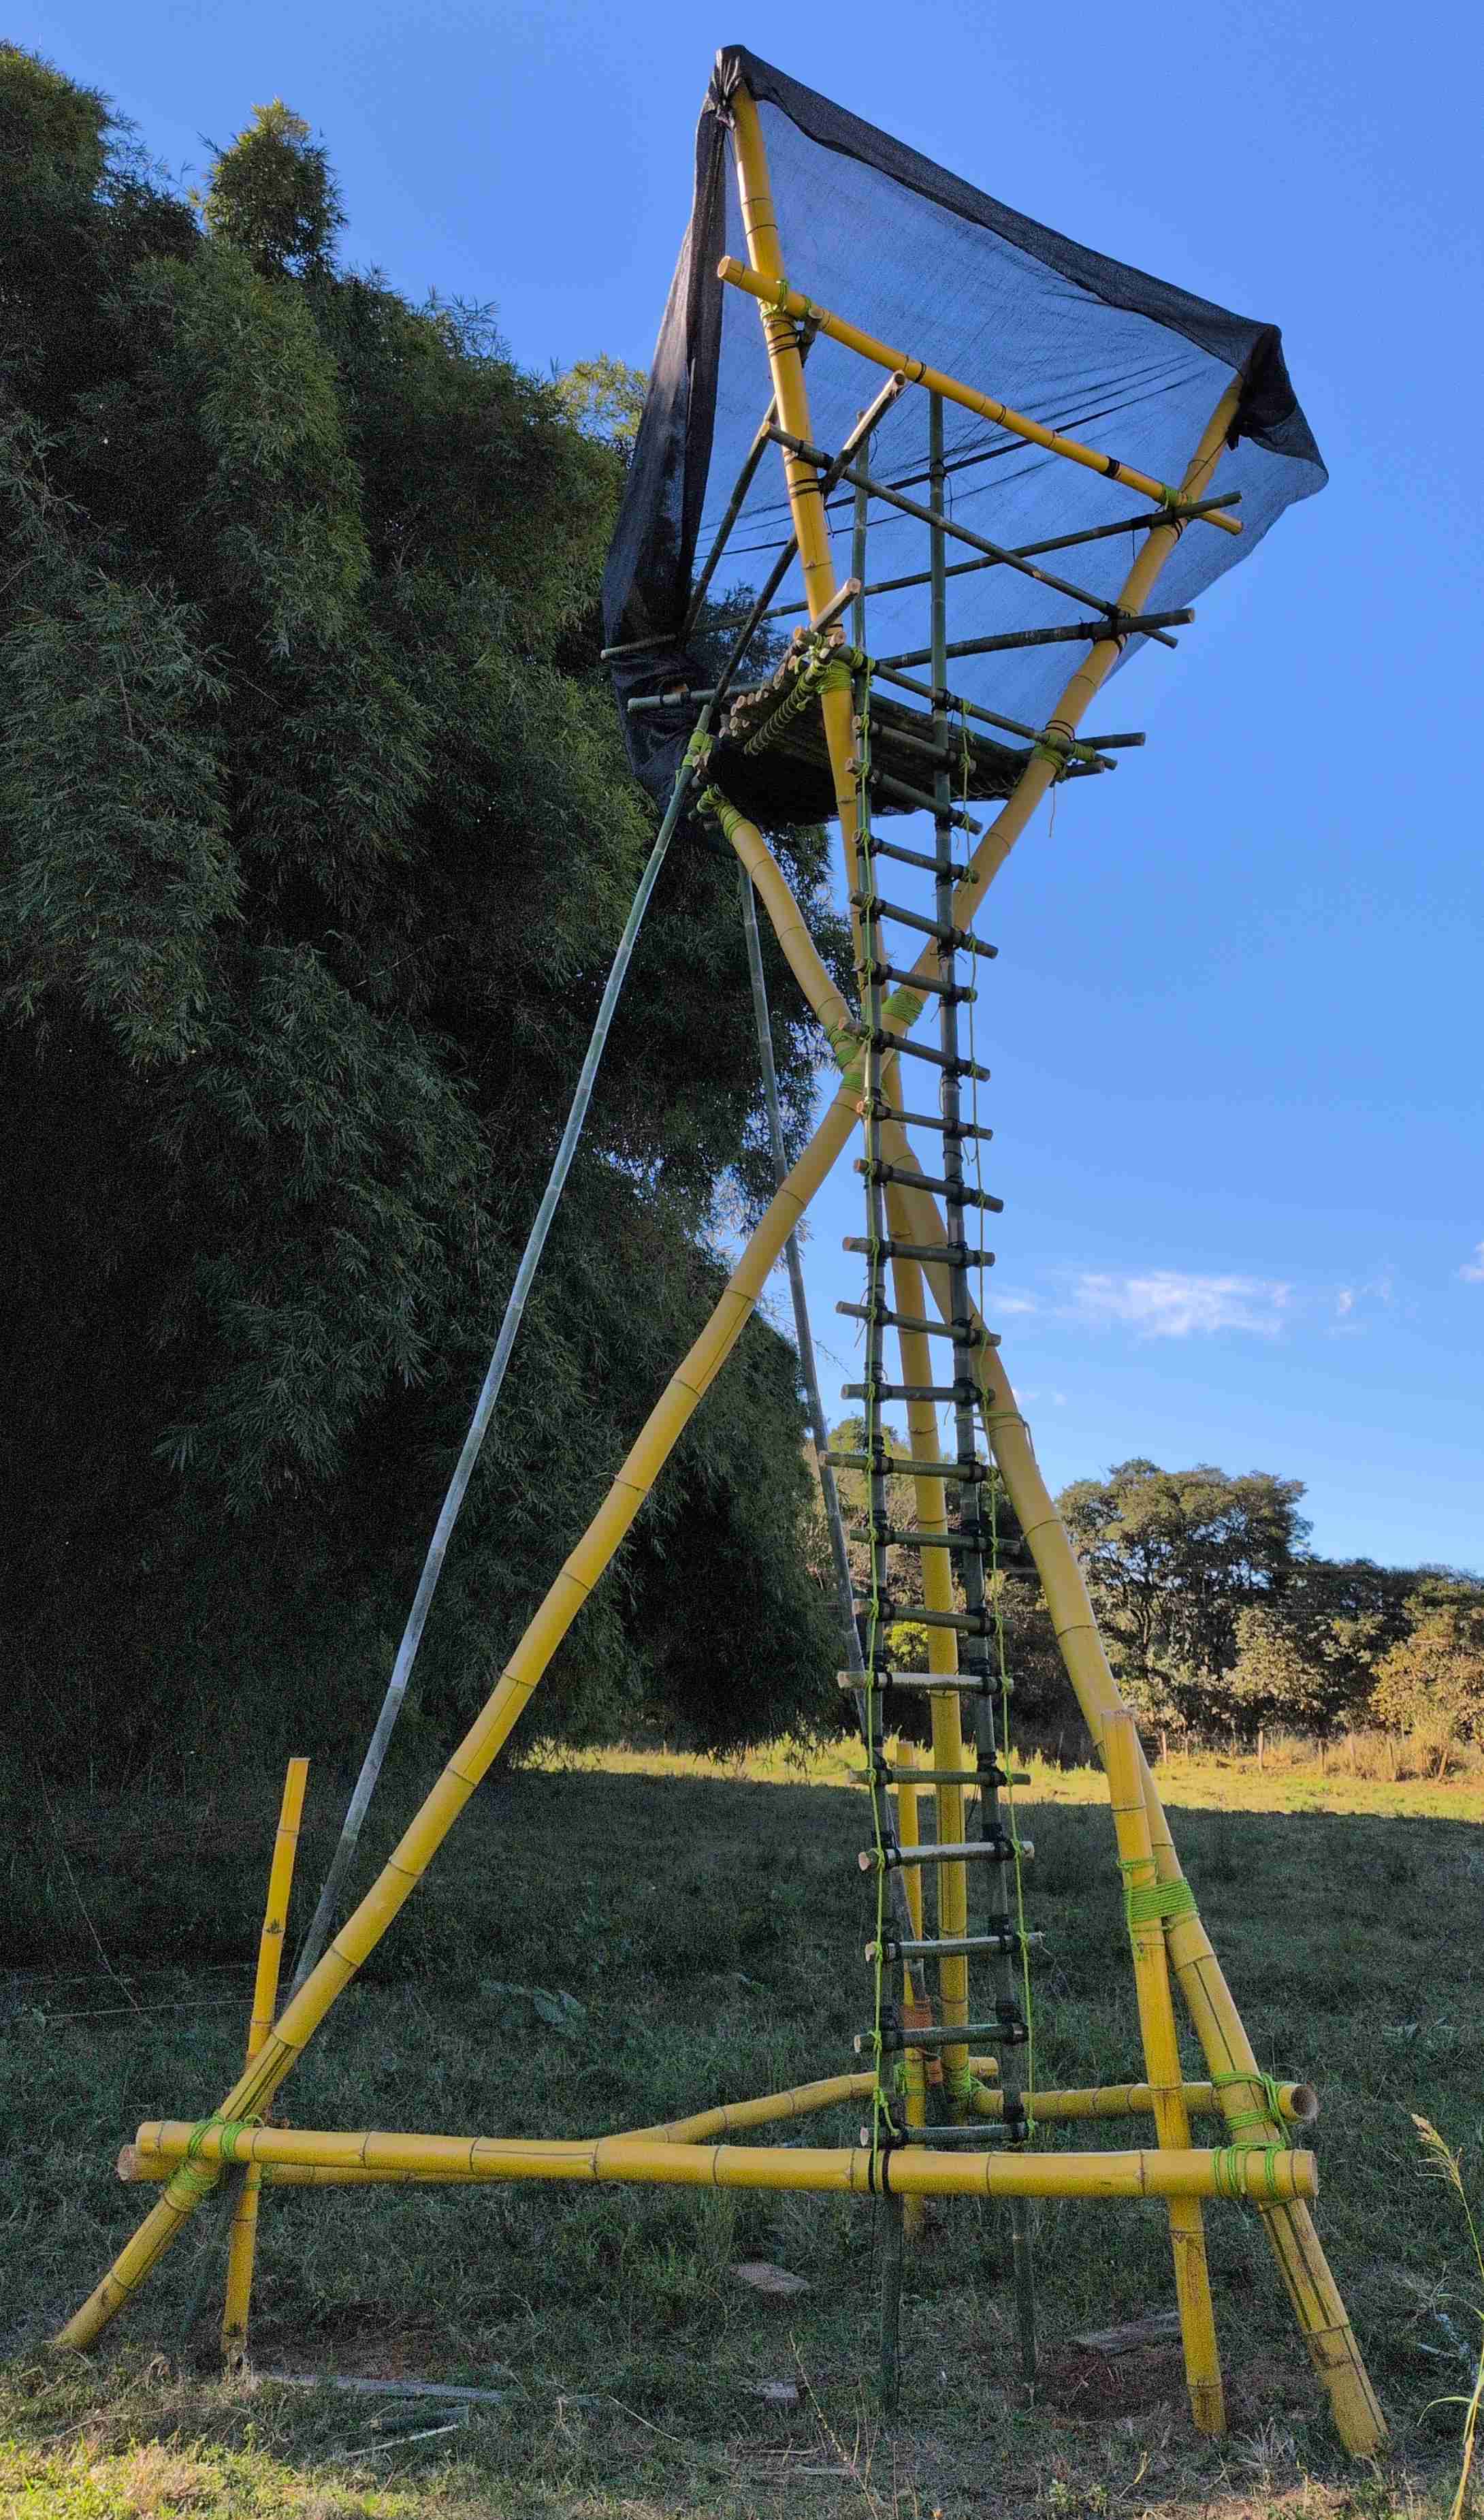
The handrails can be described as three triangles lashed to the tripod arms at different heights. The bottom triangle was attached immediately above the floor; it’s intended to prevent your foot from slipping off the edge of the floor and protect the rope holding the flooring in place. The middle triangle is around knee or thigh high and acts as a backrest if sitting on the floor. The tallest triangle is the actual handrail and comes up around the belly button. I did not add vertical elements to the handrails so the barrel of a pellet gun could sweep back and forth without obstruction. My cousin is still very interested in using the tower to defend his chickens.
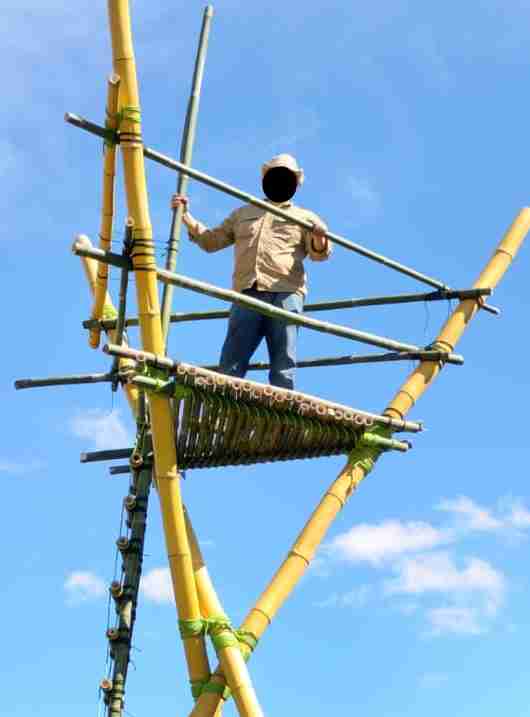
The two not-ladder sides of the platform have the handrails lashed to the inside of the tripod arms to keep them over the floor rather than the void. The ladder side of the platform put the handrails on the outside of the tripod arms so they;re behind the individual getting on or off the ladder. The free ends of bamboo at the top of the ladder were trimmed down and tensioned towards the handrail above the ladder. The tension helped stabilize the free ends, making them feel more secure while getting on and off the ladder.
The tower was almost done at this point, so we stopped for lunch. We came back in the afternoon to add the final touches. I reinforced the back corner of the tower with two more bamboo poles that anchored to the bottom corners on the tripod. This removed any sense of bouncing or sagging in the back corner and made it the most stable part of the tower. The ladder side of the tower is capable of shaking side to side, but it requires effort on the part of the occupant, so I left out additional reinforcement. I tied a sun shade over the tripod arms and down one side of the platform. The platform is in full sun in the morning when the sun comes at an angle, hence needing to cover one side. The shade is less than tidy which makes the whole tower look disheveled, but it’s better than baking in the sun.
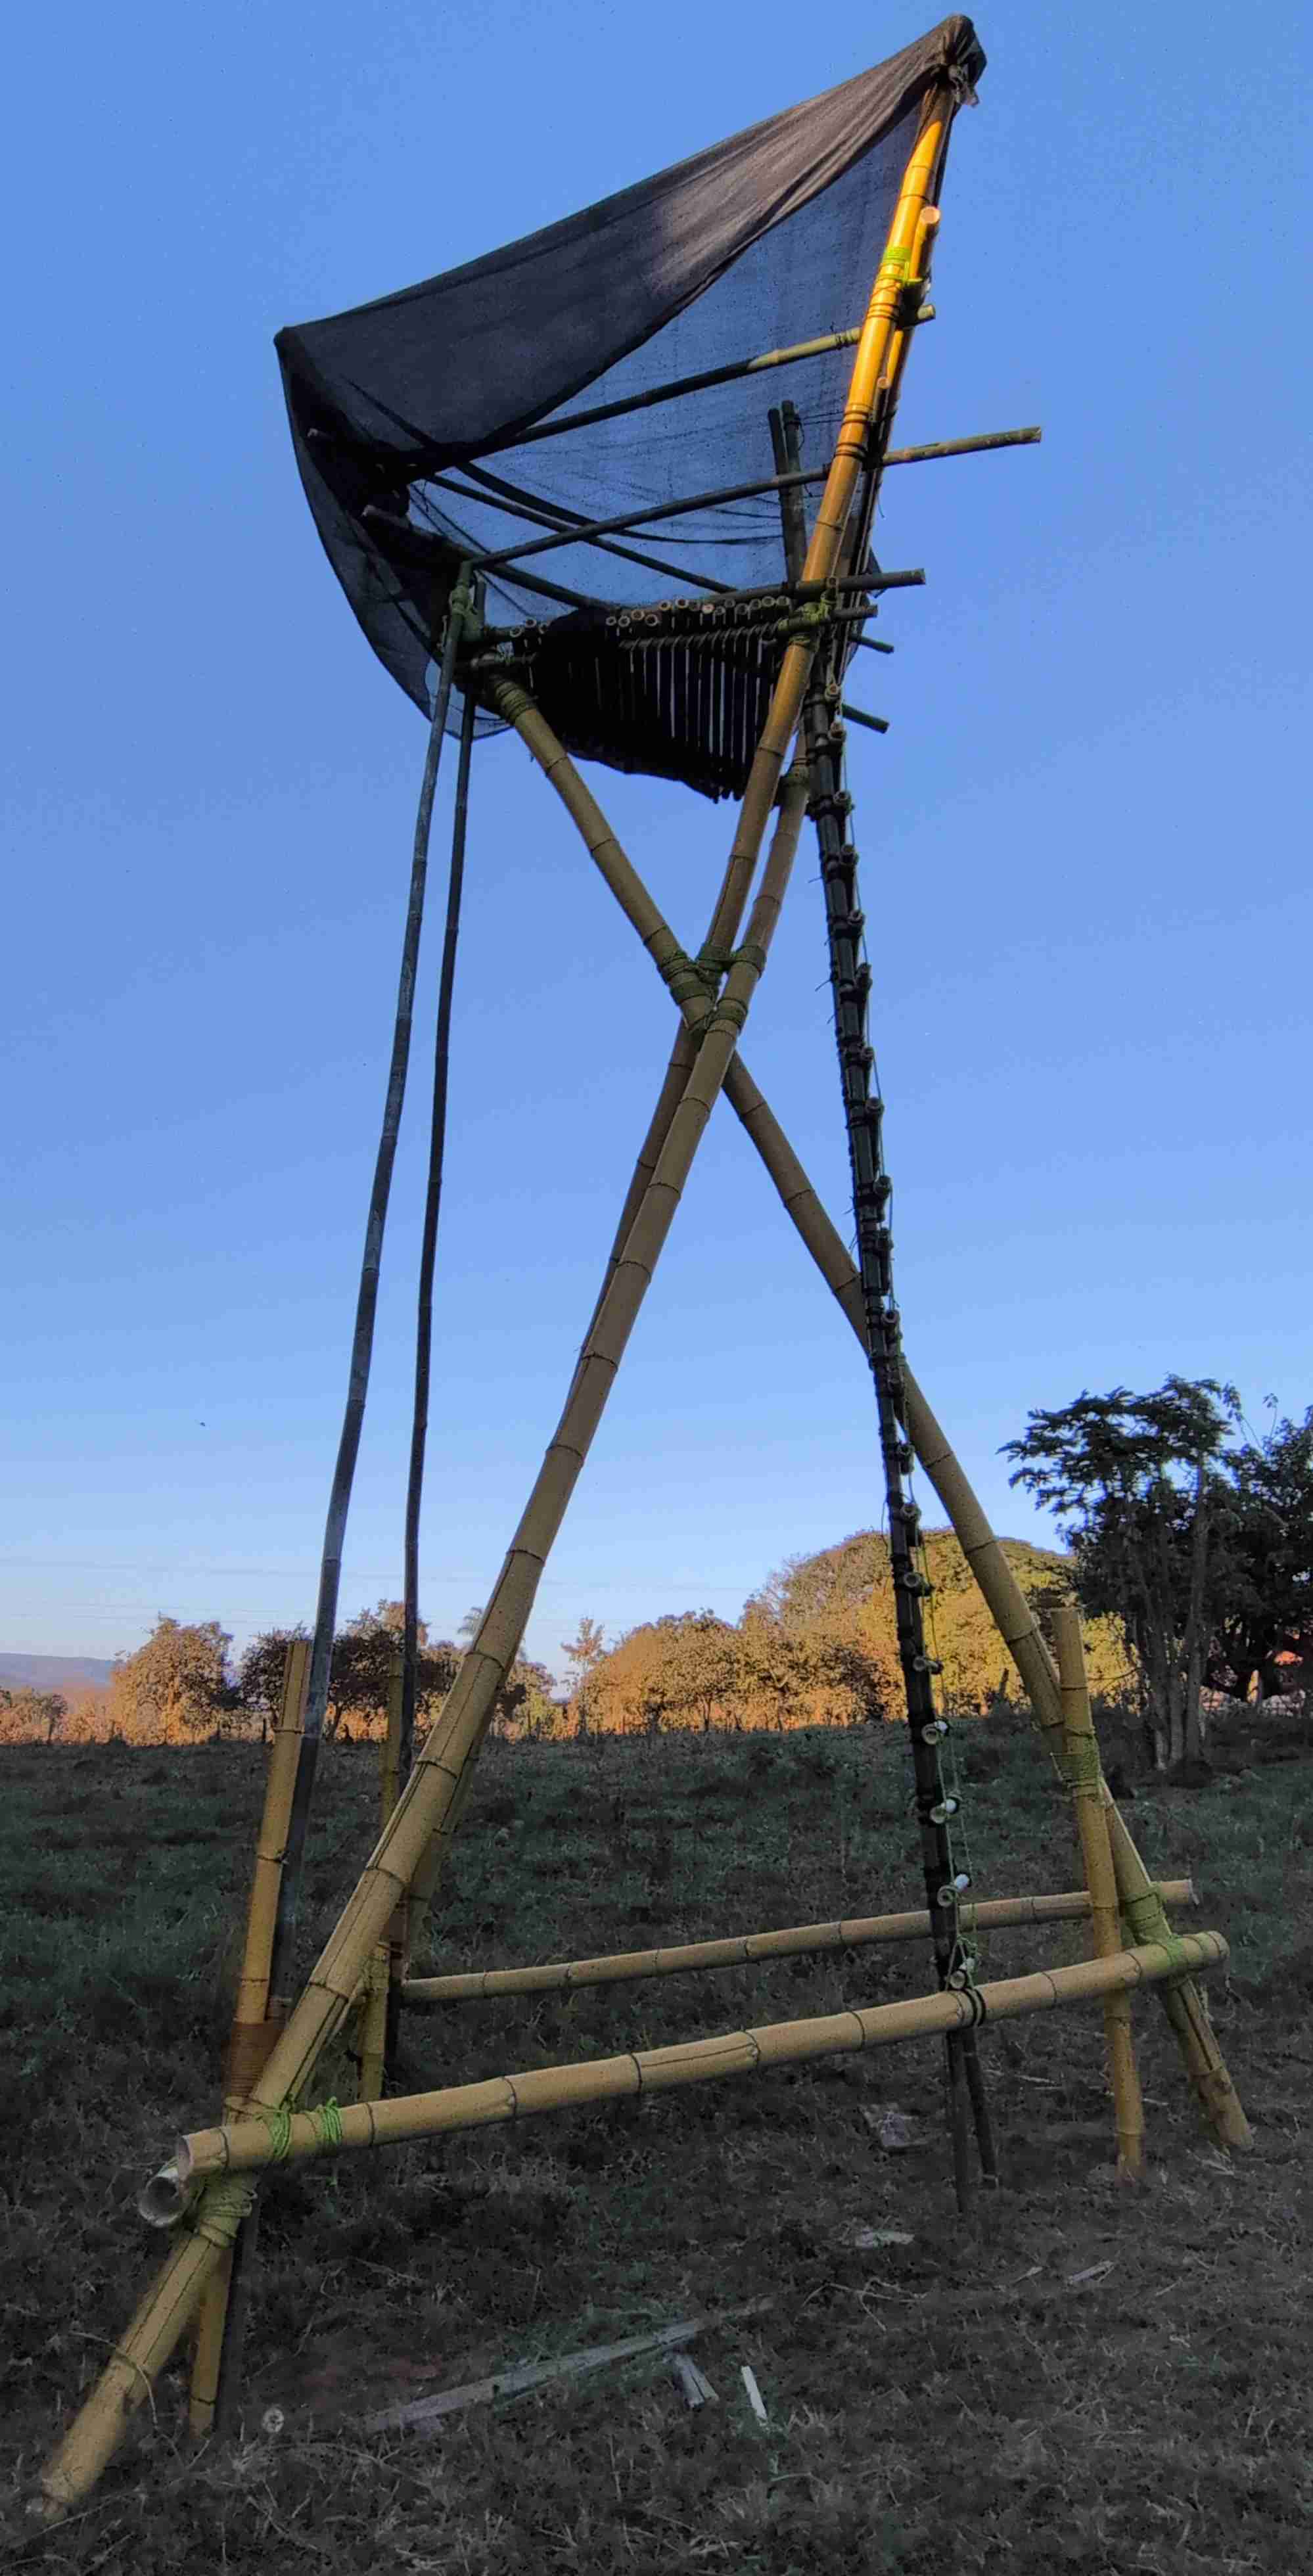
Photo Collection of the Finished Tower
Lessons Learned
The whole tower took only four working days to build, but those days were spread out over a week and a half due to weather and scheduling constraints. I’m writing this article a little over a week since finishing the tower, and I have some thoughts.
Longevity
I doubt this structure will last as long as my cousin expects, but this was a design-build contract. I am not on the hook for maintenance or inspections. I left my cousin with plenty of warnings and instructions on how to dismantle it once it’s deemed appropriate. I think the best way will be to simply topple the whole structure and cut it up on the ground. Much safer than trying to reverse the construction process.
Lashing Technique
I initially used the standard square and diagonal lashings I was taught in scouting, but ended up making some modifications to account for the slick surface of the bamboo. Square and shear lashings seemed to work best depending on the relative angle of the bamboo poles, and I stopped using diagonal lashings entirely. By the end of the project, I found that starting the lashing with a bowline loop around one bamboo and finishing with several wraps around one pole followed by a clove hitch worked best to maintain tension. Fun fact: this is similar to how large cargo ships secure their mooring lines to a pier which is what inspired this method.
Those Japanese square lashings I tried out on the ladder? I thought they’d be more secure since you work with both ends of the rope in the lashing and end by tying the free ends together with a square knot. In contrast, standard lashings secure one free end to a pole and the opposite end is used to make the lashing and again secured to a pole. The problem I encountered with the Japanese lashings is that no matter how I pulled on the square knot or added stopper knots, the square knot would settle and release a small amount of tension from the lashing. The ladder rungs that wiggled the least were the ones that had the free ends of the square knot wrapped around the pole and finished with a clove hitch.
Now that the tower is finished, I have noticed some lashings that used to be as tight as could be have loosened up. While some of the lashings are coming loose, I also think the rope has stretched while under tension. While my family has lost interest in the project and is happy to call it done, I would like to inspect and retie lashings as opportunity permits. Thankfully there are no small children on the farm, and I trust my cousin to recognize when the tower is no longer stable.
Leveling the Tripod
If I were to do this project over again, I would lash the tripod legs together differently and take steps to ensure the tripod had vertical rotational symmetry. I was unaware how heavy the bamboo would be and did not take the time to reevaluate the planned assembly steps accordingly. My original design also assumed leveling the tripod could be accomplished by moving the legs in or out without compromising stability. Here is how I would fix both problems.
To account for the weight of the bamboo, I would change how the legs were lashed together. The original tripod had the legs lashed together side by side with all three feet facing the same direction. Raising the tripod consisted of planting two of the feet, lifting the tip of the tripod up into the air, rotating the third foot 180°, and then pushing that foot towards the middle of the tripod. A better design would flip the middle leg over such that the two outside legs had their feet on one side of the lashing, and the middle leg had its foot on the opposite side of the lashing while laid out on the ground. This would avoid rotating the third leg 180° during the raising process.
Ensuring rotational symmetry requires additional preparation before raising the tripod. While the legs are still on the ground, a fixed distance from the tripod lashing would be marked on each leg. The mark on each leg would be roughly 1 meter (~3 ft) from the shortest foot. Once the tripod was raised, the legs would be moved in and out until the marked locations on each leg make an equilateral triangle. A measured piece of rope tied between all three points would aid in maintaining the equilateral triangle. The feet of each leg would then be gradually cut down until the equilateral triangle is level. Trimming load bearing feet may sound difficult or awkward, but experience shows it is doable. The alternative would be to survey the hillside and calculate ahead of time the precise lengths of the bamboo legs which would likely require adjustments and trimming anyway.
Acknowledgements
A big thank you to my cousin and FIL who provided tools, bamboo, land, labor, and helped in the problem solving. Our respective wives, while not directly involved, made lunches, brought water, and reminded us when it was time to slow down to rest or take safety precautions. This was a group effort and I am grateful to everyone that helped make this vision come to life.
All the best, Akelas.
Month and a Half Later
It is August 16th and I had the opportunity to inspect the tower again. Half of the bamboo has changed color to a dusty brown from the vibrant green or yellow it used to be. The bambot has also dried out and shrunk making all the lashings loose. Naturally, I climbed up to the top.
Every ladder rung slips, the floor boards spin, and the whole thing wobbles. I was able to tighten up some of lashings at the top of the ladder, the handrails, and green structural supports we added at the end. All that worked together to make it comfortable to hang out in top for a minute but it clearly won’t last very long.
My cousin, who owns the farm where the tower is built, wants to keep it up a little longer. He reports a lot of the neighbors comment on it and like to see it, but agrees it is no longer suitable to climb. He’ll bring it down in a week or two probably to harvest and repurpose the ropes before they deteriorate too much in the sun.