 Maestro
Lightsaber V.1
Last Updated: 2026-06-11
It cost US$40 and it’s one of a kind.
I came across some videos on YouTube showing people making custom lightsabers out of hardware found at Home Depot or Lowe’s. Some looked really good and others were kind of bad, but they all looked like something I could do. So I did.
How I Made my Saber
All the videos I watched are Americans walking through the big, nation-wide, home improvement stores like Home Depot and Lowe’s. I am currently in a small farming town in southern Brazil. While I didn’t have the big box stores, I do have a father-in-law excited to participate.
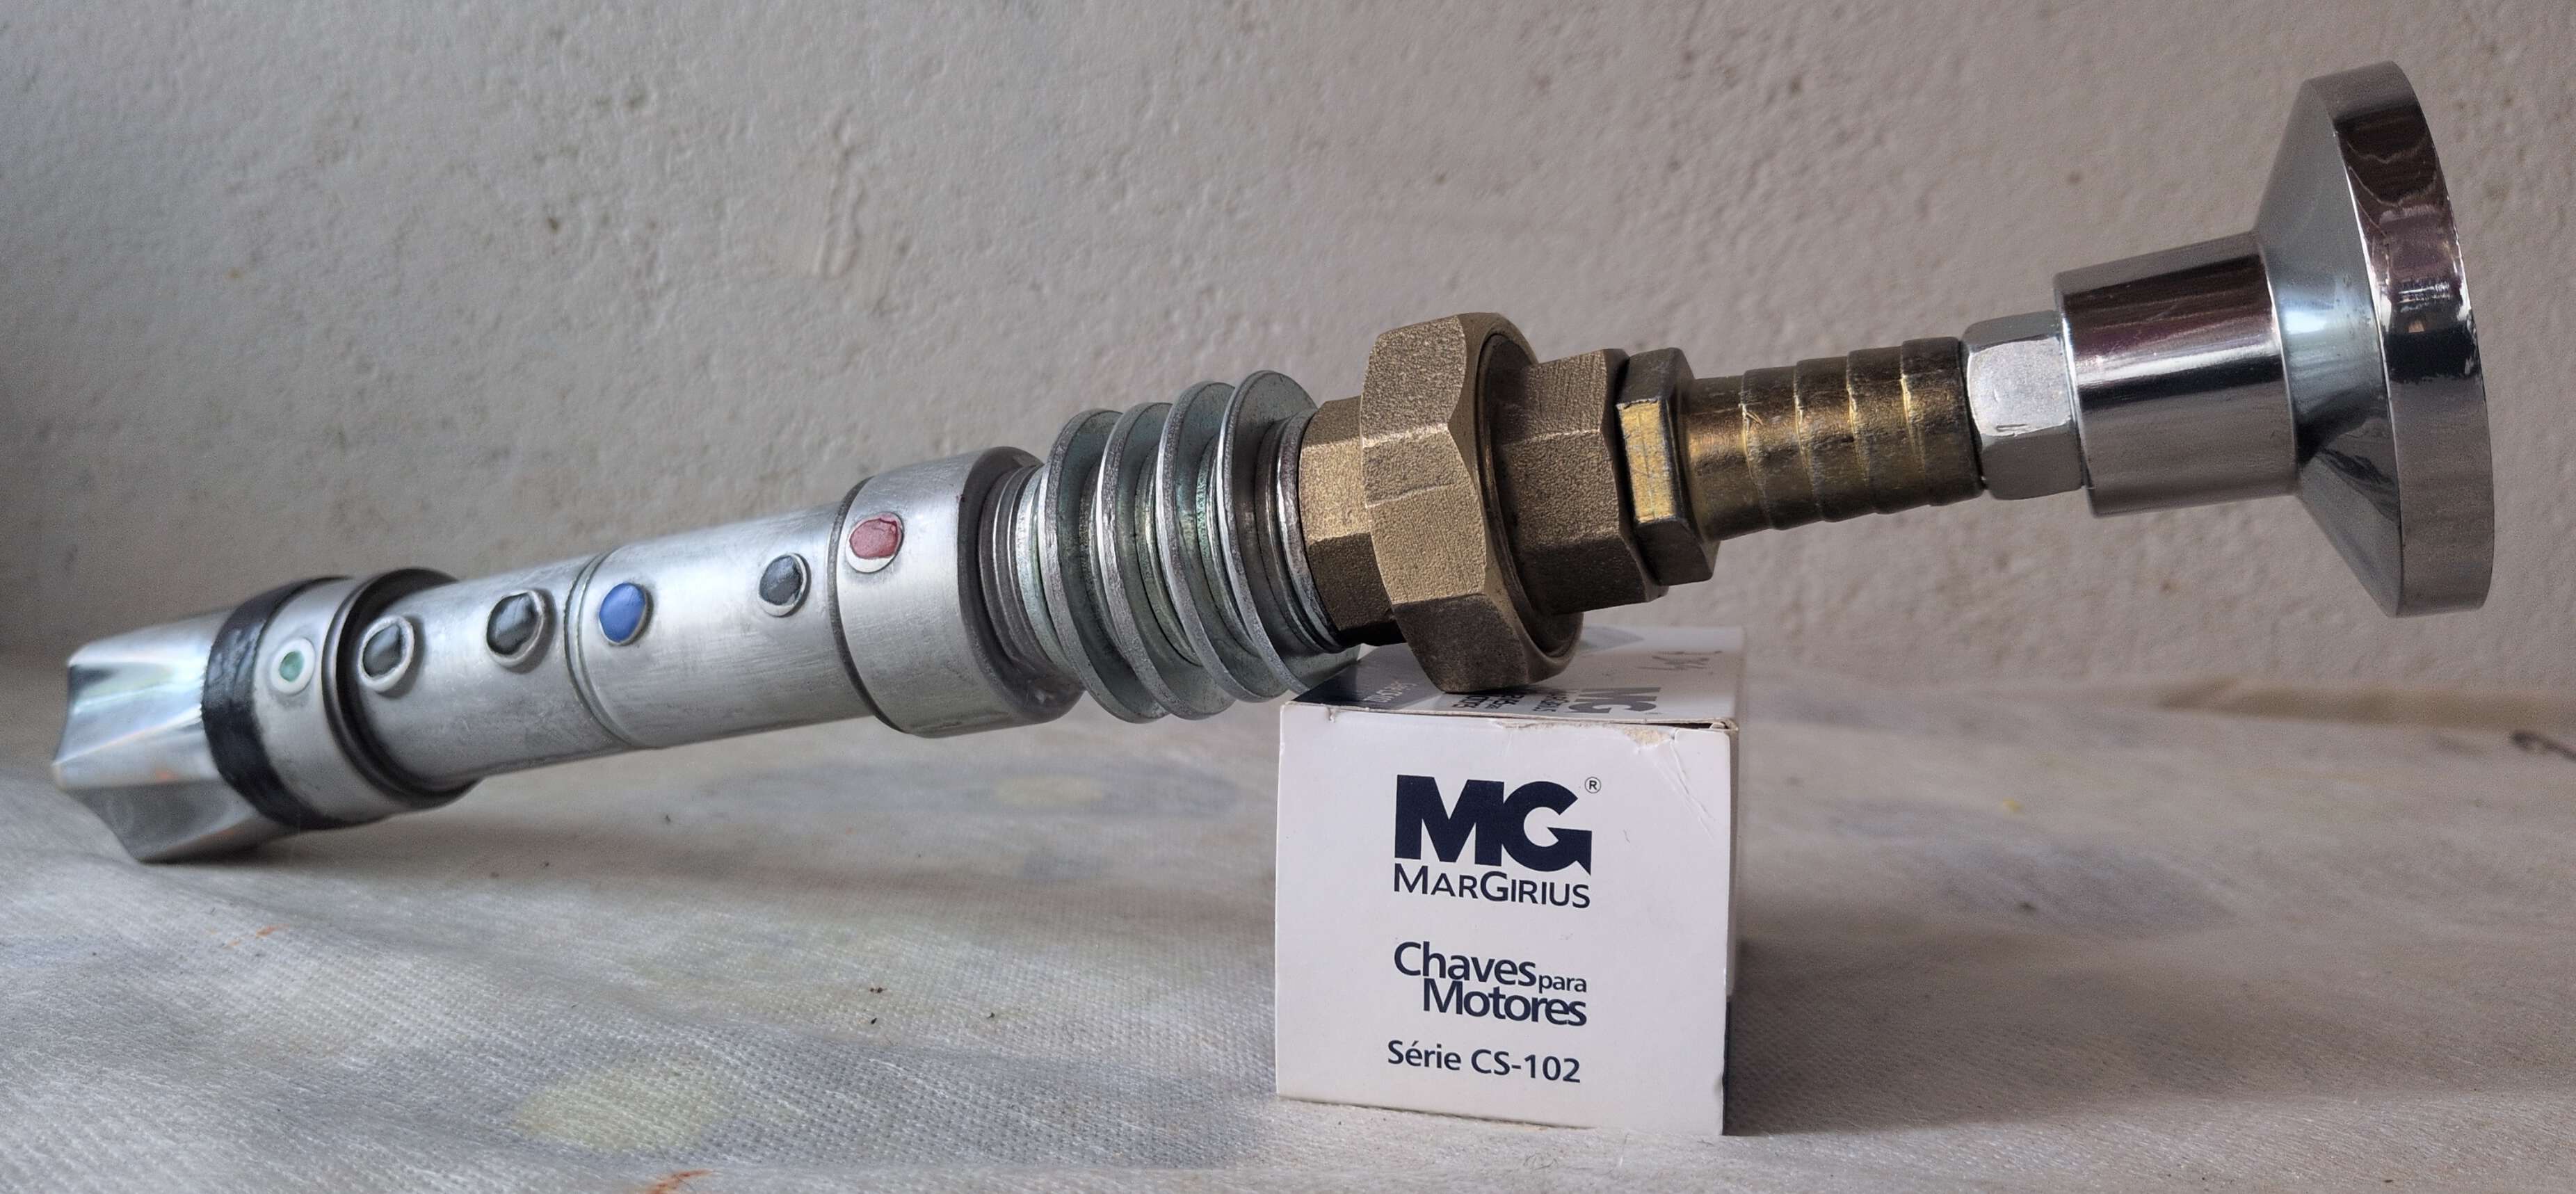
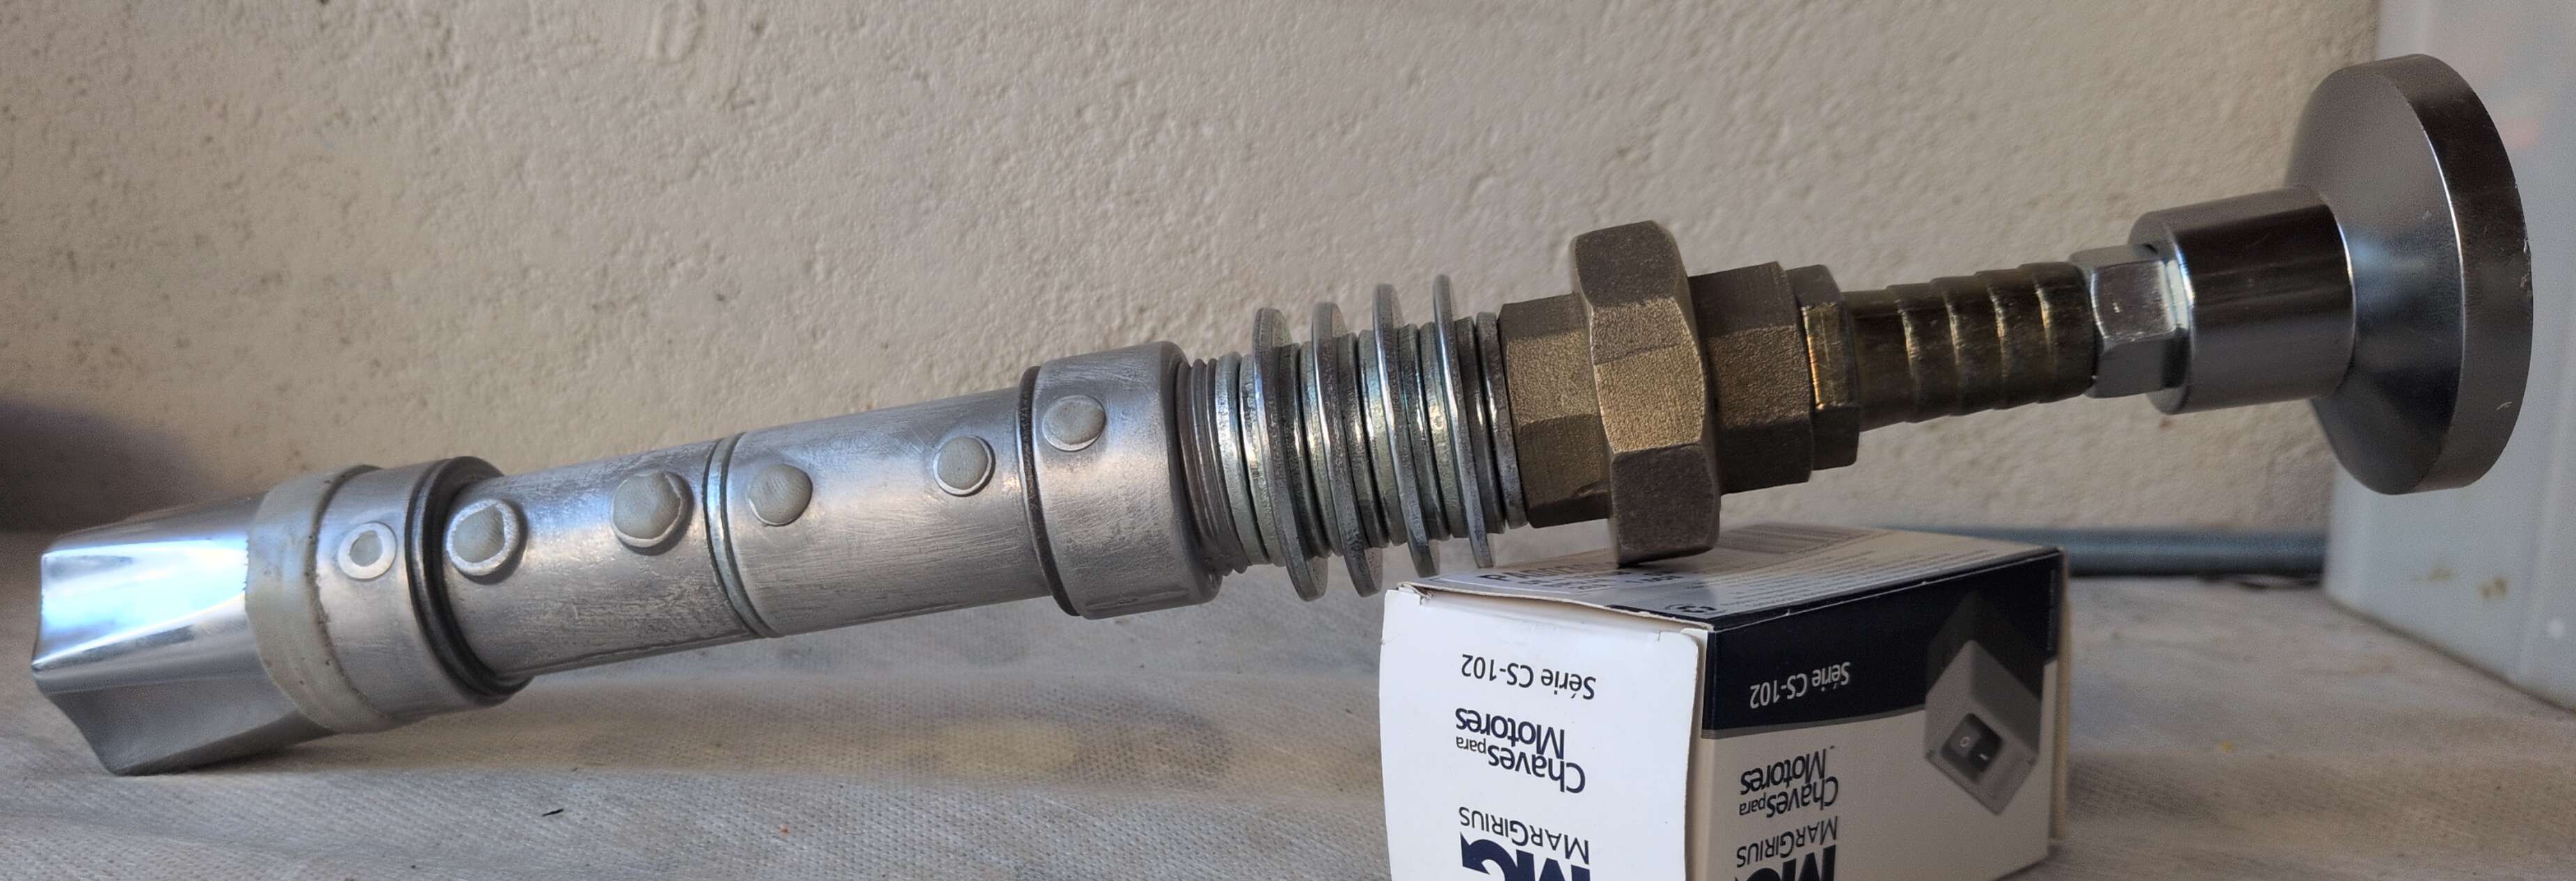
Our tools are limited to a drill and a hodge podge of old hand tools. To compensate, I opted for one of the simplest and most versatile assembly methods: a collection of pipe fittings and washers pinned together with a threaded rod and a few nuts.
I noticed that some of the parts didn’t want to sit flat against one another which made the stack crooked. I used some sand paper we happened to have to file down the ends of each fitting and flatten the faces of some of the washers. I am aware there are optimal grits of side paper for the desired finish; I used 120 just because it was available.
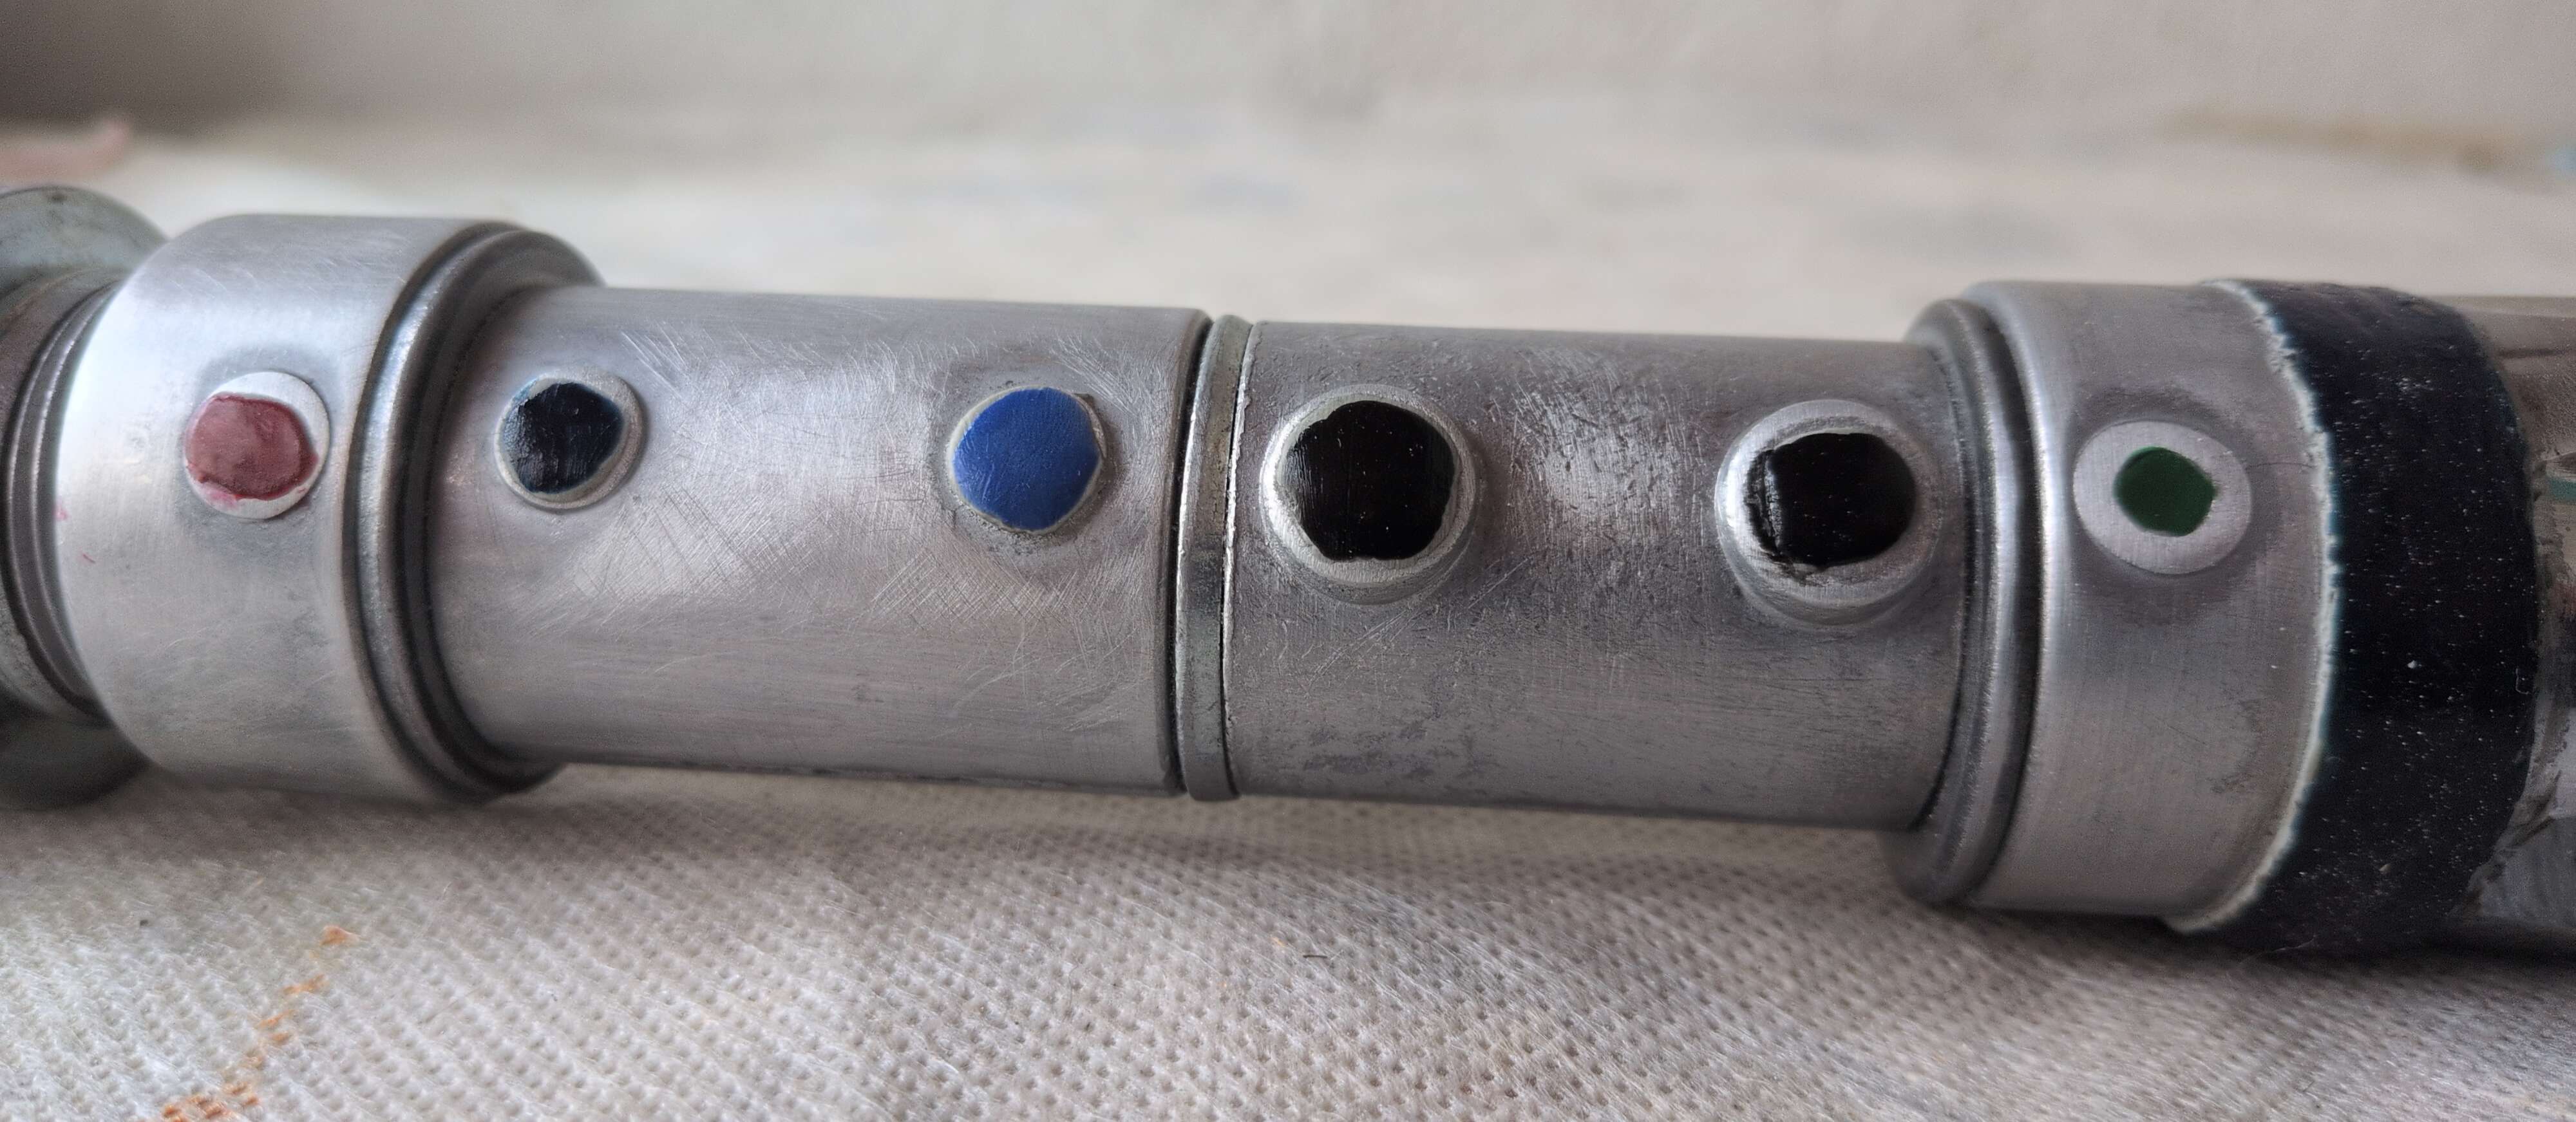
Fun fact: there is a small difference between each side of a washer. One has a rounded edge and the other has a sharp edge. With this in mind, I made sure to flip the washers so the desired side was facing in what I felt was the right direction. This improved how the fittings pressed against each other and added small greebly details I liked.

Washers are keys. Stacking different sizes made a shape inspired by Obi-wan’s lightsaber. They help transition between fittings with different diameters and add details between identical pieces. Most importantly, they make sure the nuts on either end can actually press against the fittings.
With most of the parts stacked in order, I hand tightened the nuts and carefully aligned the washers and fittings. Most of the fittings don’t touch the threaded rod in the middle at all and are held in place only by the clamping force provided by the nuts on either end. This is why it’s important everything stacks neatly. I found that a light sanding of the ends of the fittings and the faces of the washers helped all the parts sit flat.
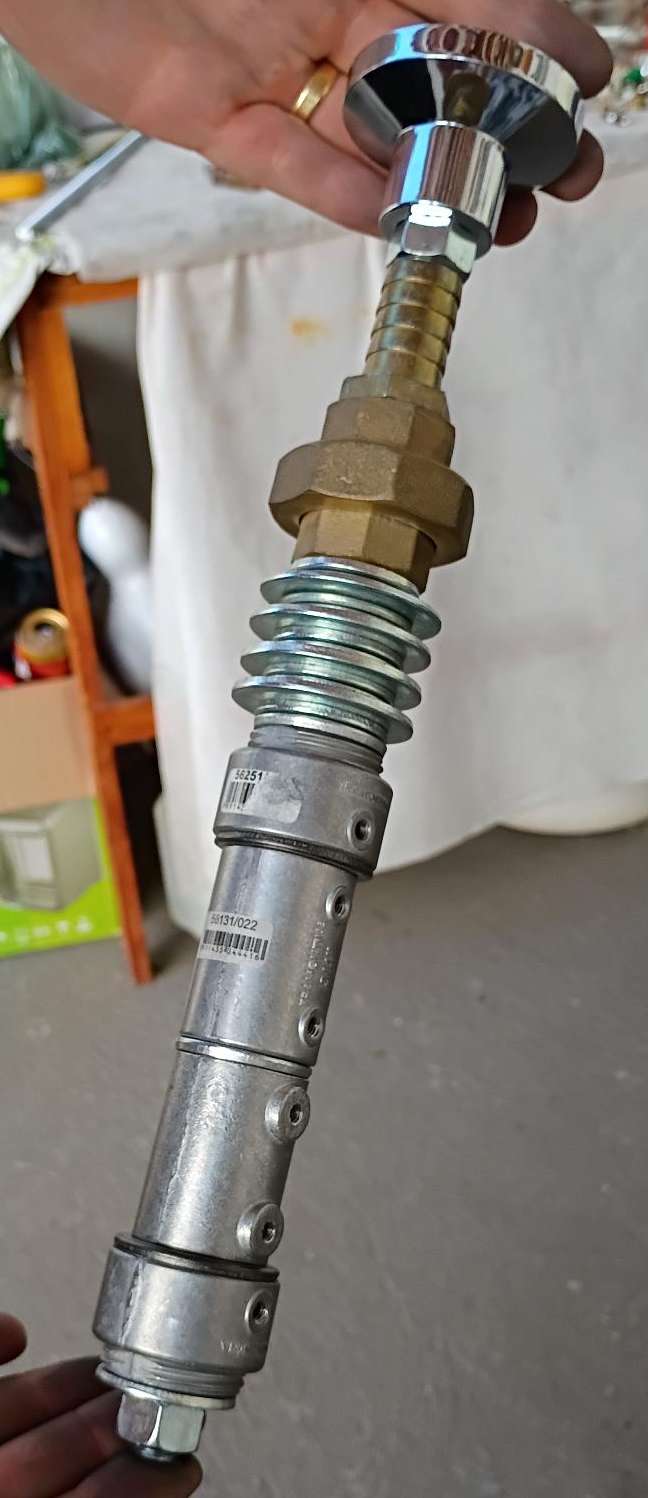
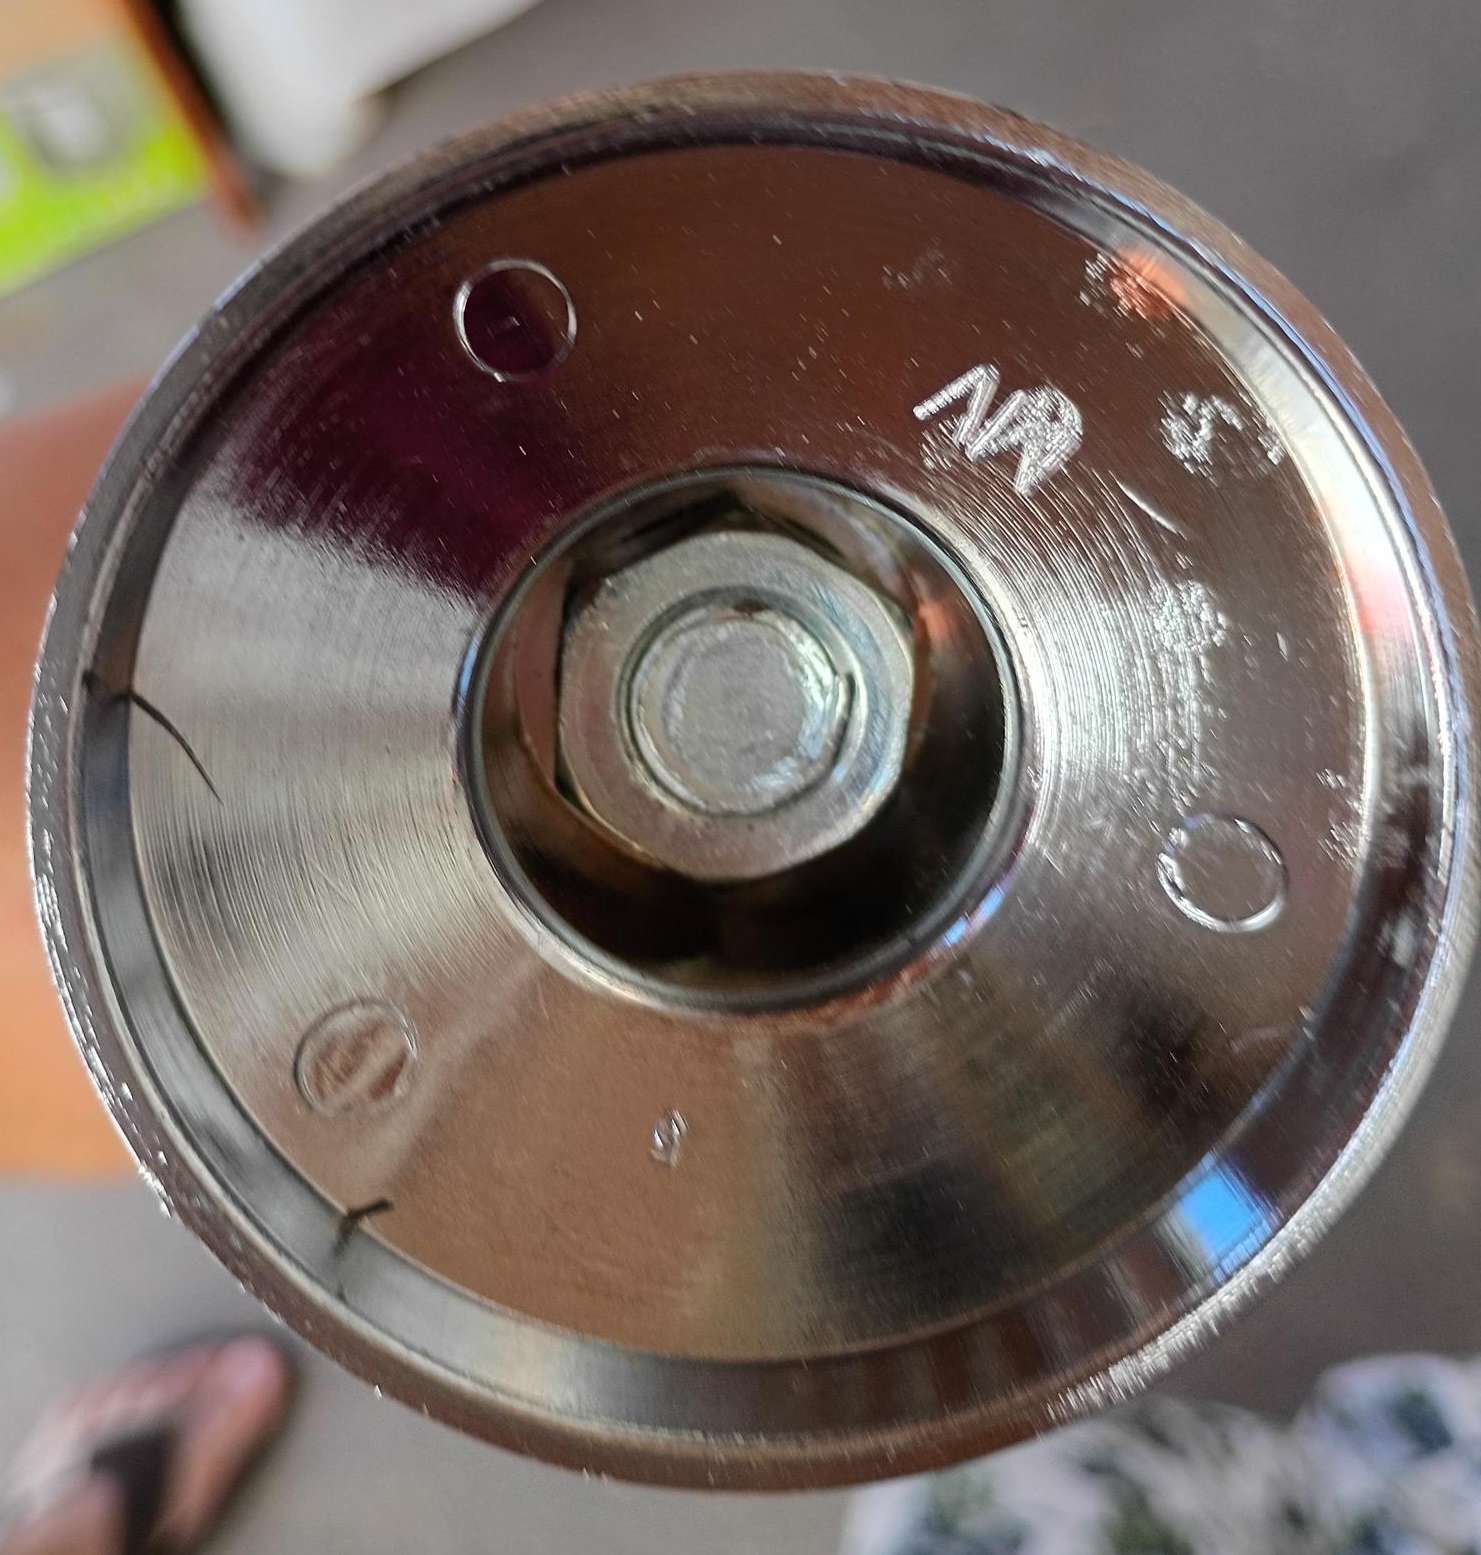
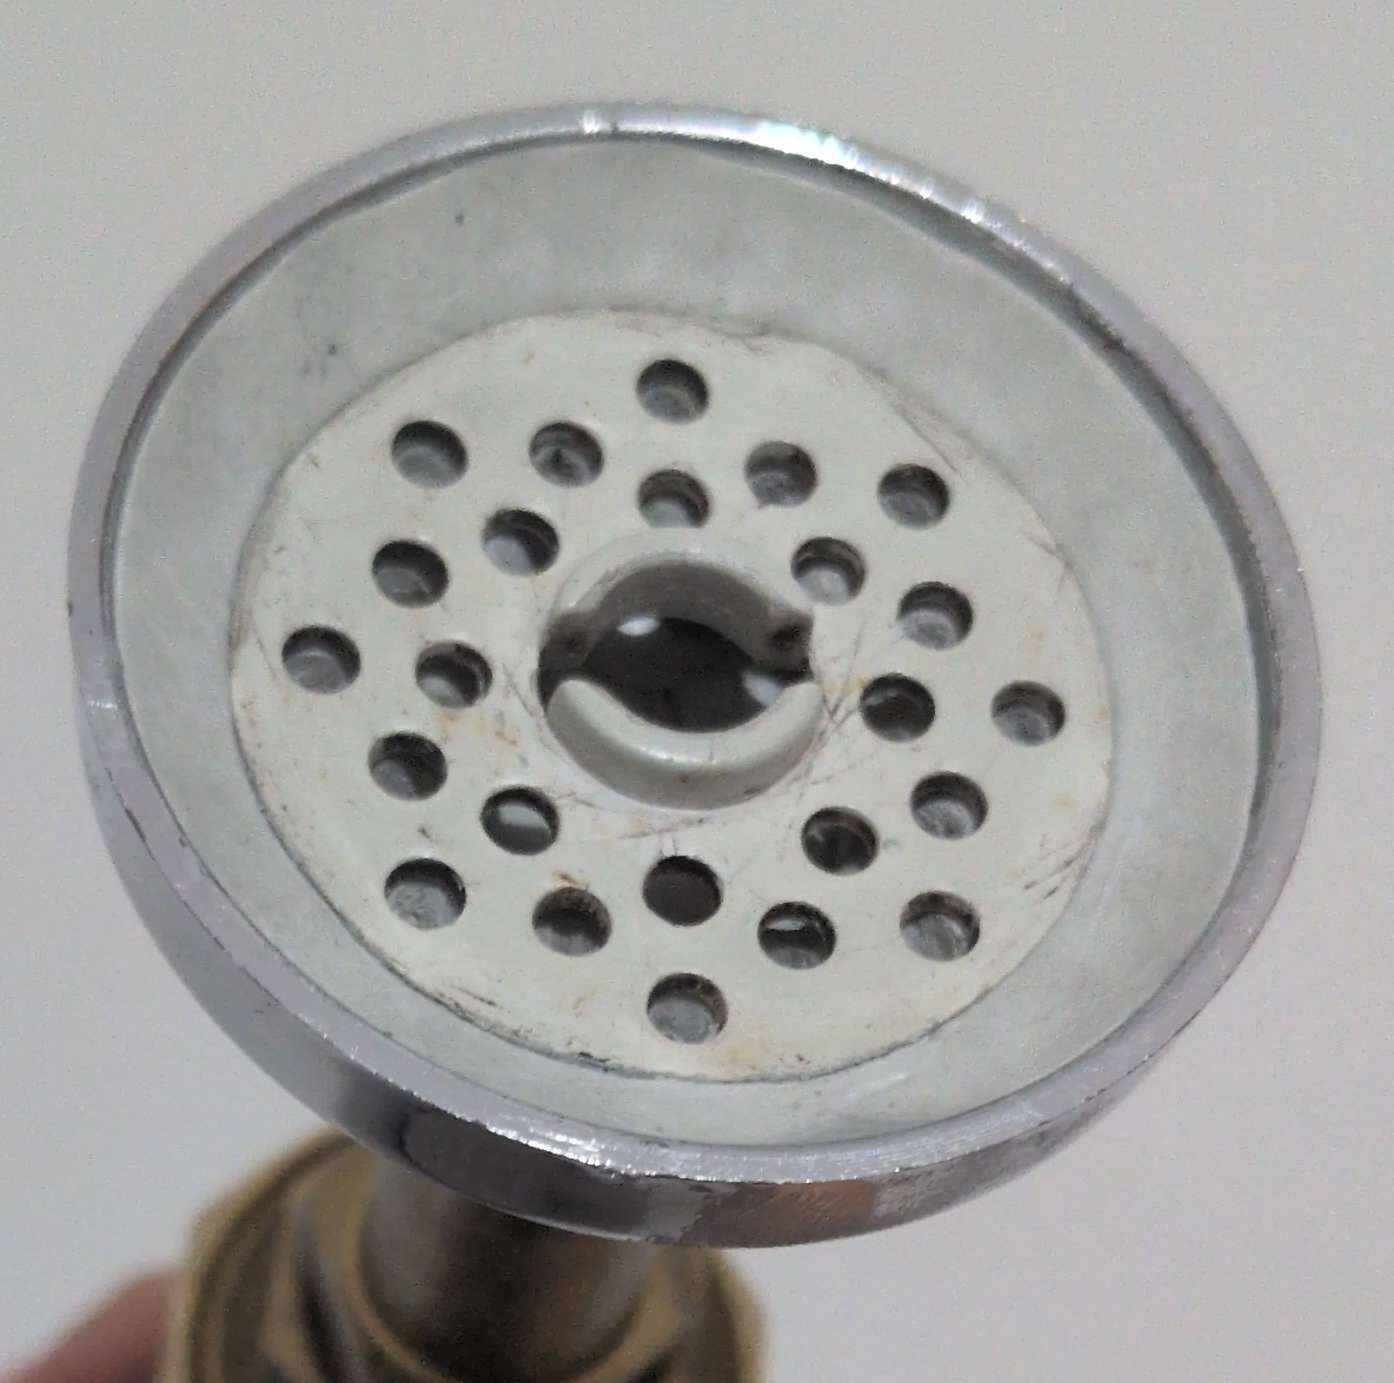
The emitter on the end is the base to a faucet handle and is one of three plastic parts in this build. It’s held in place by pinning it between one of the main clamping nuts and a second nut inside. I am not a huge fan of exposing one of the clamping nuts as it breaks the immersion a little, but the brass fitting wasn’t wide enough to pin the emitter against the nut. Even if the emitter could be pinned between the brass fitting and the nut, It would likely crack under the pressure. If I could do it again, I would let the emitter sit loosely on the tip of the brass fitting and use epoxy to stabilize it. Unfortunately, I didn’t learn of epoxy until later on in the project.
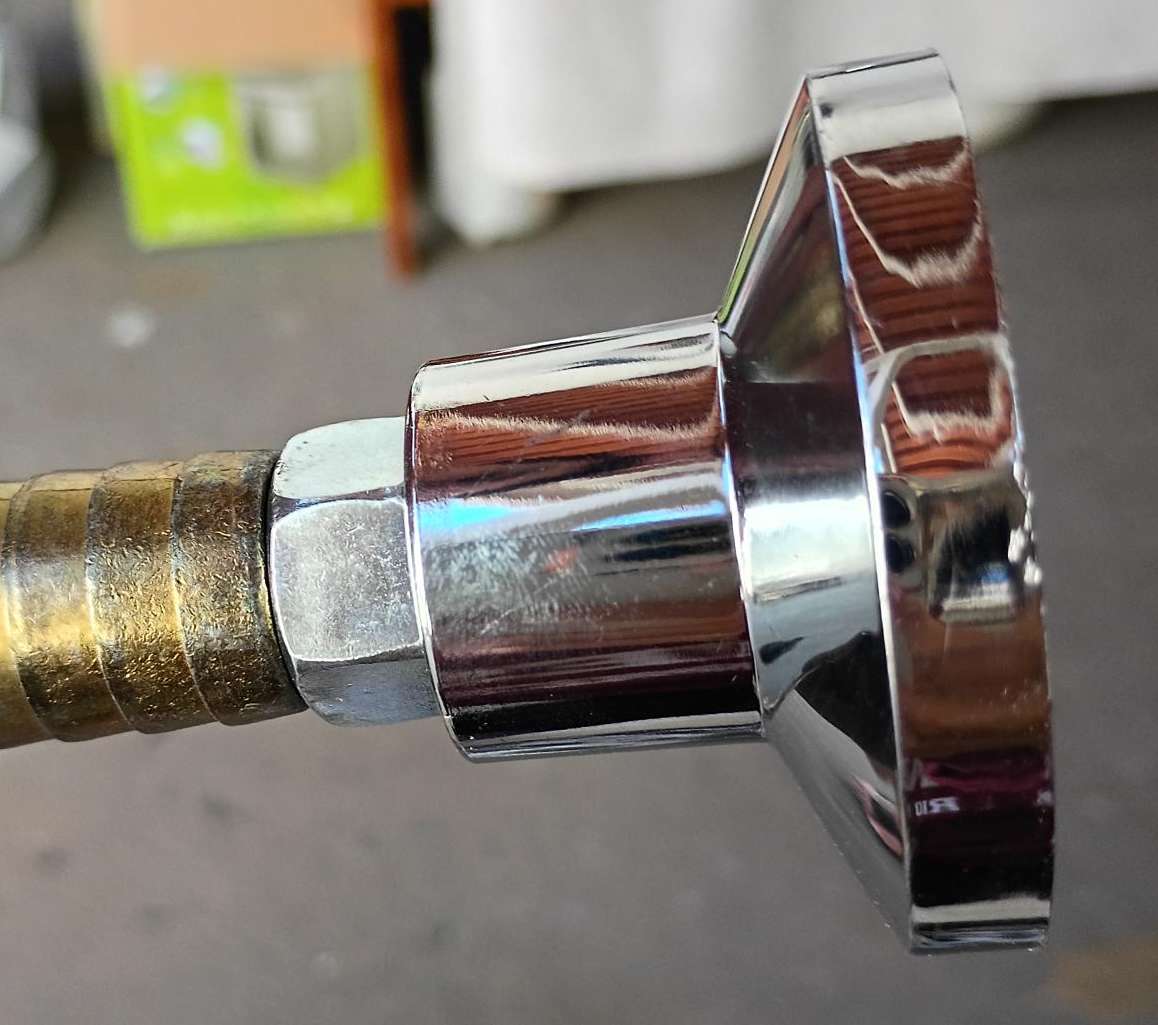
The faucet handle itself was purchased to cover the compression nut on the opposite end and form the pommel. Attaching it proved to be the hardest part of the project. My father-in-law and I were throwing all sorts of junk at it from his collection of cast-offs and nothing really worked. I wanted this to be a toy I could heft in my hand just as much as I wanted it to look good on a shelf, so it had to be strong connection.
While talking about our options over lunch, he suddenly had the idea of a two-part putty-based epoxy! Before the table was cleared, he was already in the car and quickly returned with the mix. I only knew of liquid epoxies, but this stuff was like a stiff playdough with a grey and white stick individually wrapped in paper in a small cardboard box. No plastic wrap, so this stuff doesn’t seem to dry out, though a little bit of water went a long way in facilitating mixing and molding the putty. We filled the faucet handle, wrapped some putty around the nut, and pressed the two parts together. To even out the transition, I put a band of putty over the transition and used a dull steak knife to cut the edges straight.
I was pleasantly surprised there was putty leftover, so I filled the screw holes in a few of the fittings and added details to the emitter. The base of the emitter was filled with putty and an old kitchen drain plug was cut up and secured.
When the putty hardened a couple hours later, the flimsy plastic emitter stiffened, the drain plug added some greebling, and the faucet handle was firmly attached. Using the same sand paper as before, I was able to remove any numbers and lettering from the fittings. It also removed any finger prints from the putty.
My wife and mother-in-law were doing their nails at the same time, and they let me borrow some nail polish to add some color and disguise the putty as buttons and reinforcement. My paint job is sloppy, but the color adds some life. While sanding off the letters and numbers, I realized I preferred the shinier color underneath and sanded the whole thing. Since the sandpaper couldn’t reach into the corners, I got a weathered and battered look by default.
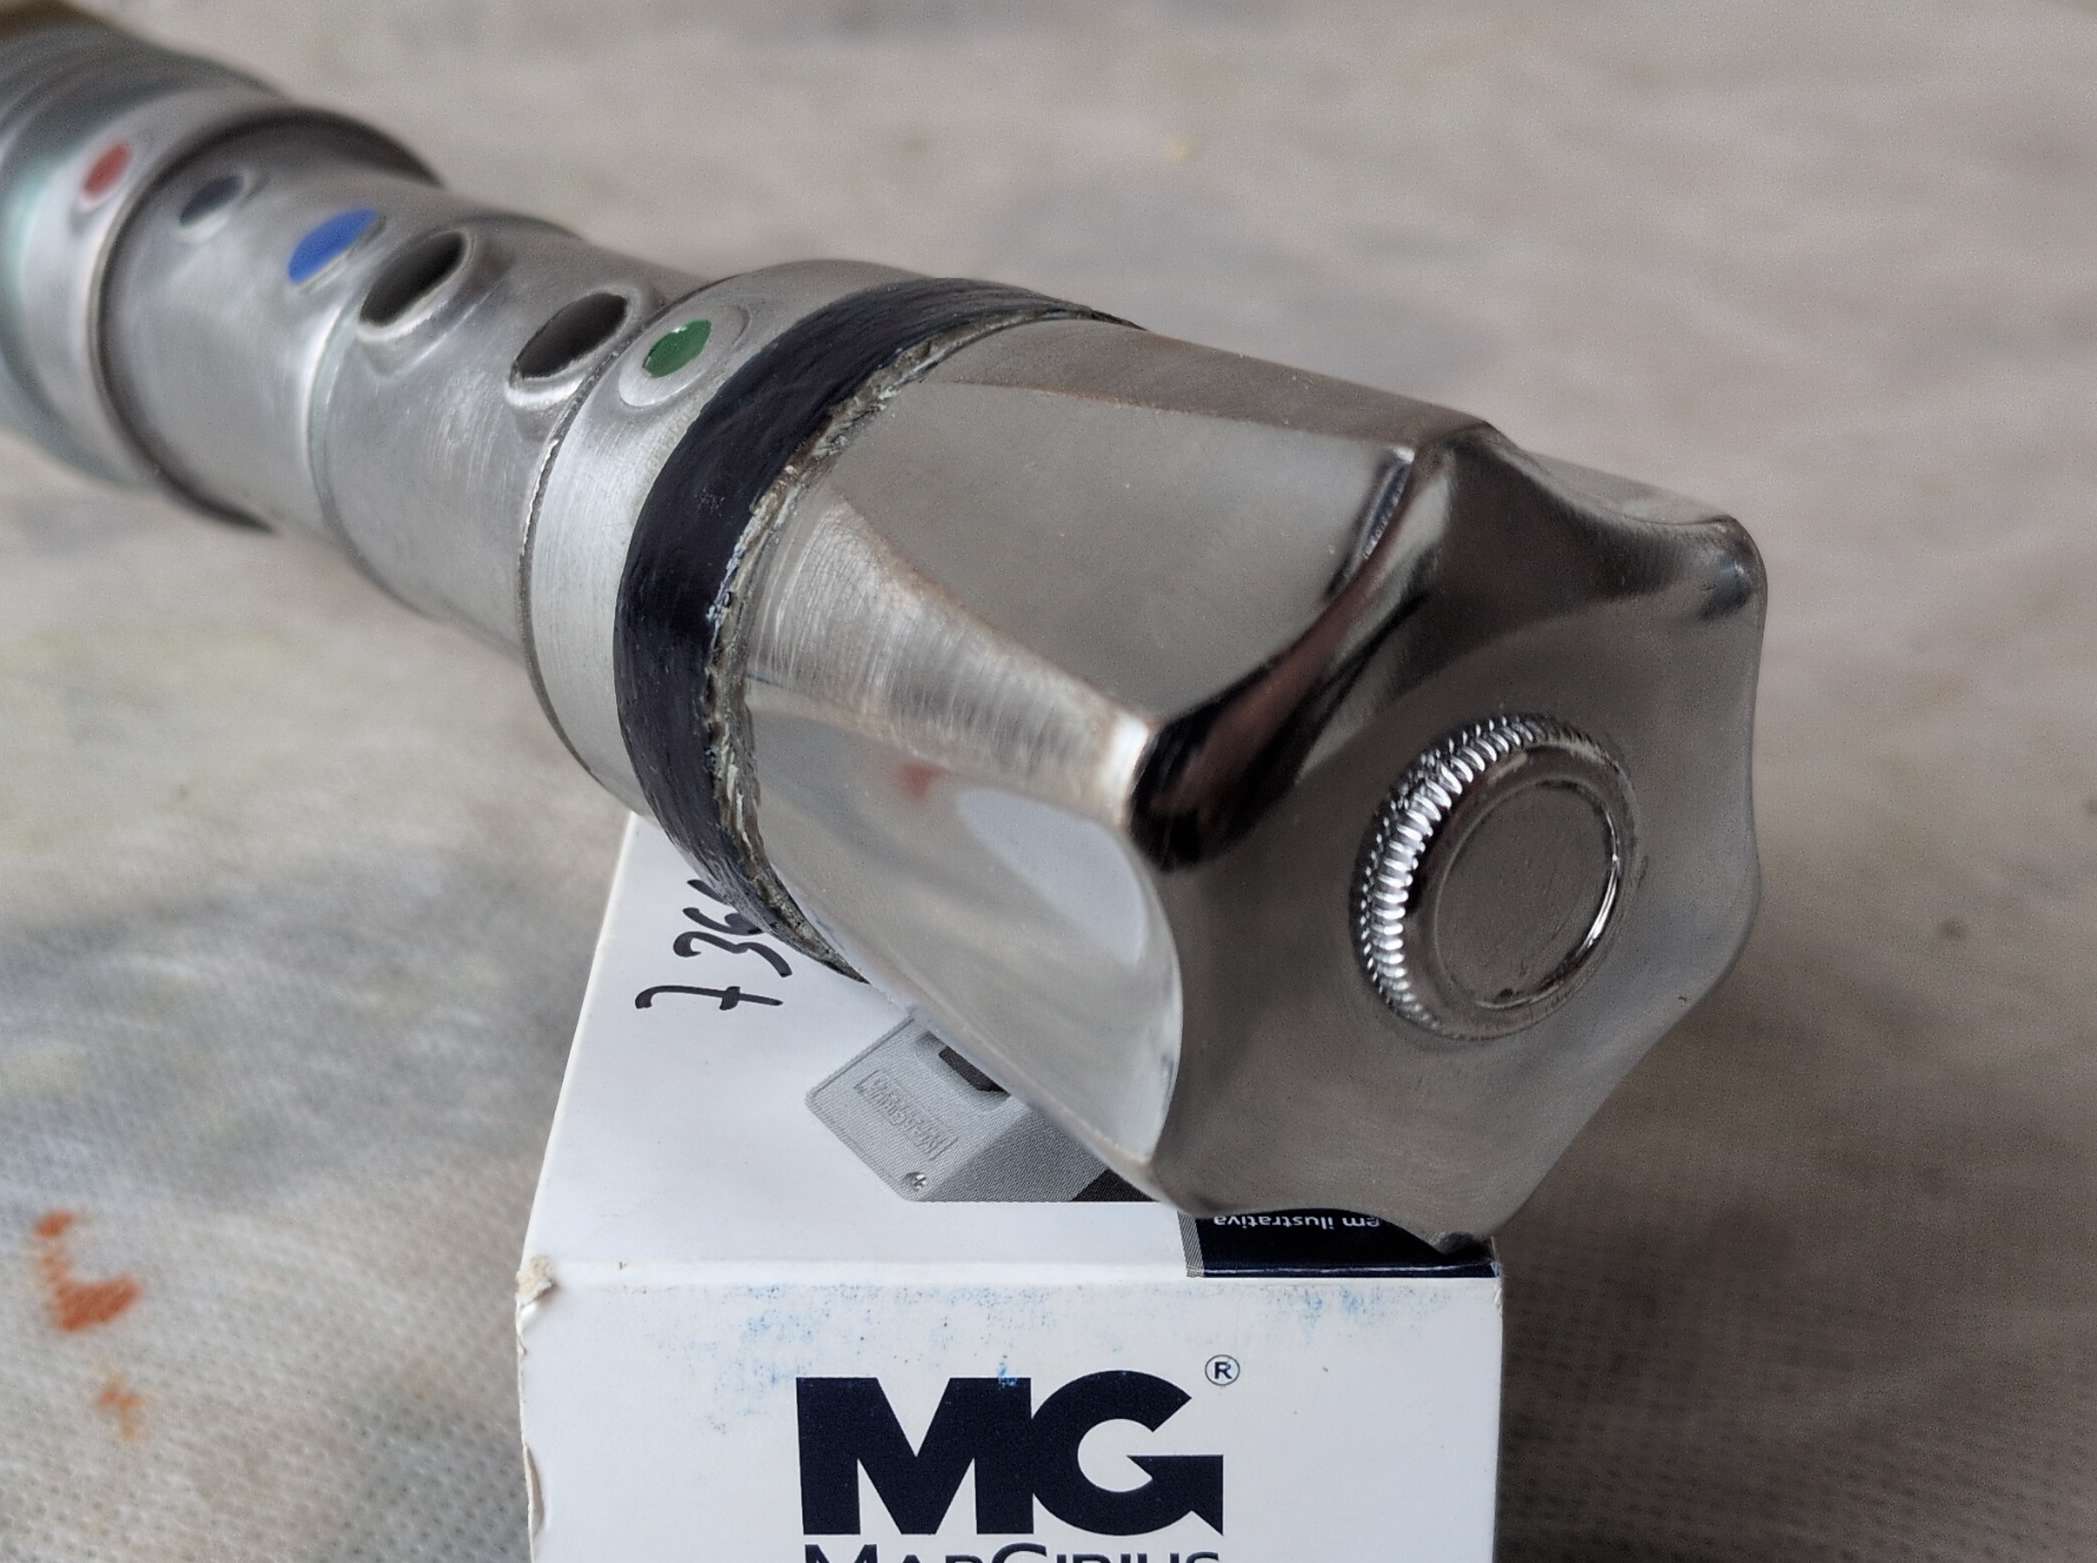
The finished saber weighs about as much as an electric drill or maybe a framing hammer and is just short of 14 inches long.Its balance point is in line with the red button in the middle. Unlike some canon lightsabers, I wanted this one to be reasonably comfortable to hold and I think I achieved that if you use a hand-and-half grip on the pommel. The hexagonal shape of the pommel and the octagonal brass nut work together to prevent the saber from rolling when set down.
Everyone who has seen it so far as asked if it lights up, and it does not. With my limited resources and no previous experience in electronics, I wanted to keep this project super simple. Once I am back in the States, I will probably make more light sabers with more features, especially since I will be leaving this one here in Brazil. The wife and I only fly with one carry-on bag each and I doubt security would let me fly with what is effectively a cudgel.
Conclusion
For my first attempt, I really like it! Obviously, it’s not perfect. It’s a couple inches too long to fit in with the props seen in the films and the exposed compression nut under the emitter bothers me. Holding it as designed, below the washer stack, puts the weight too far forward and the base of the blade several inches away from the hand. Those few inches would diminish a user’s available leverage in a proper sword fight. I know lightsabers are fictional, but a dose of reality helps to sell the illusion.
With these points in mind, I have already started my second lightsaber hilt. I’ll post photos and the full report once it’s done to the light saber project.
All the best,
Akelas