 Maestro
Patlabor Model
Last Updated: 2026-03-09
My first foray into model making, photography, and silly poses.
What is Patlabor?
Patlabor is a Japanese intellectual property from the 80’s. There’s a show, a few movies, and a manga all focused on a police force that uses mecha to fight crime committed with other mecha. I have never watched the show despite my casual interest. It’s not readily available on any streaming service, and I don’t feel like buying it. But all the art I see from the show is cool robots, and I can’t say no to a cool robot.
Aesthetically, Patlabor feels very different than Gundam, which is another show I haven’t watched. The robots shown in Gundam feel too fantastical with all their pointy bits, bright colors, and other design elements. Patlabor conversely feels slightly more grounded. If society decided to make a giant police mech, I could see it looking like this.
My First Time Making a Model
I’ve had a casual interest in model making for a long time. I have a couple friends that are into Warhammer models, and I found the assembly process more compelling than the painting. I bought the patlabor model this past November as an early Christmas present to myself. I chose it based on my love for sci-fi, it’s believable tacticool aesthetic, and how well it poses. This type of model making, cutting parts out of a sprue and assembling everything, scratches an itch that so far only Lego has been able to reach. But compared to Lego, modelling offers more complexity for a lower cost. There’s also greater dimensionality than Lego; a big part of model making is in painting and modifying models. Adam Savage and SublightDrive have some great videos on YouTube concerning the subject. I would eventually like to get into scratch building, the process of making models without a kit, but I have other priorities for my time at the moment.
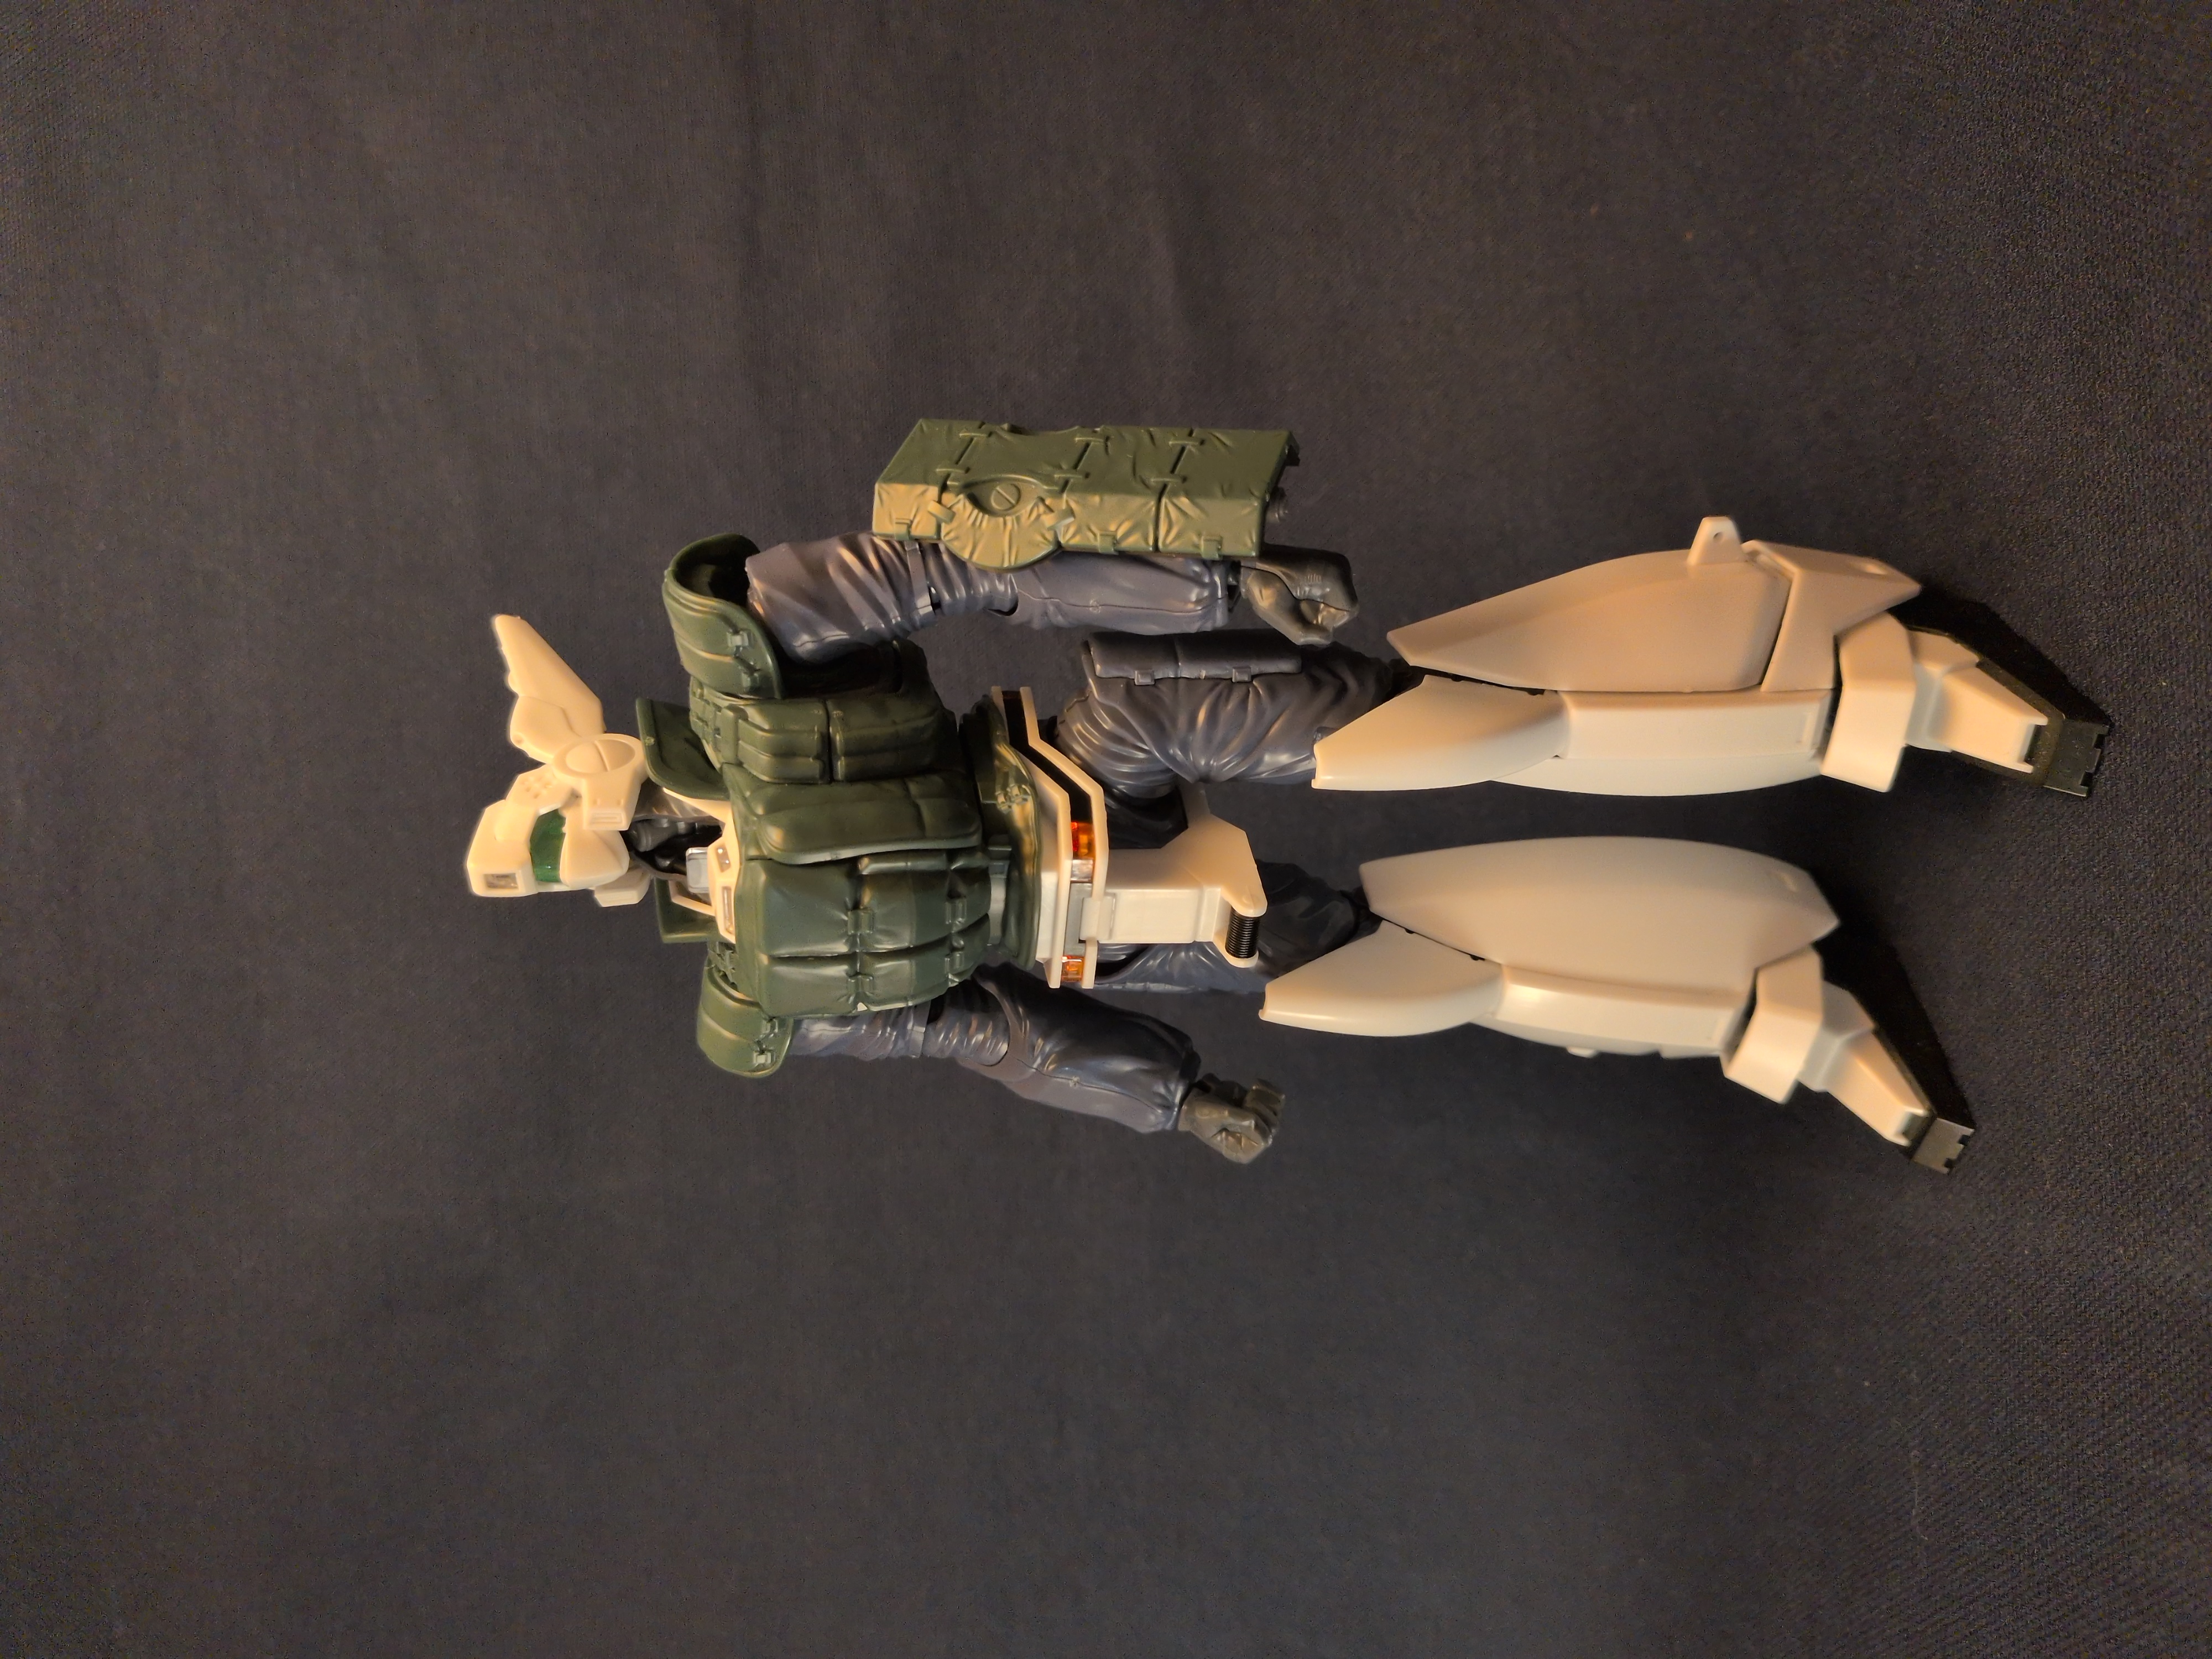
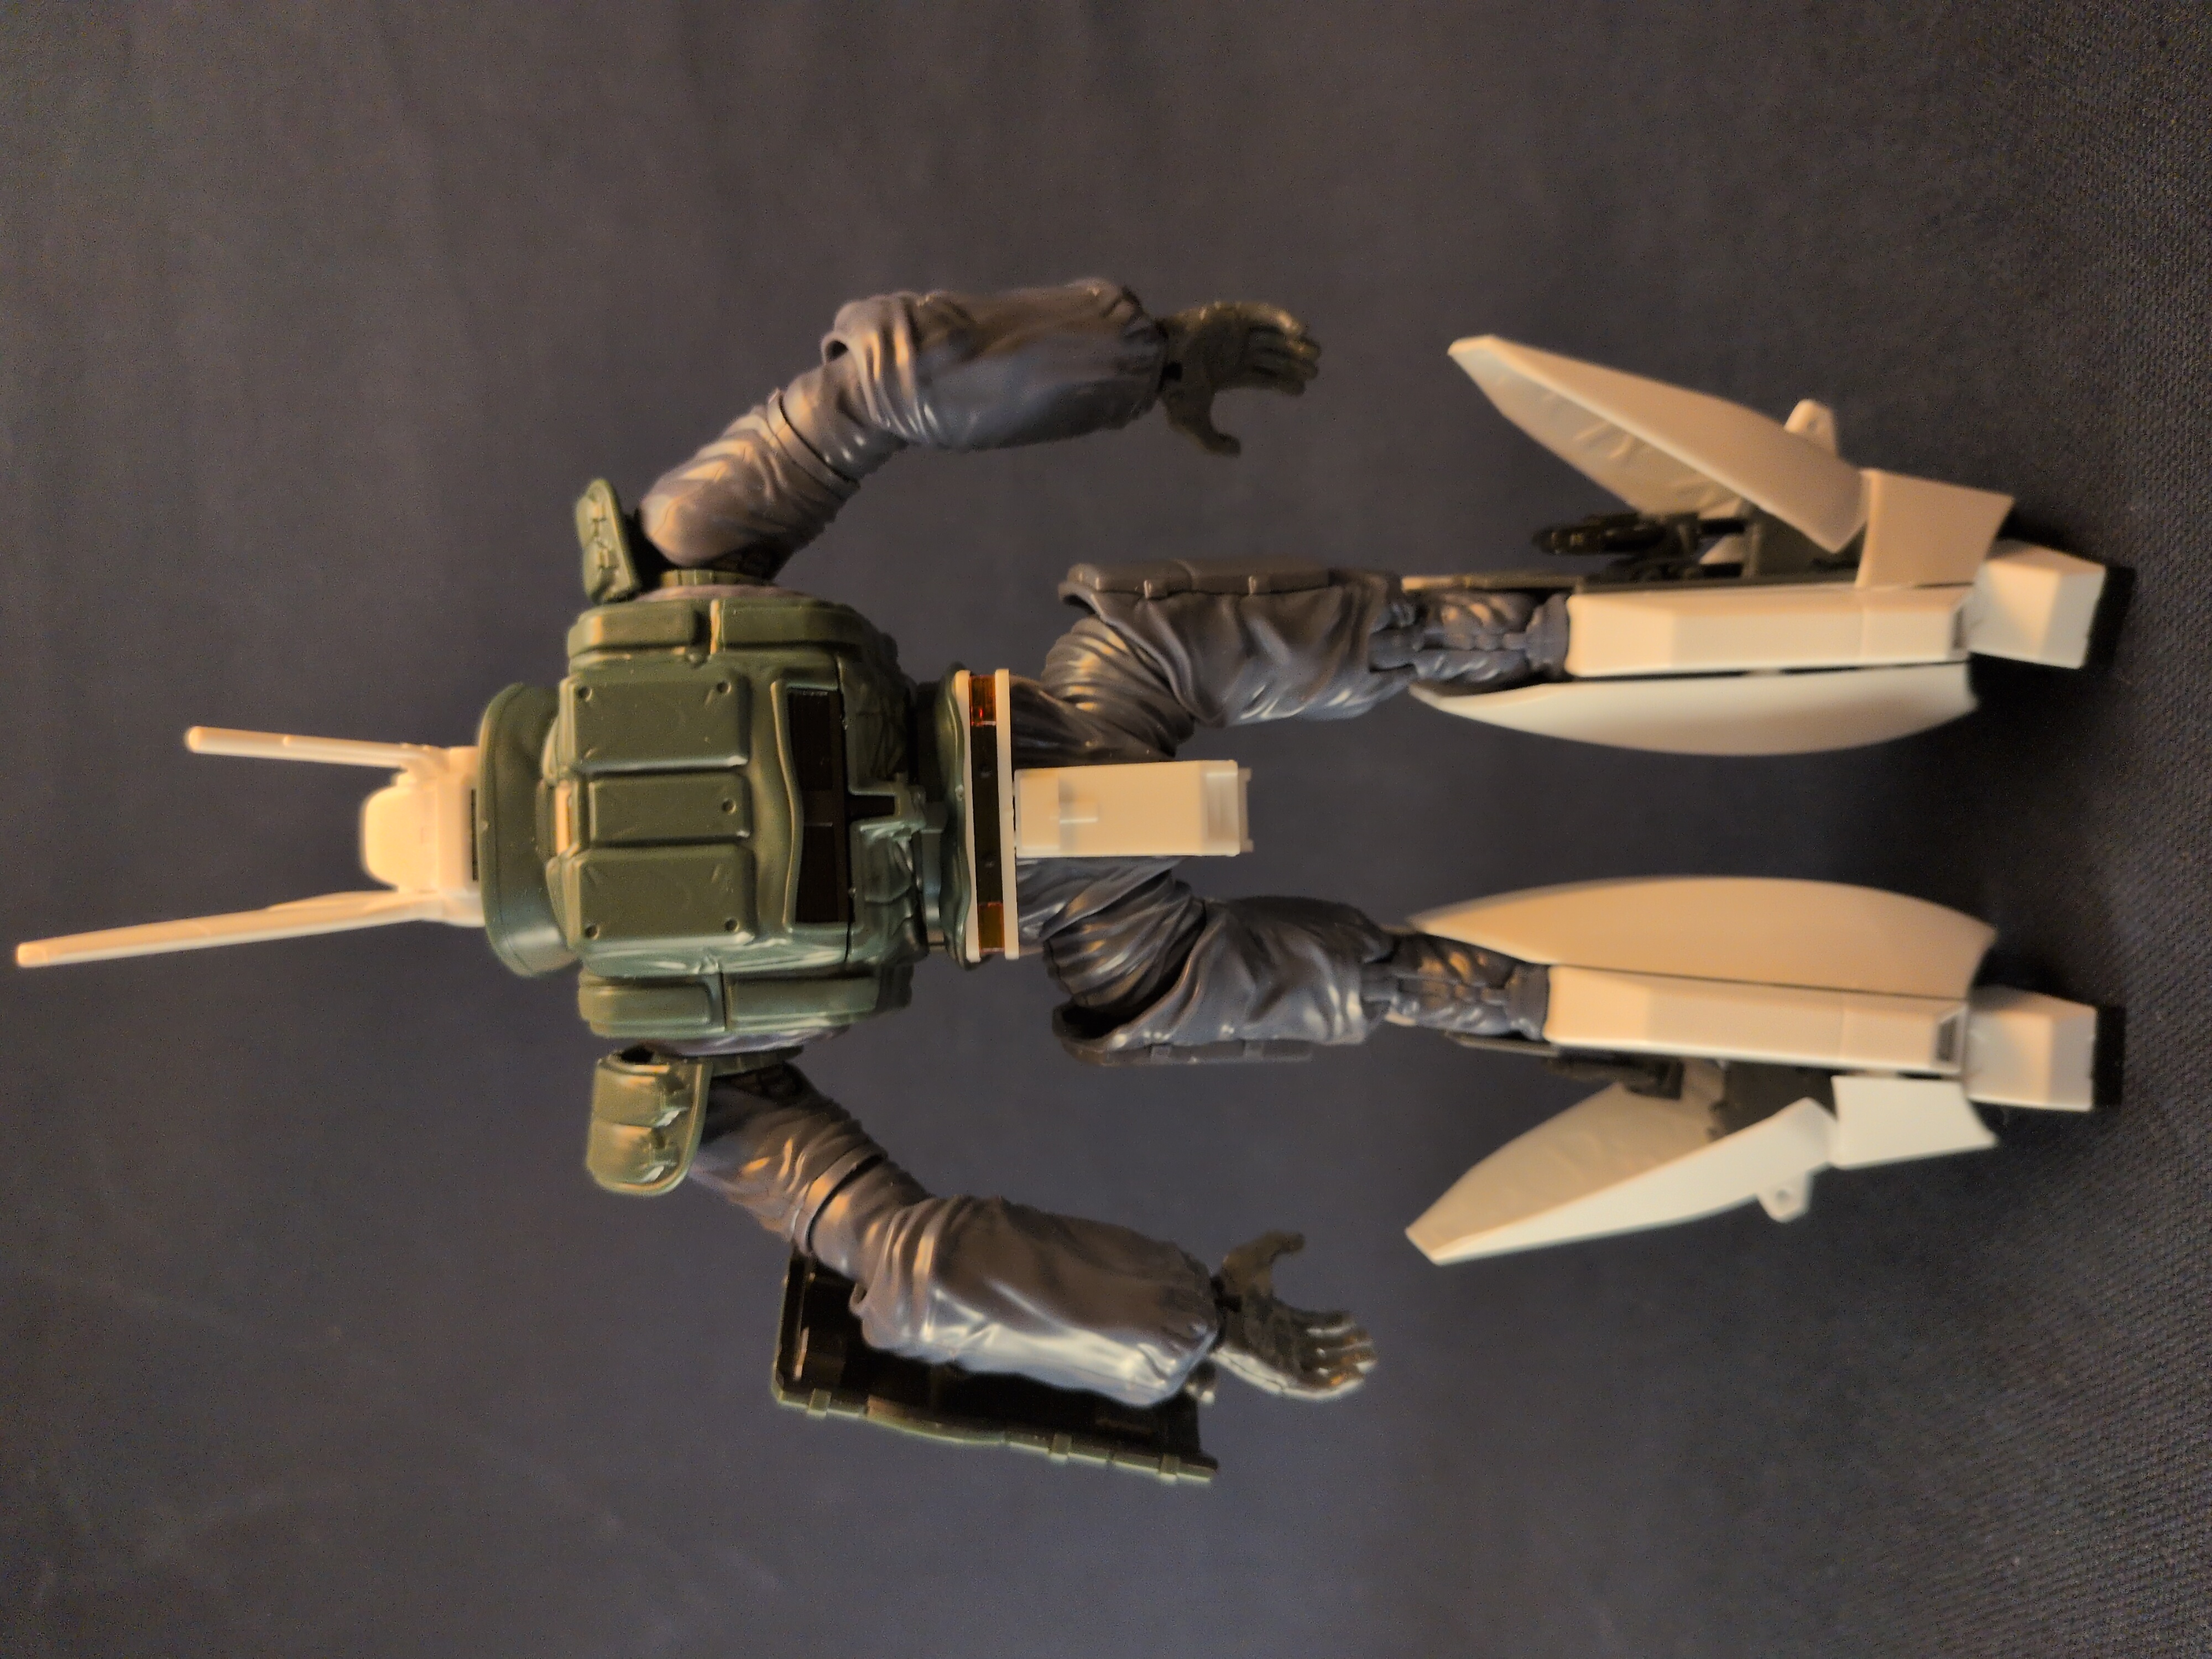
You’ll notice that my model is not painted. It doesn’t even have the decals yet. I really like this model, and I didn’t want it to be my first attempt at painting. The intention is to learn how to paint on some scratch builds, and come back to this mecha once I have developed the talent and collected some tools. Who knows when I’ll come back to it so it sits on my desk. This is definitely one of the few things I own that really sparks joy. For now, I content myself with its plain form and dream of what it could become.
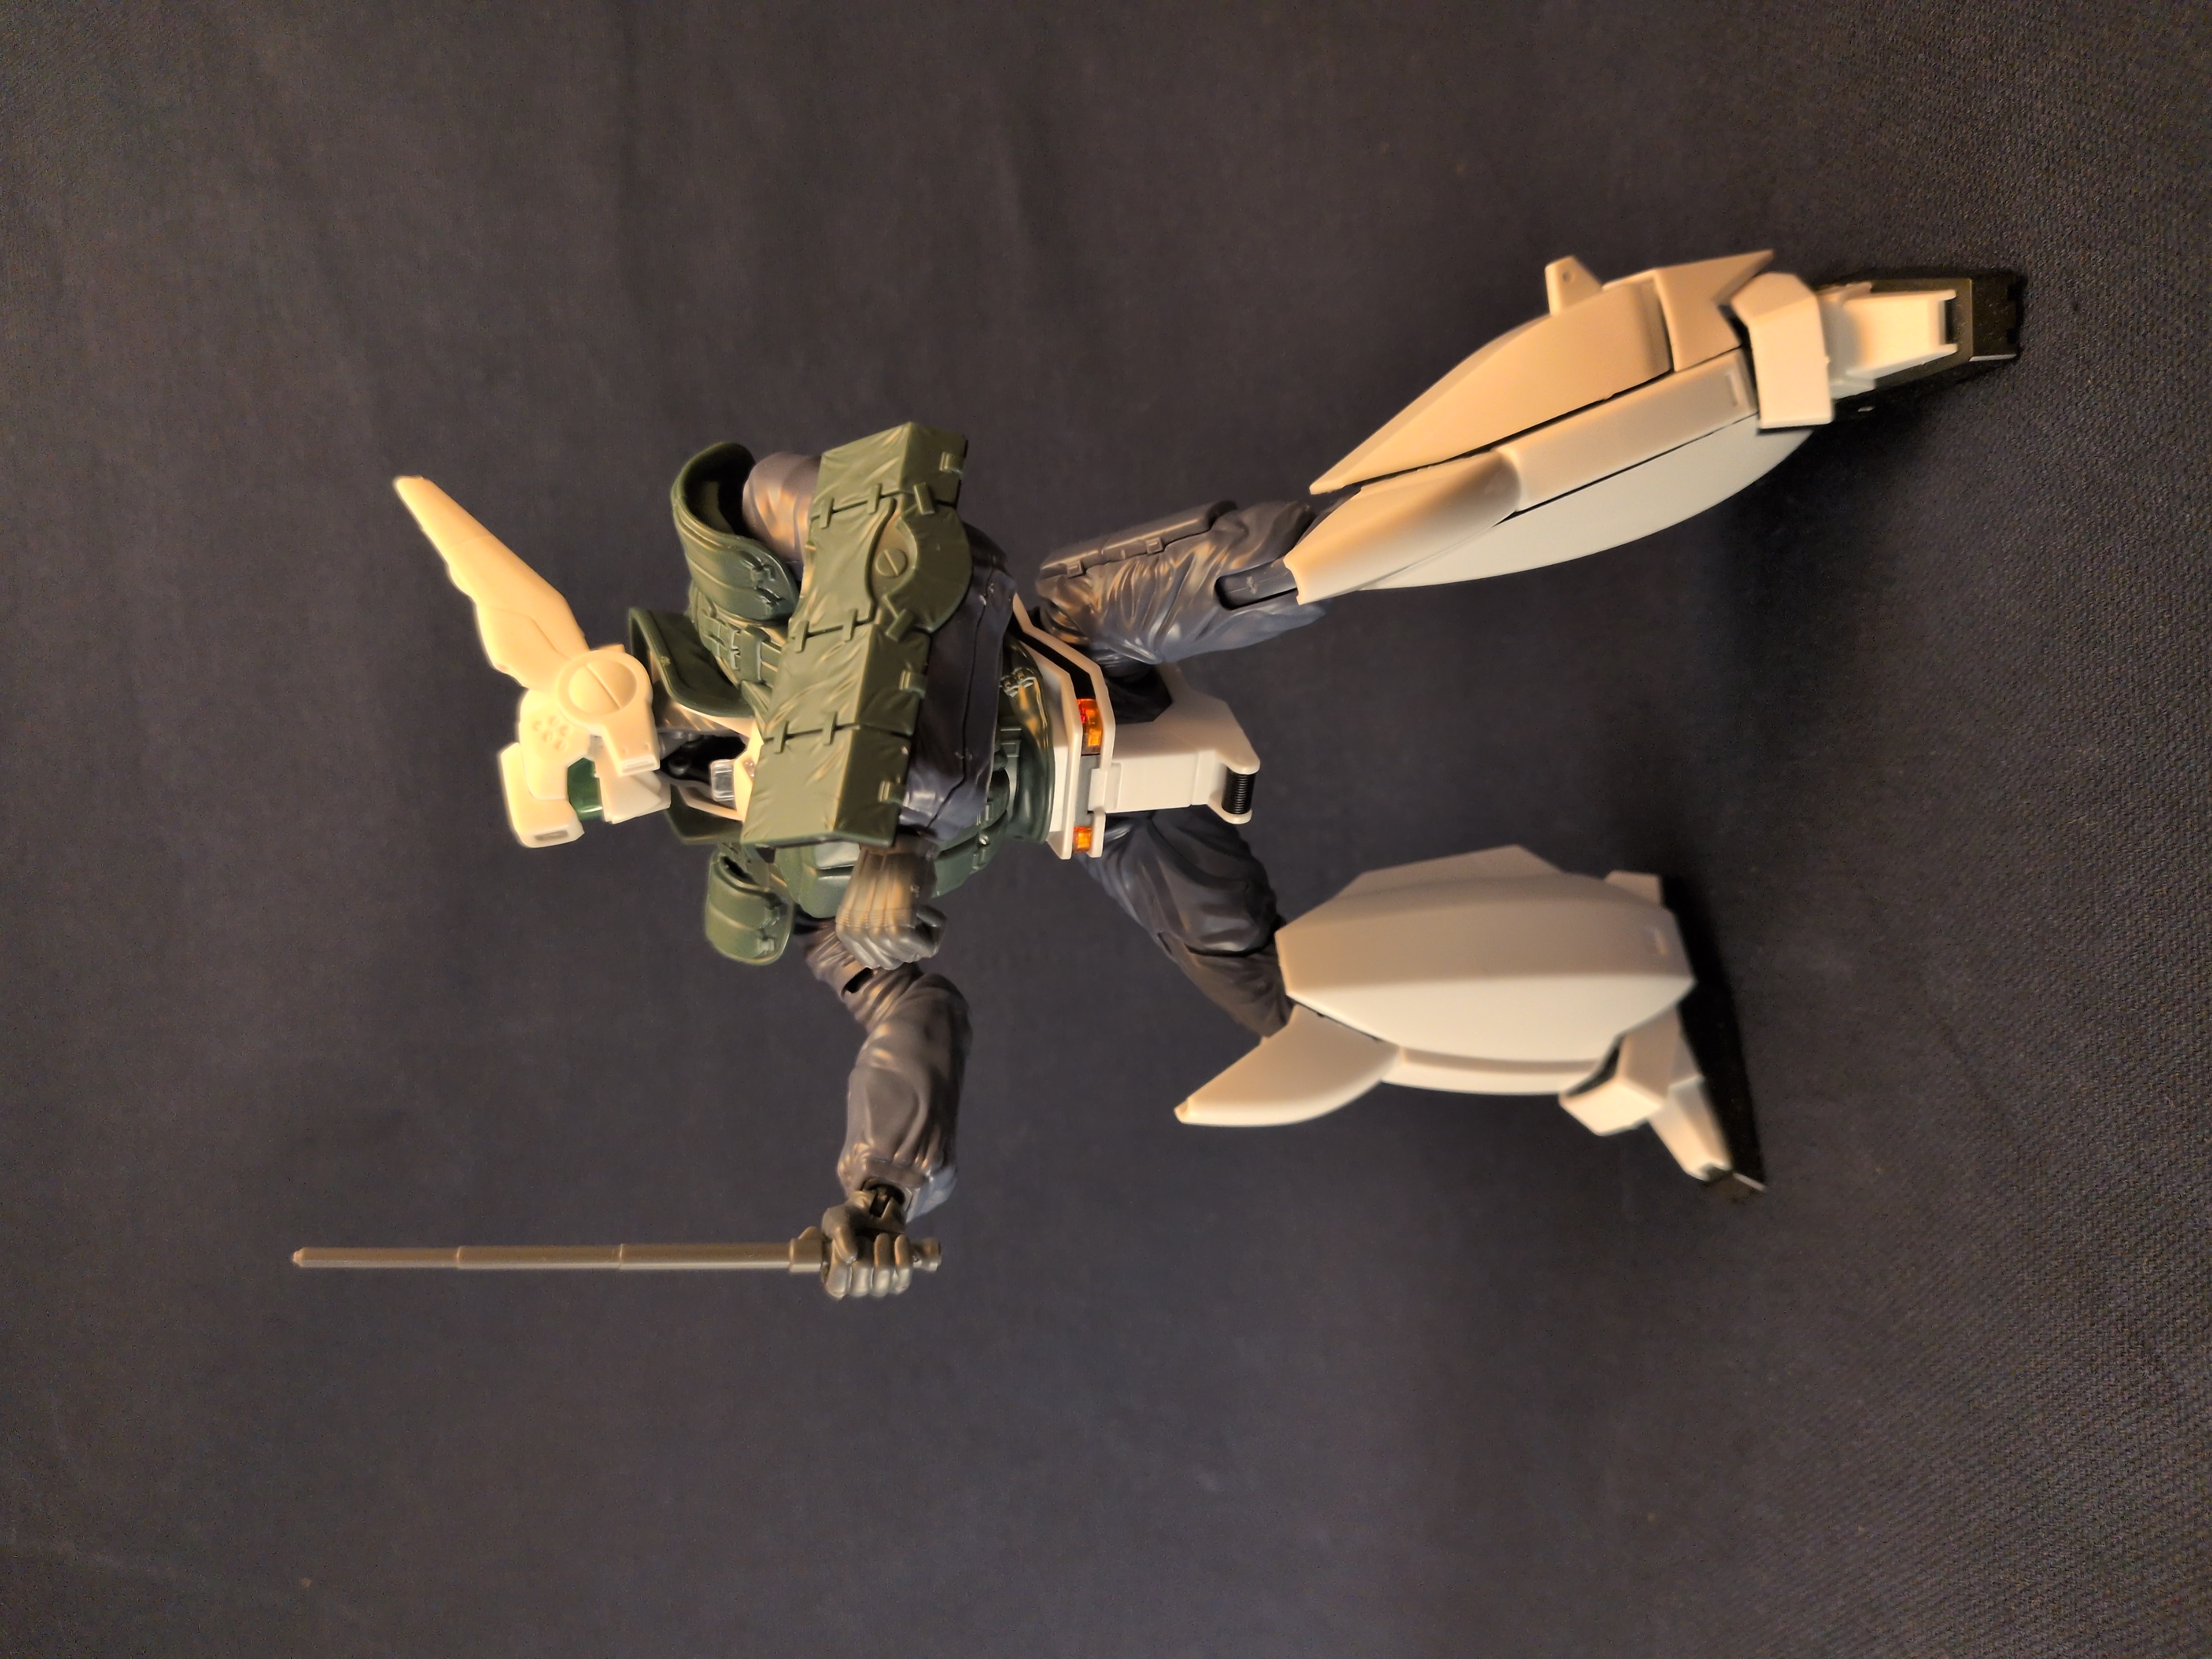
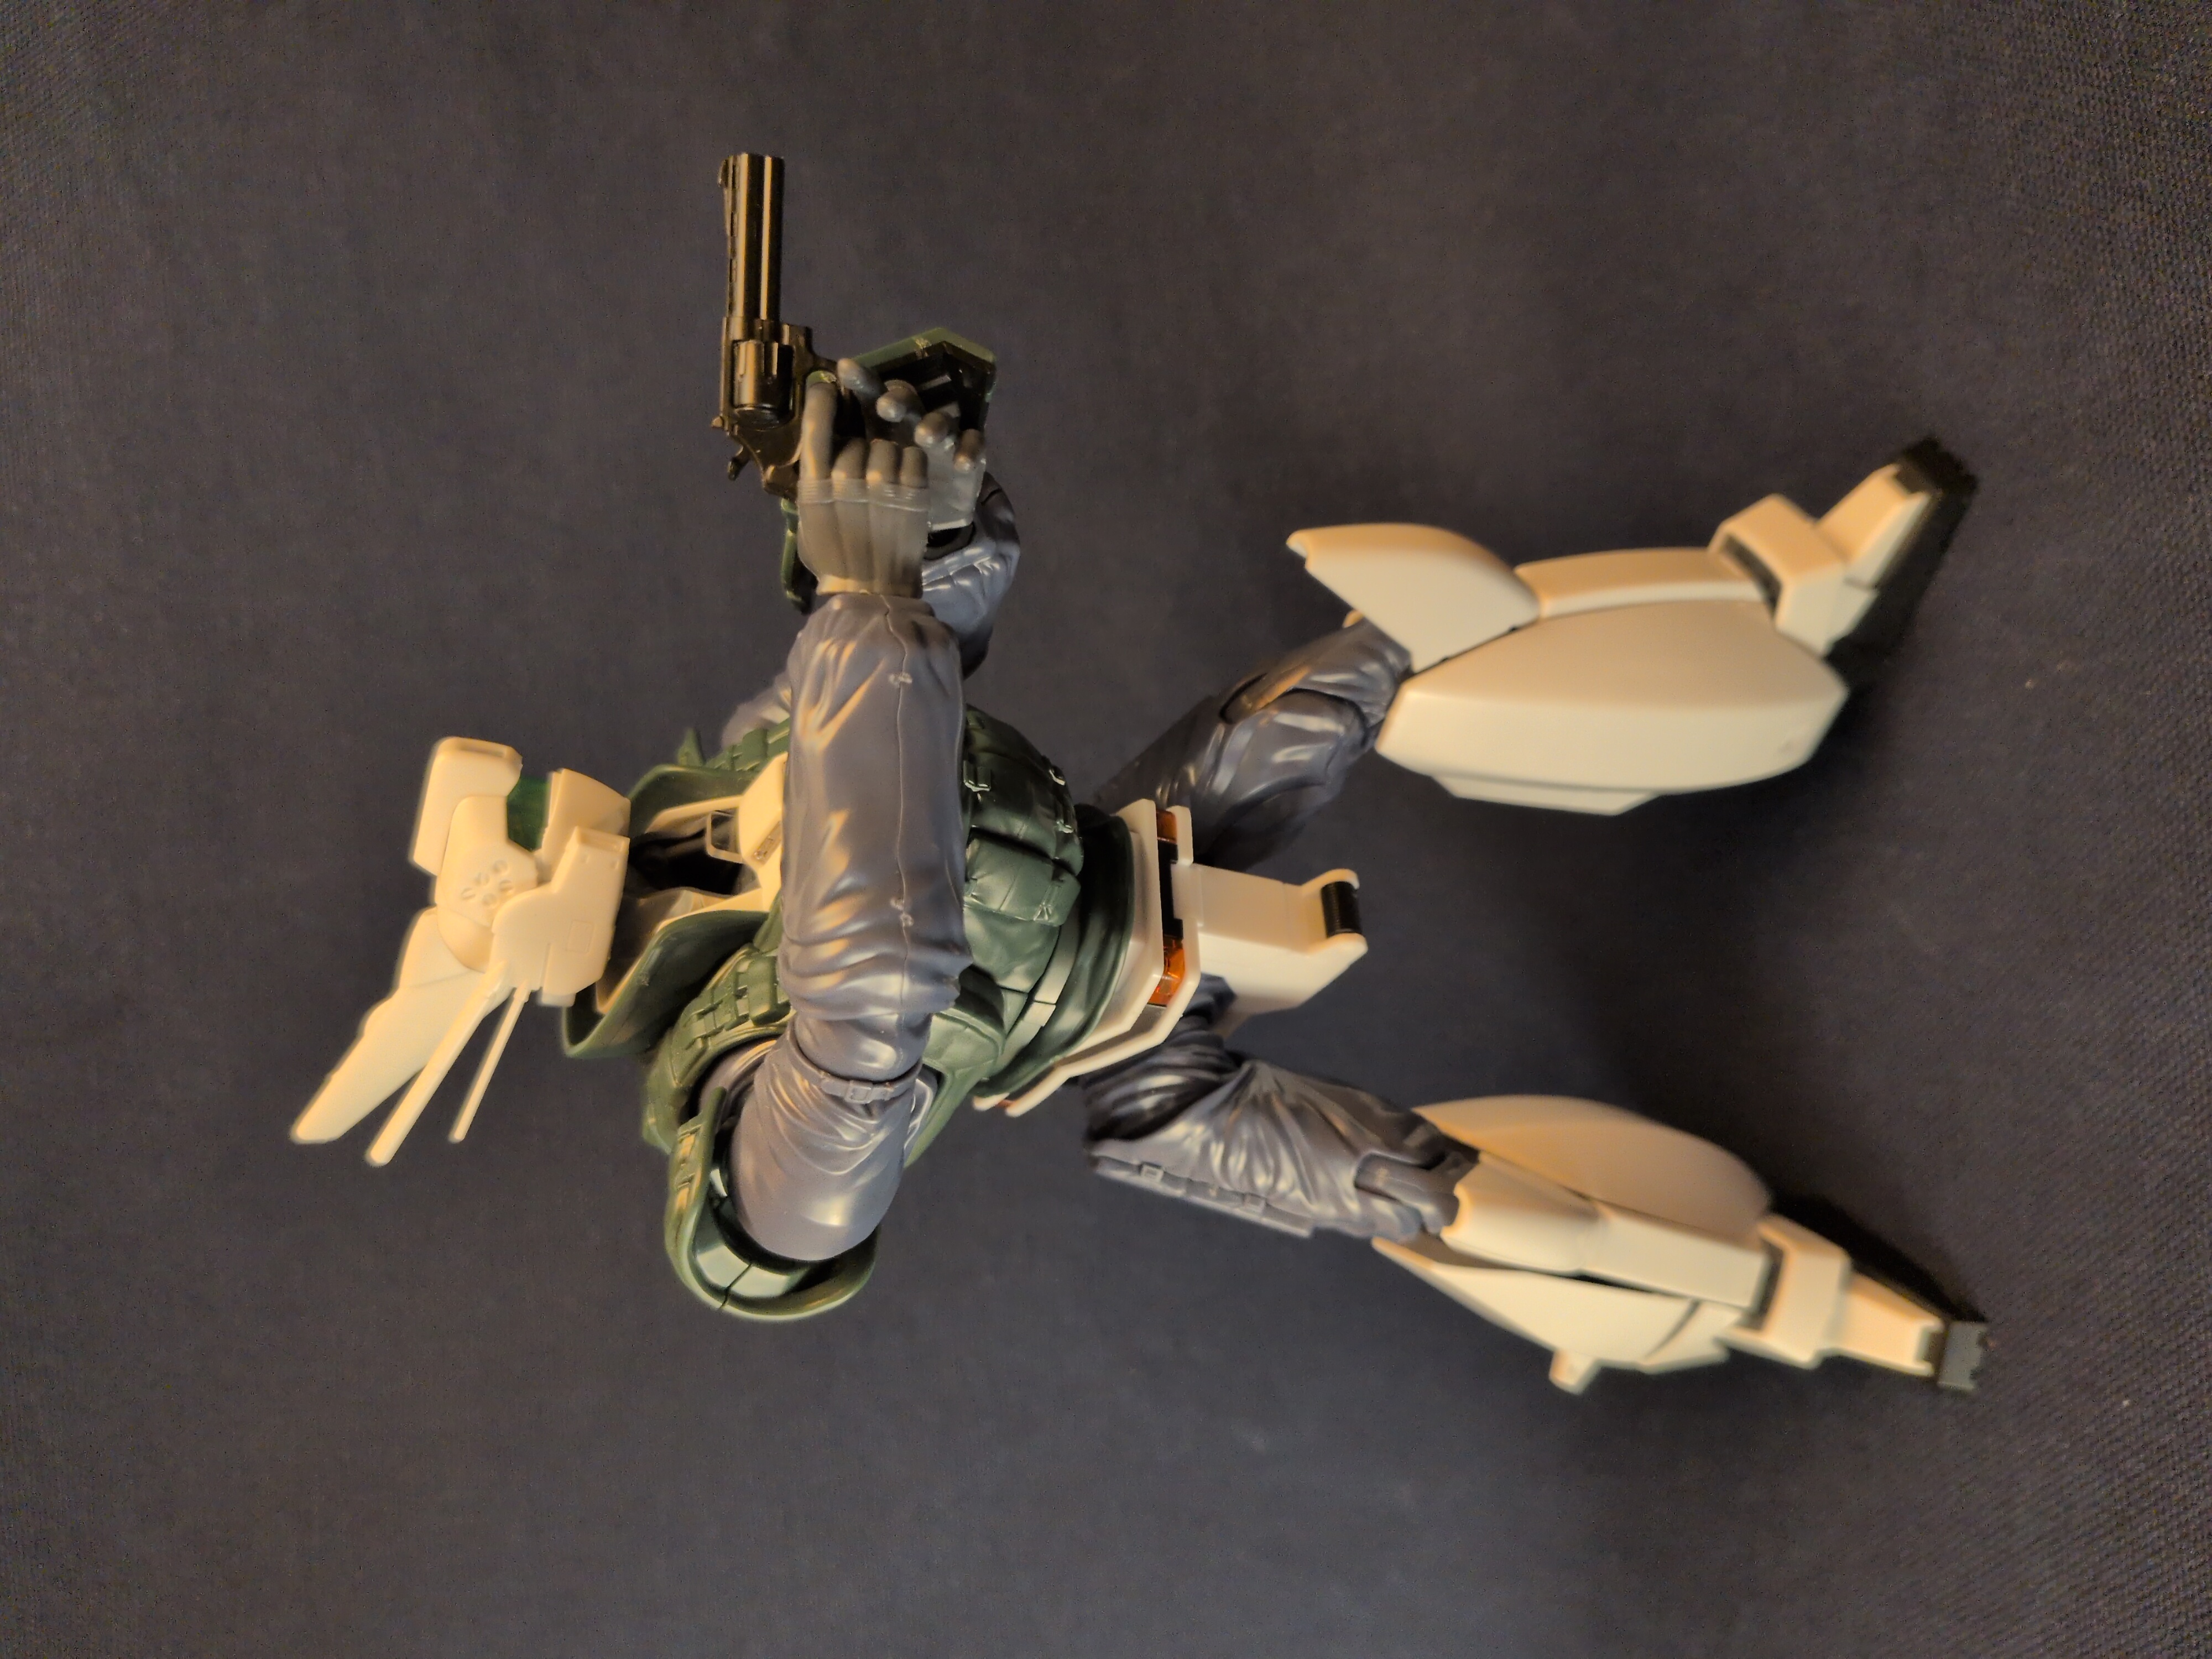
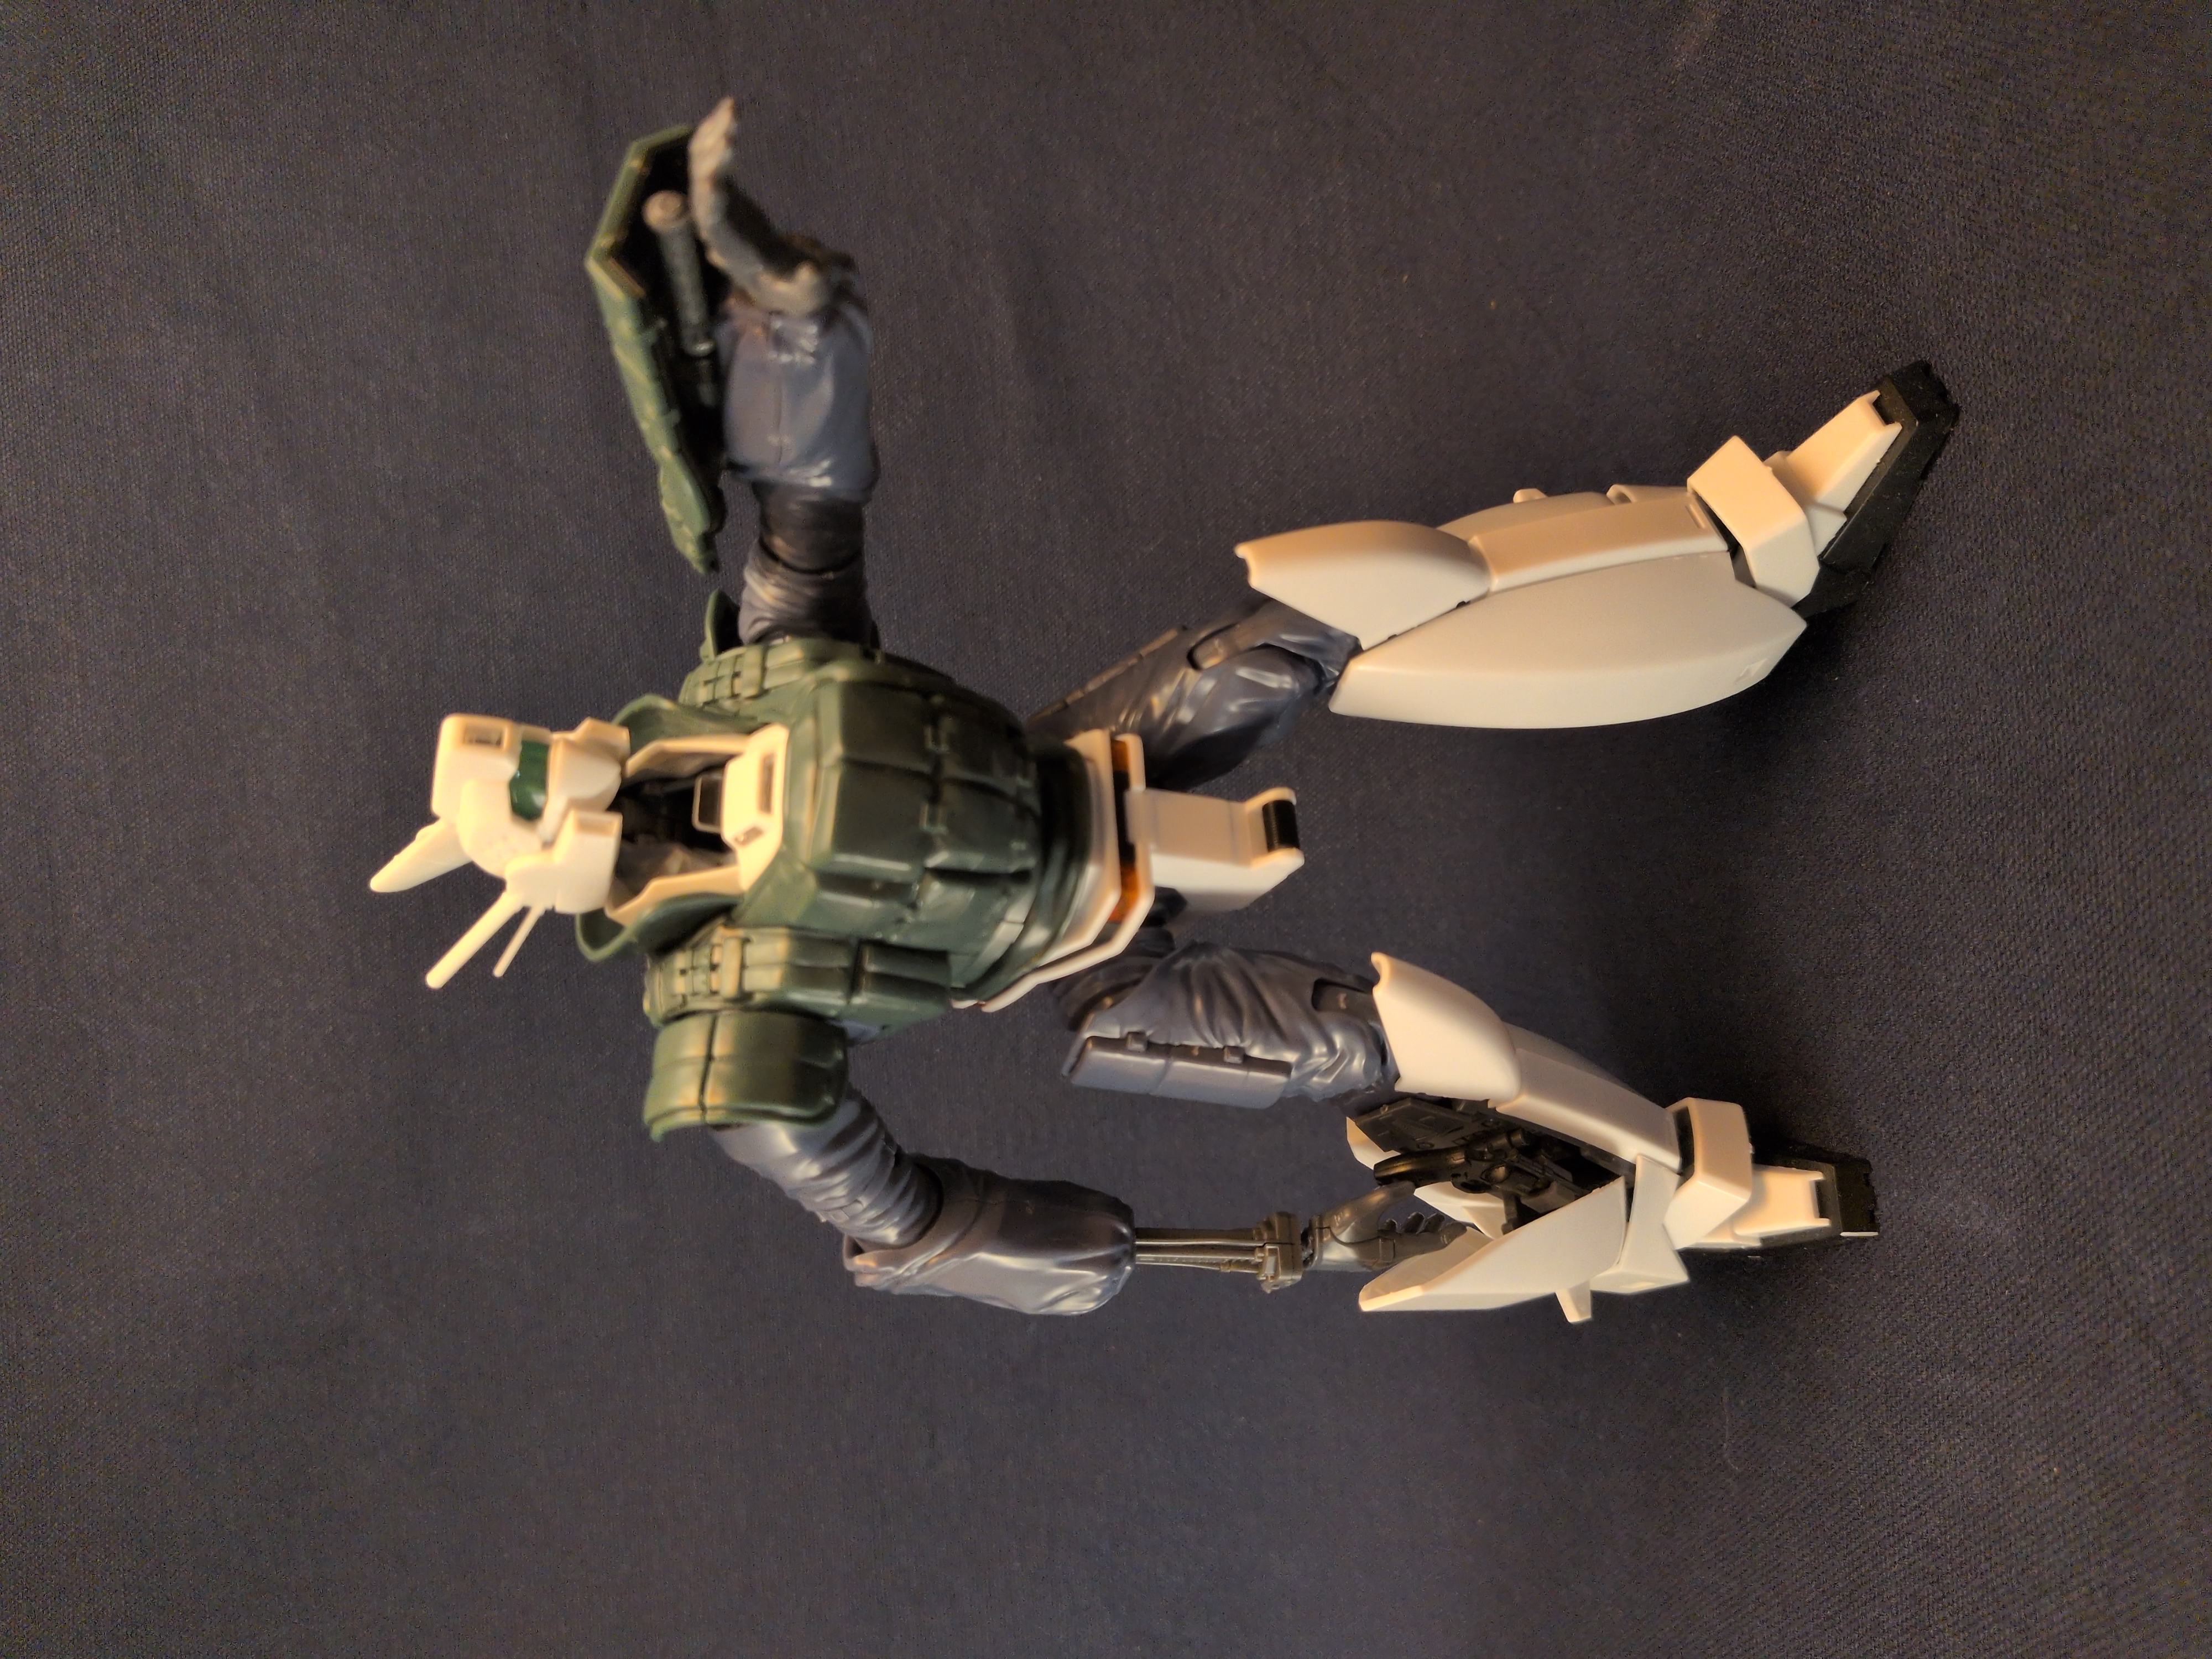
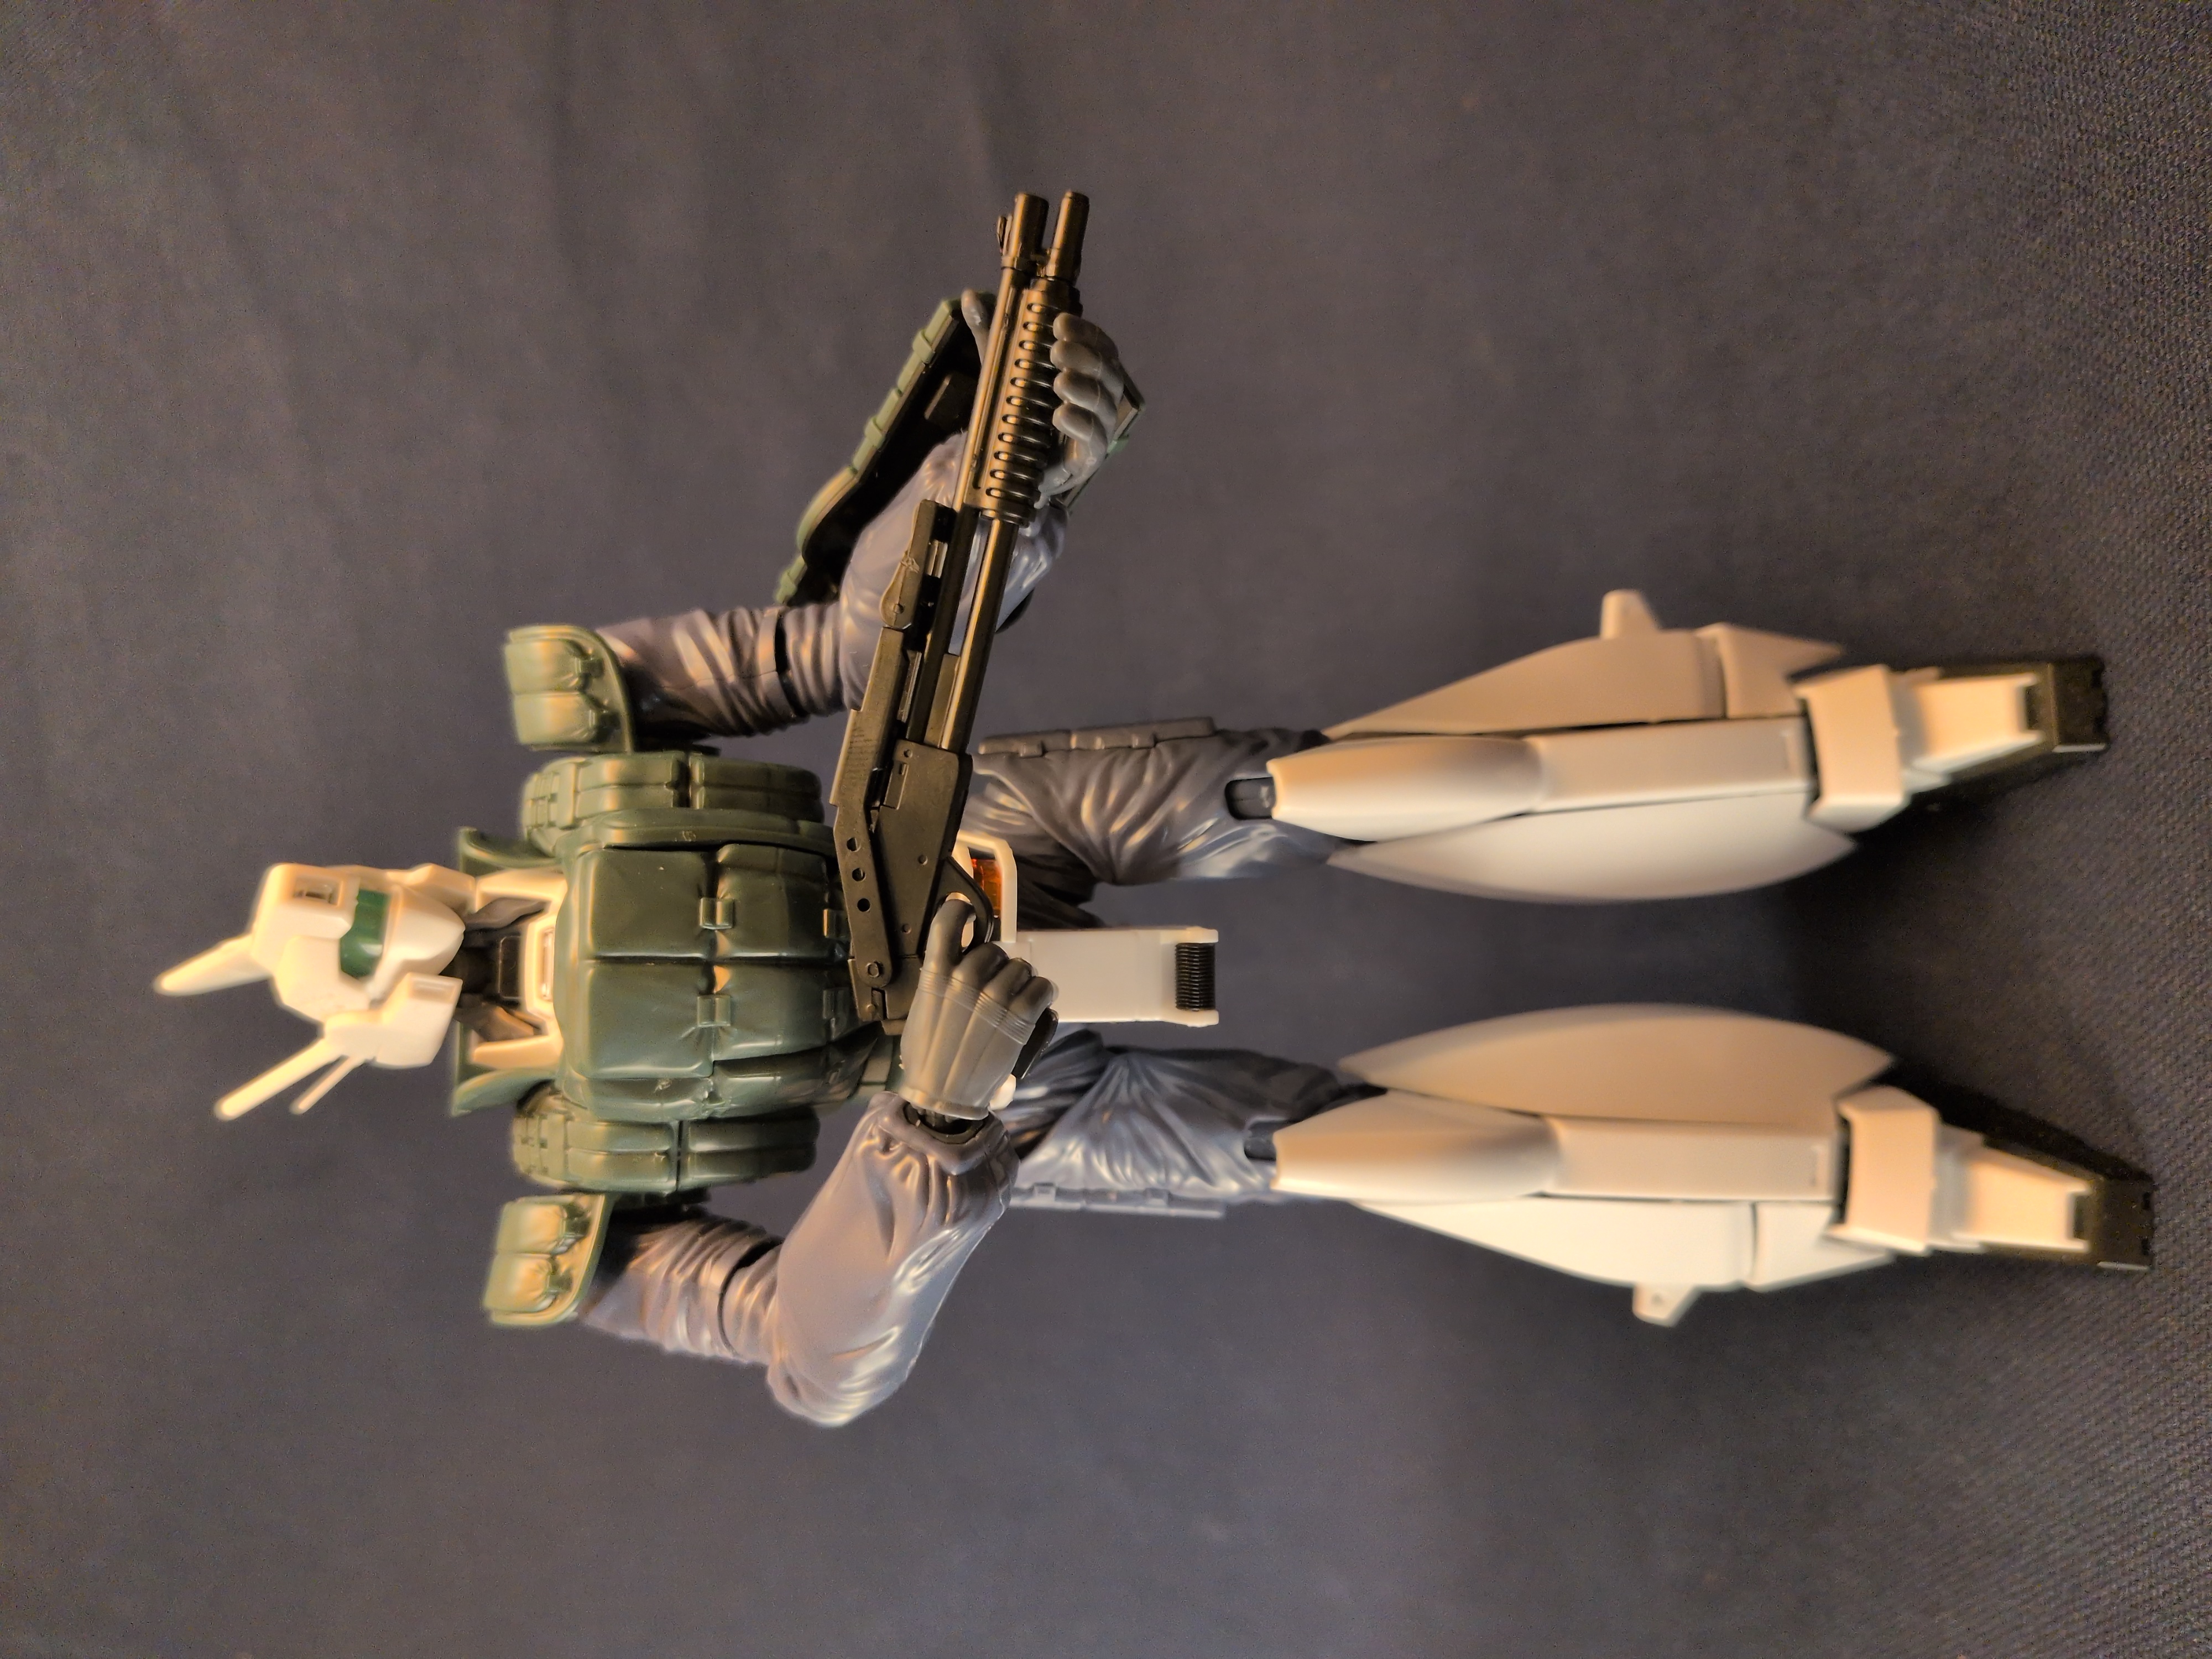
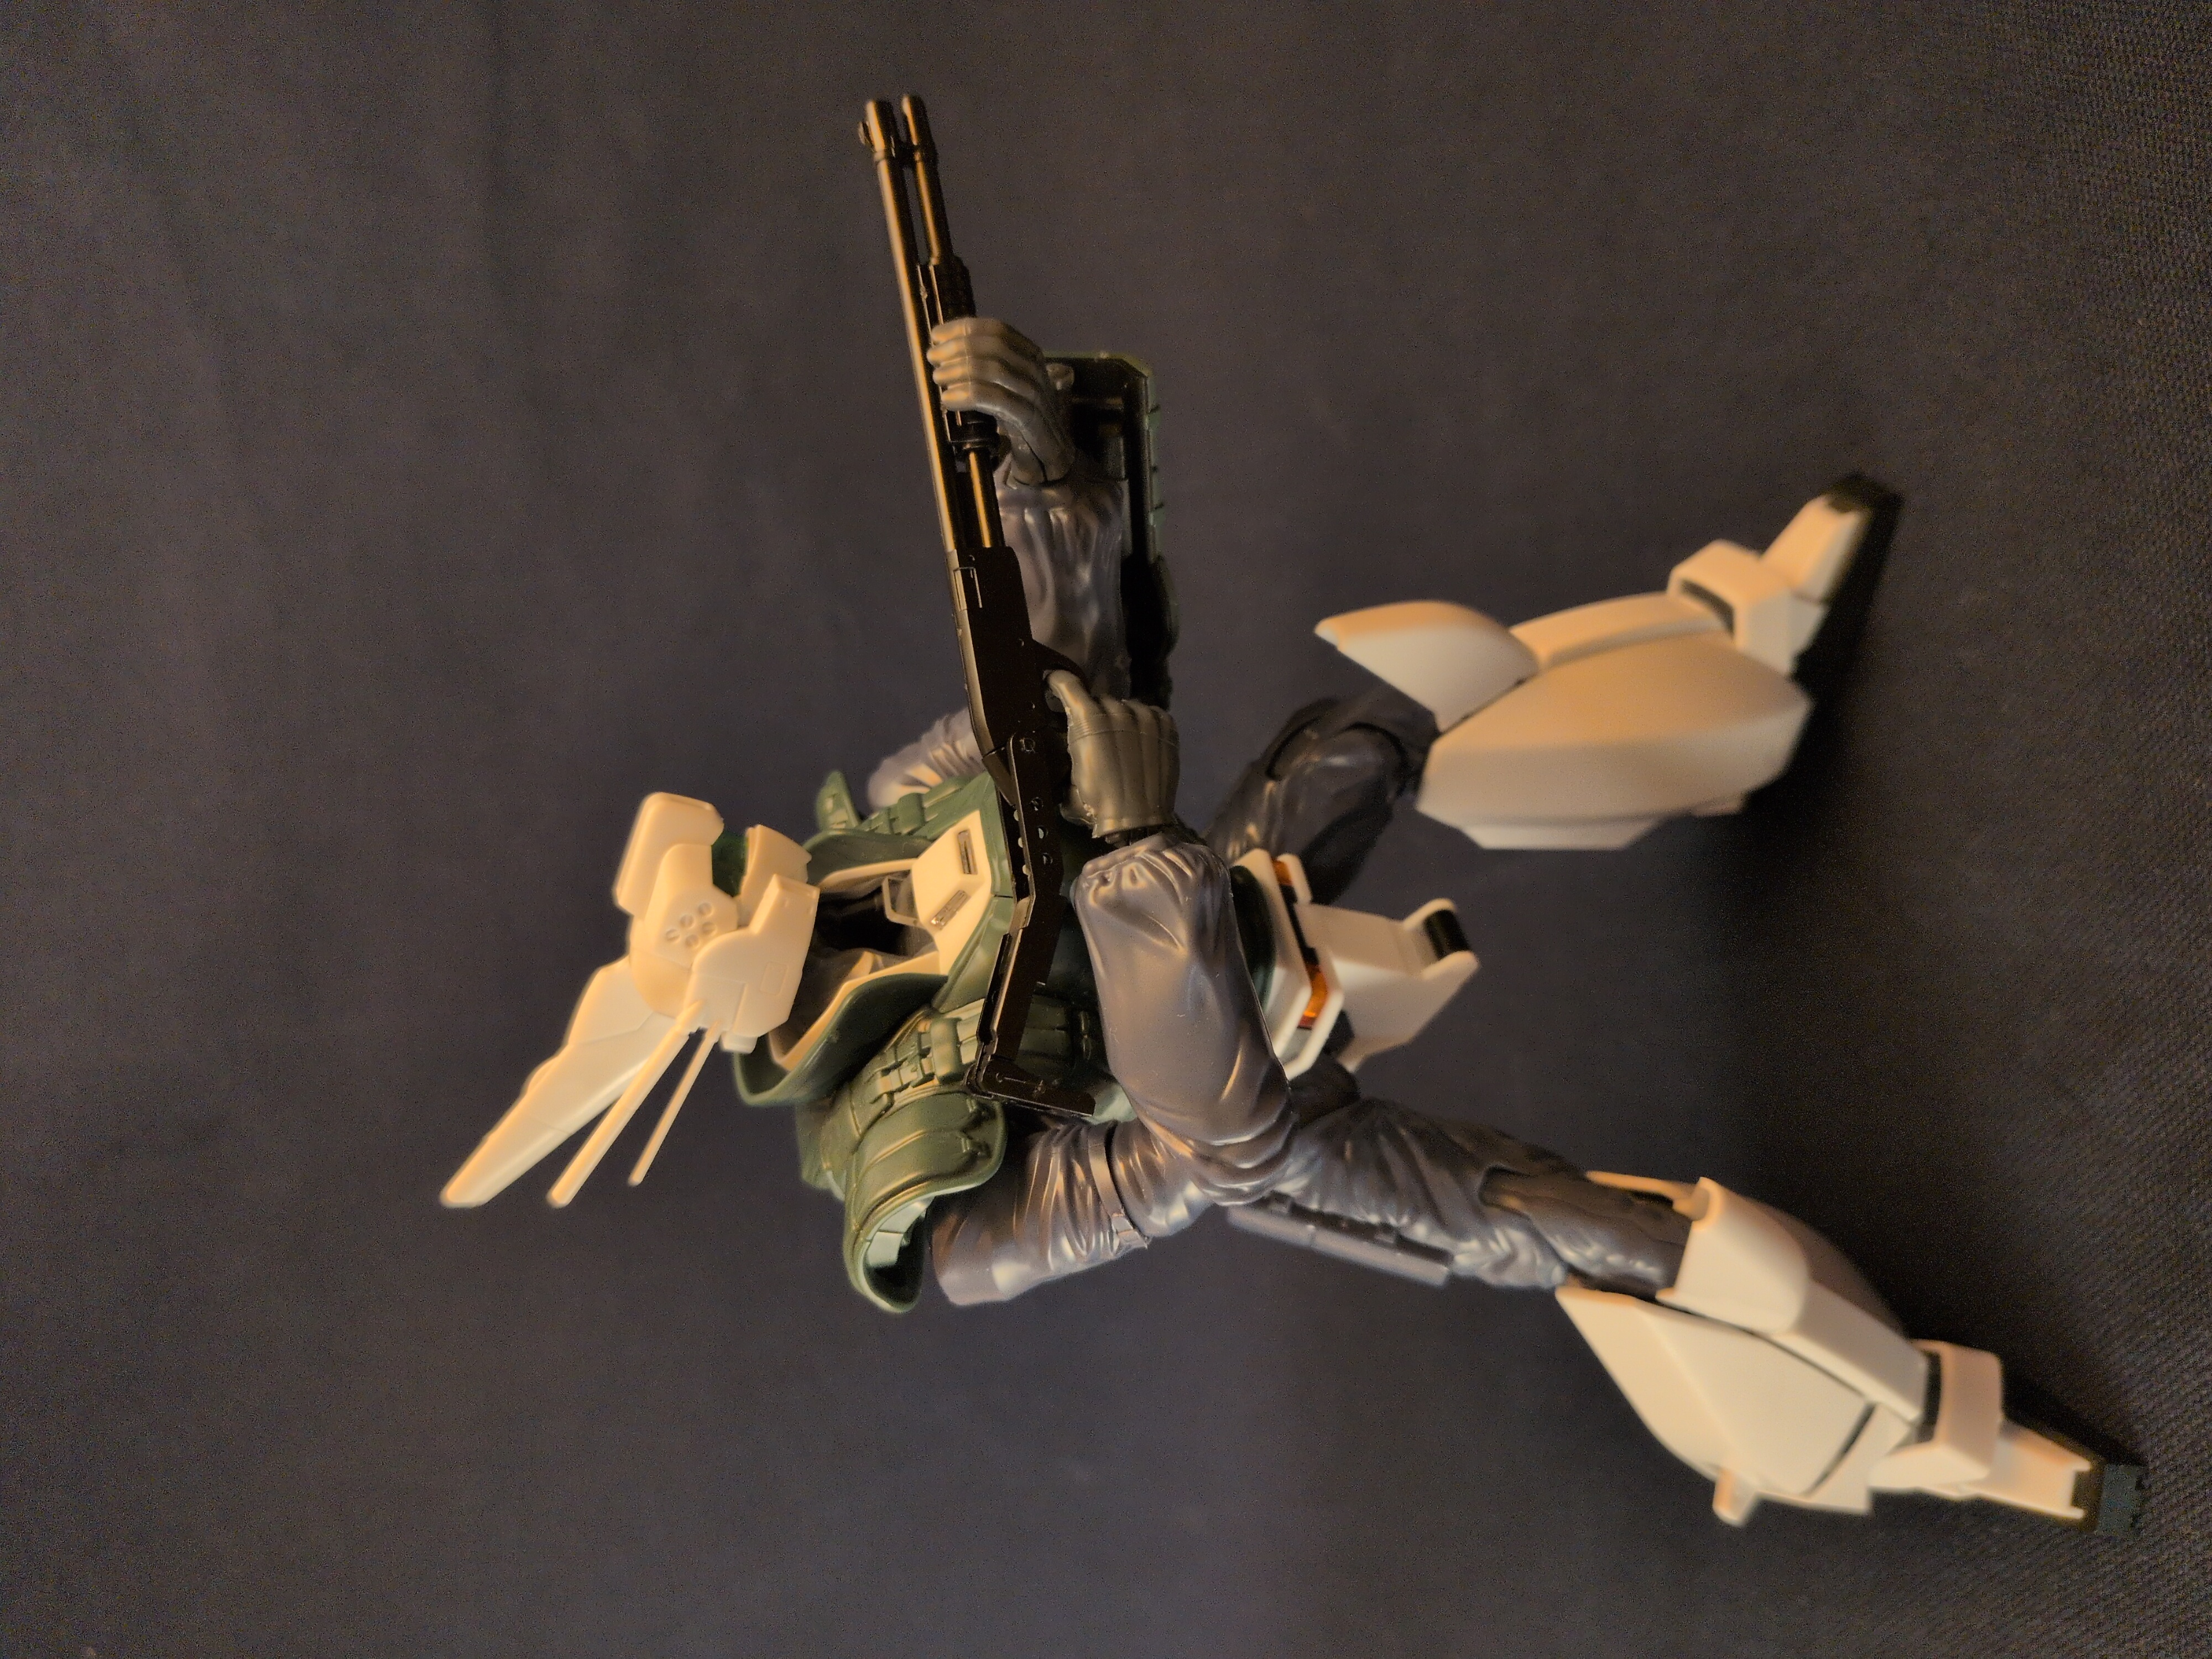
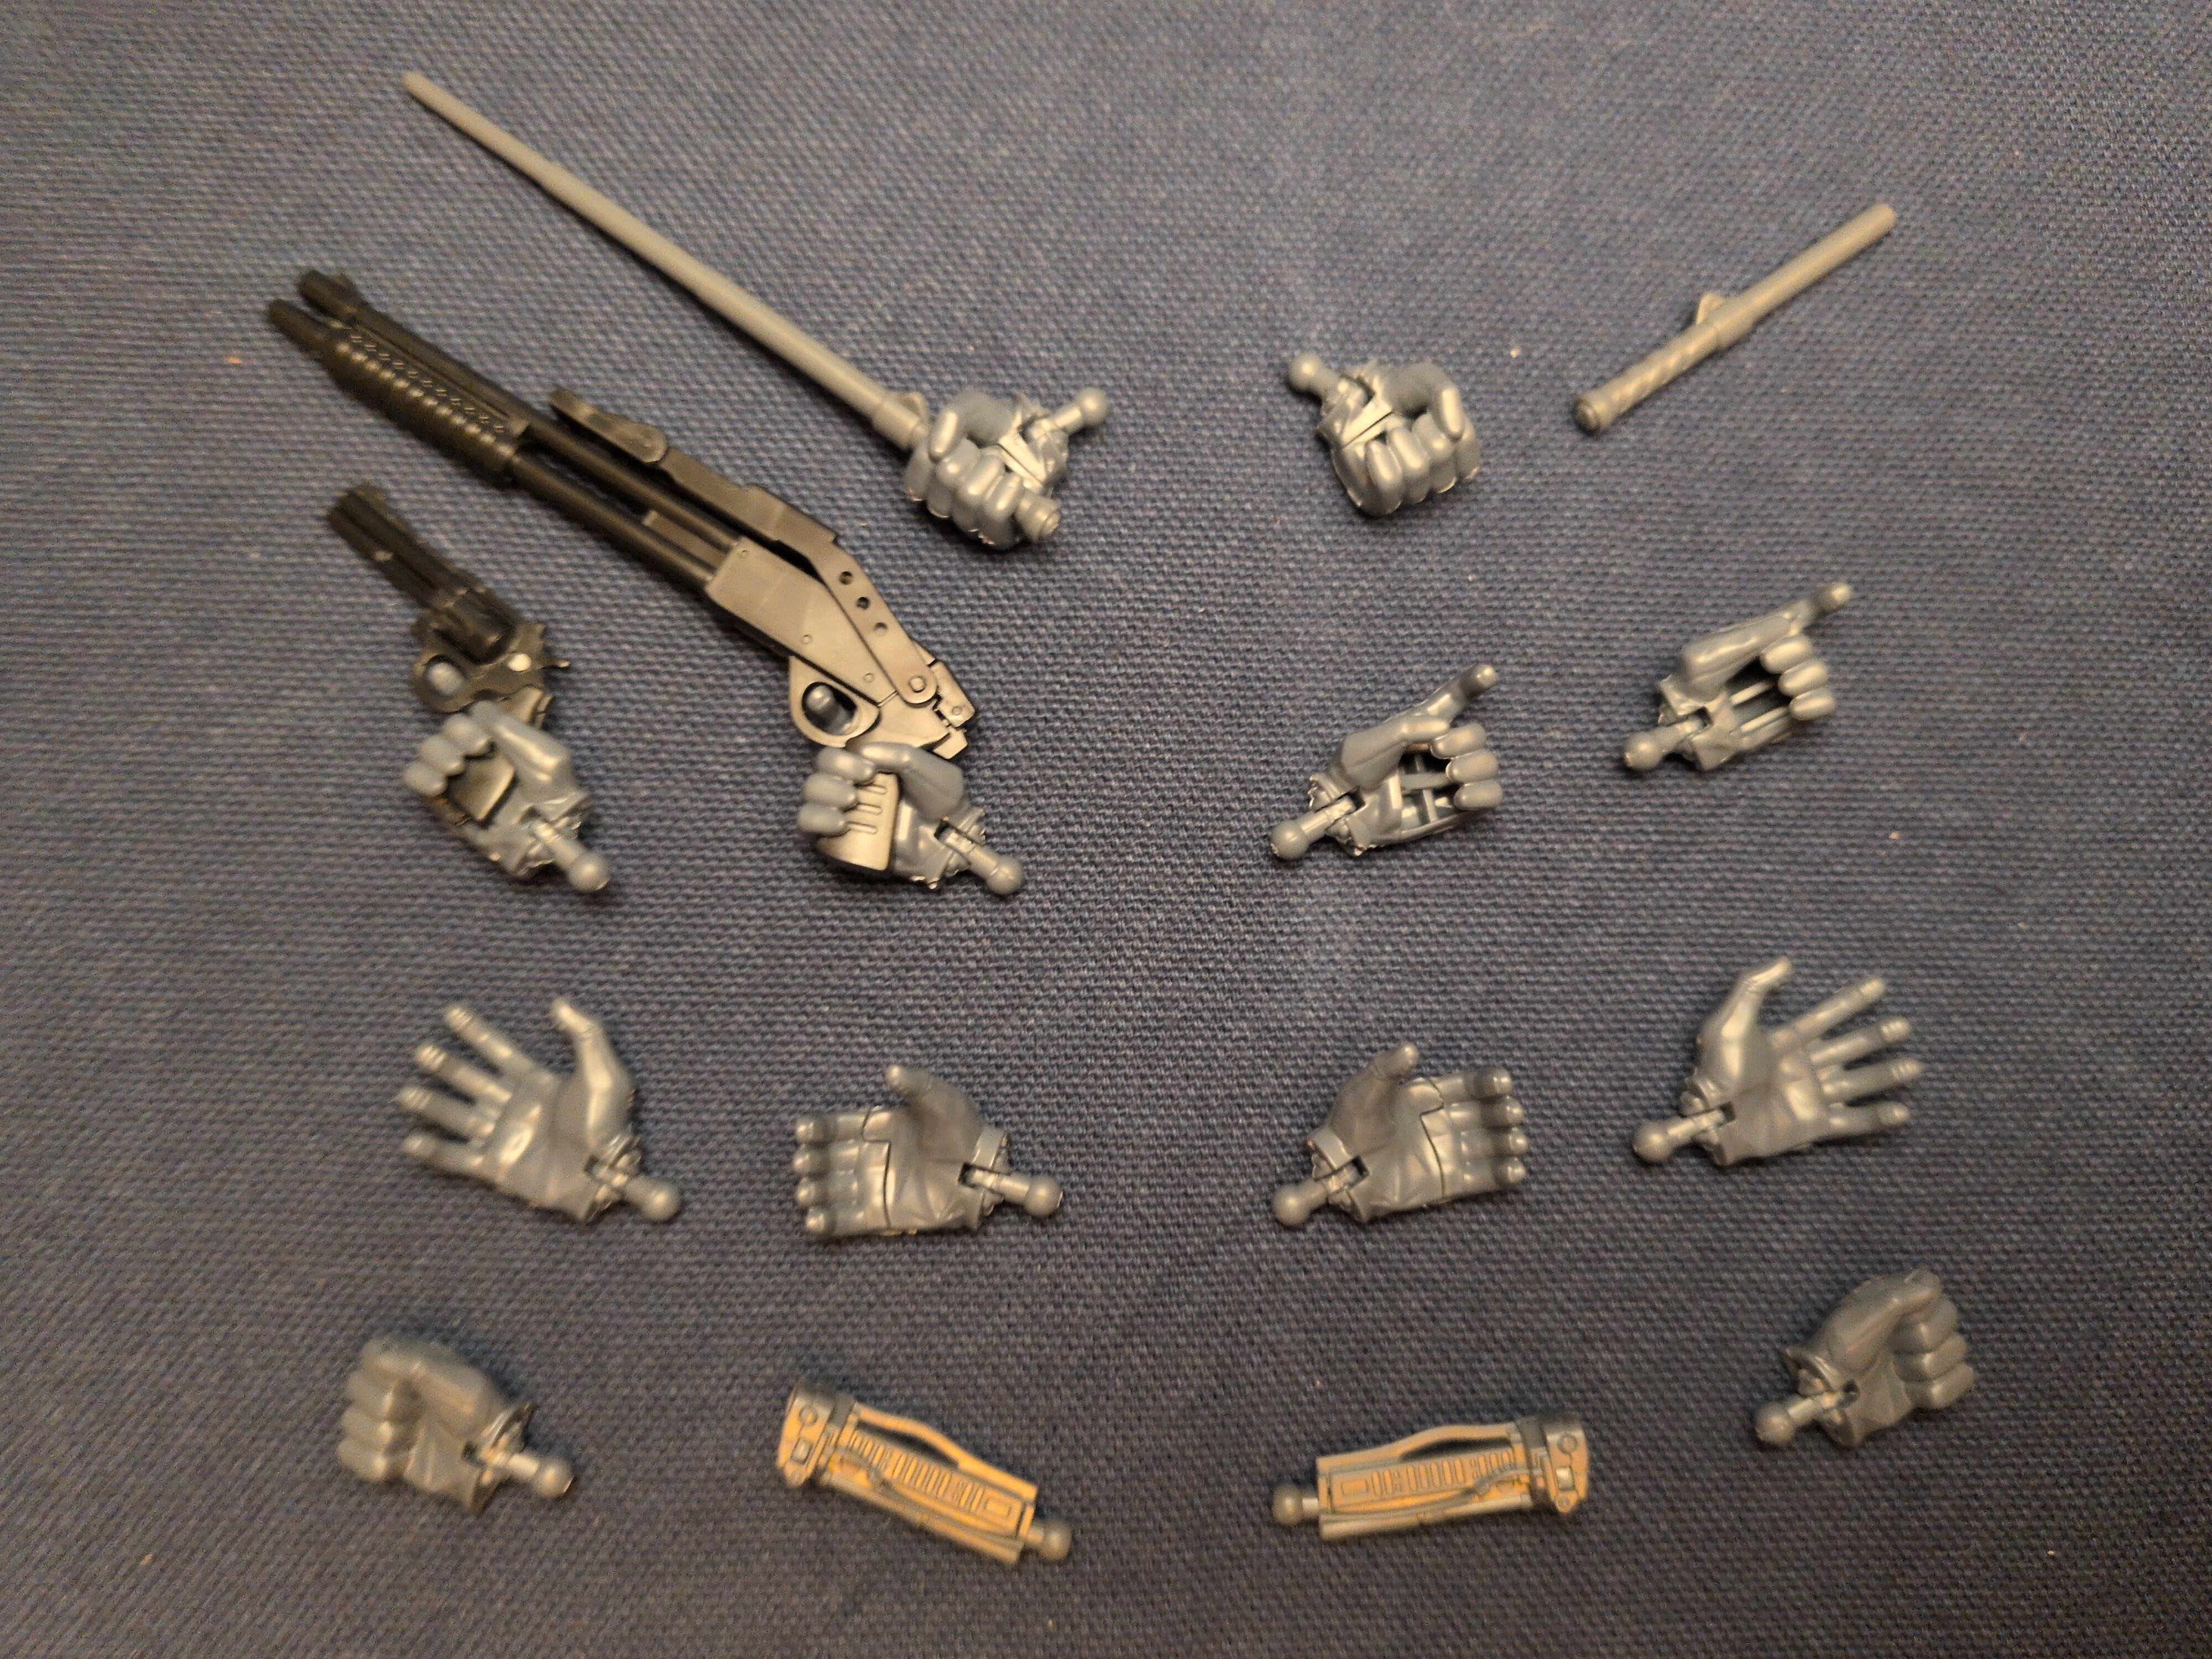
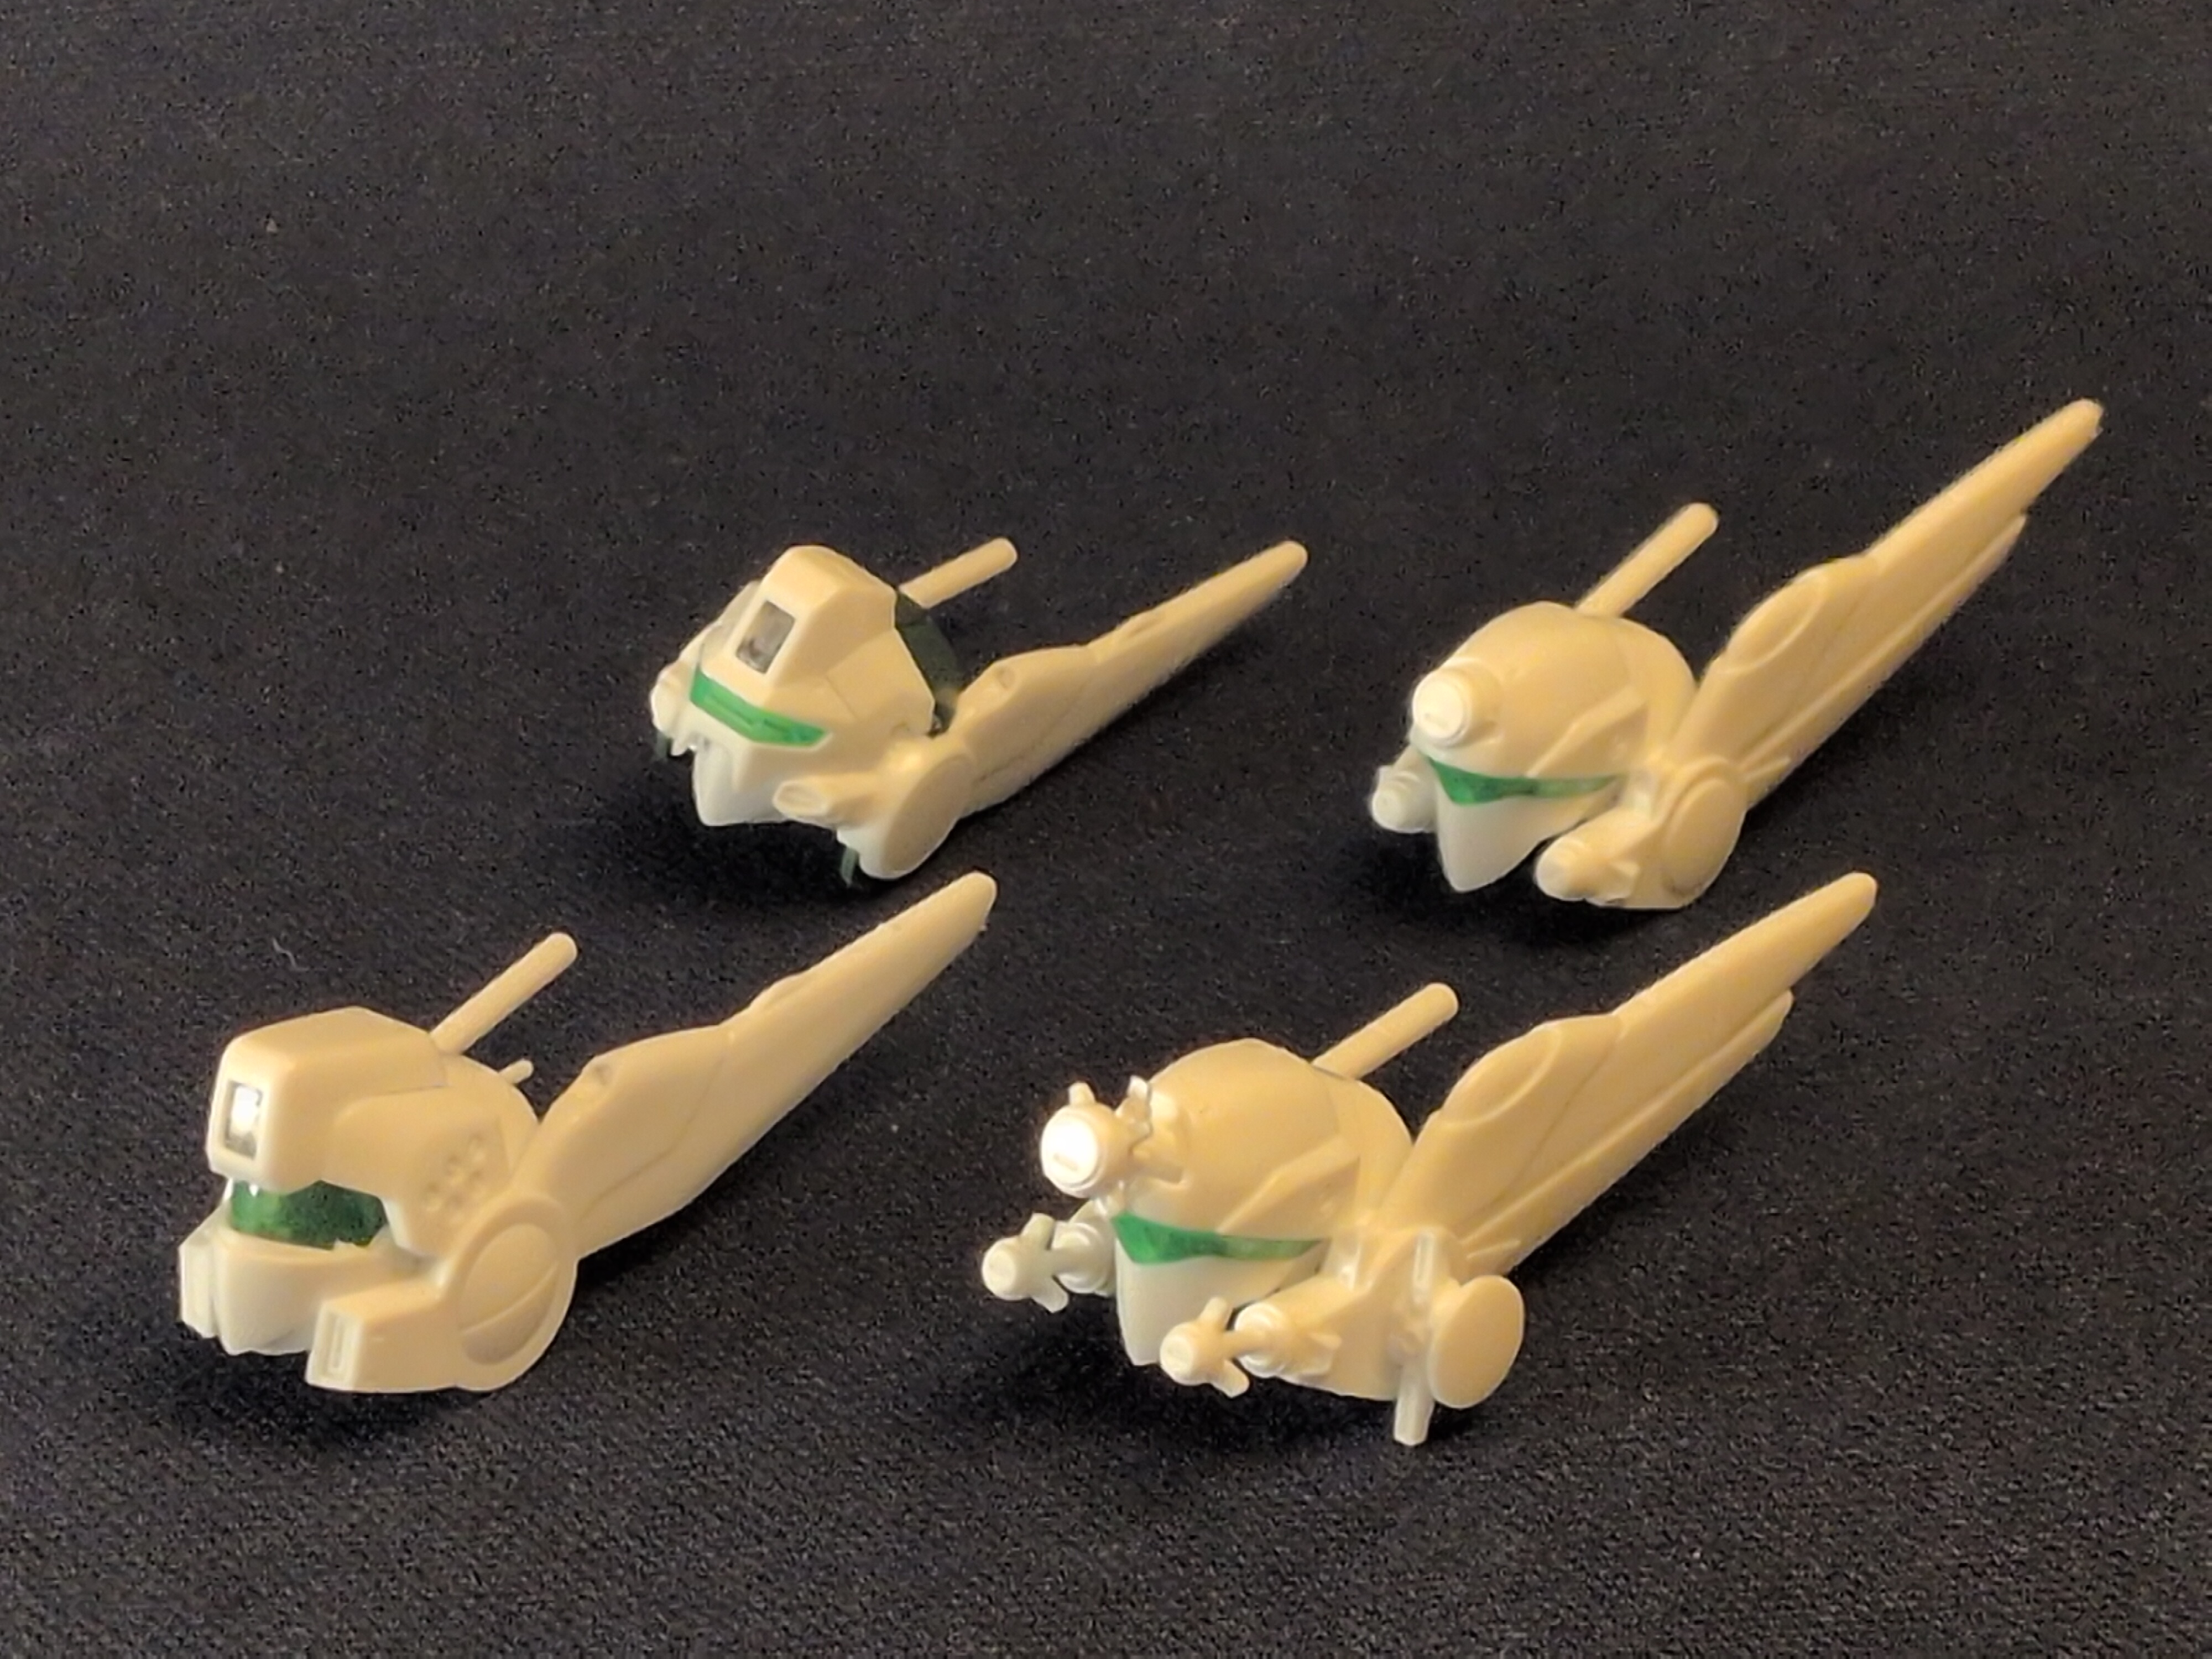
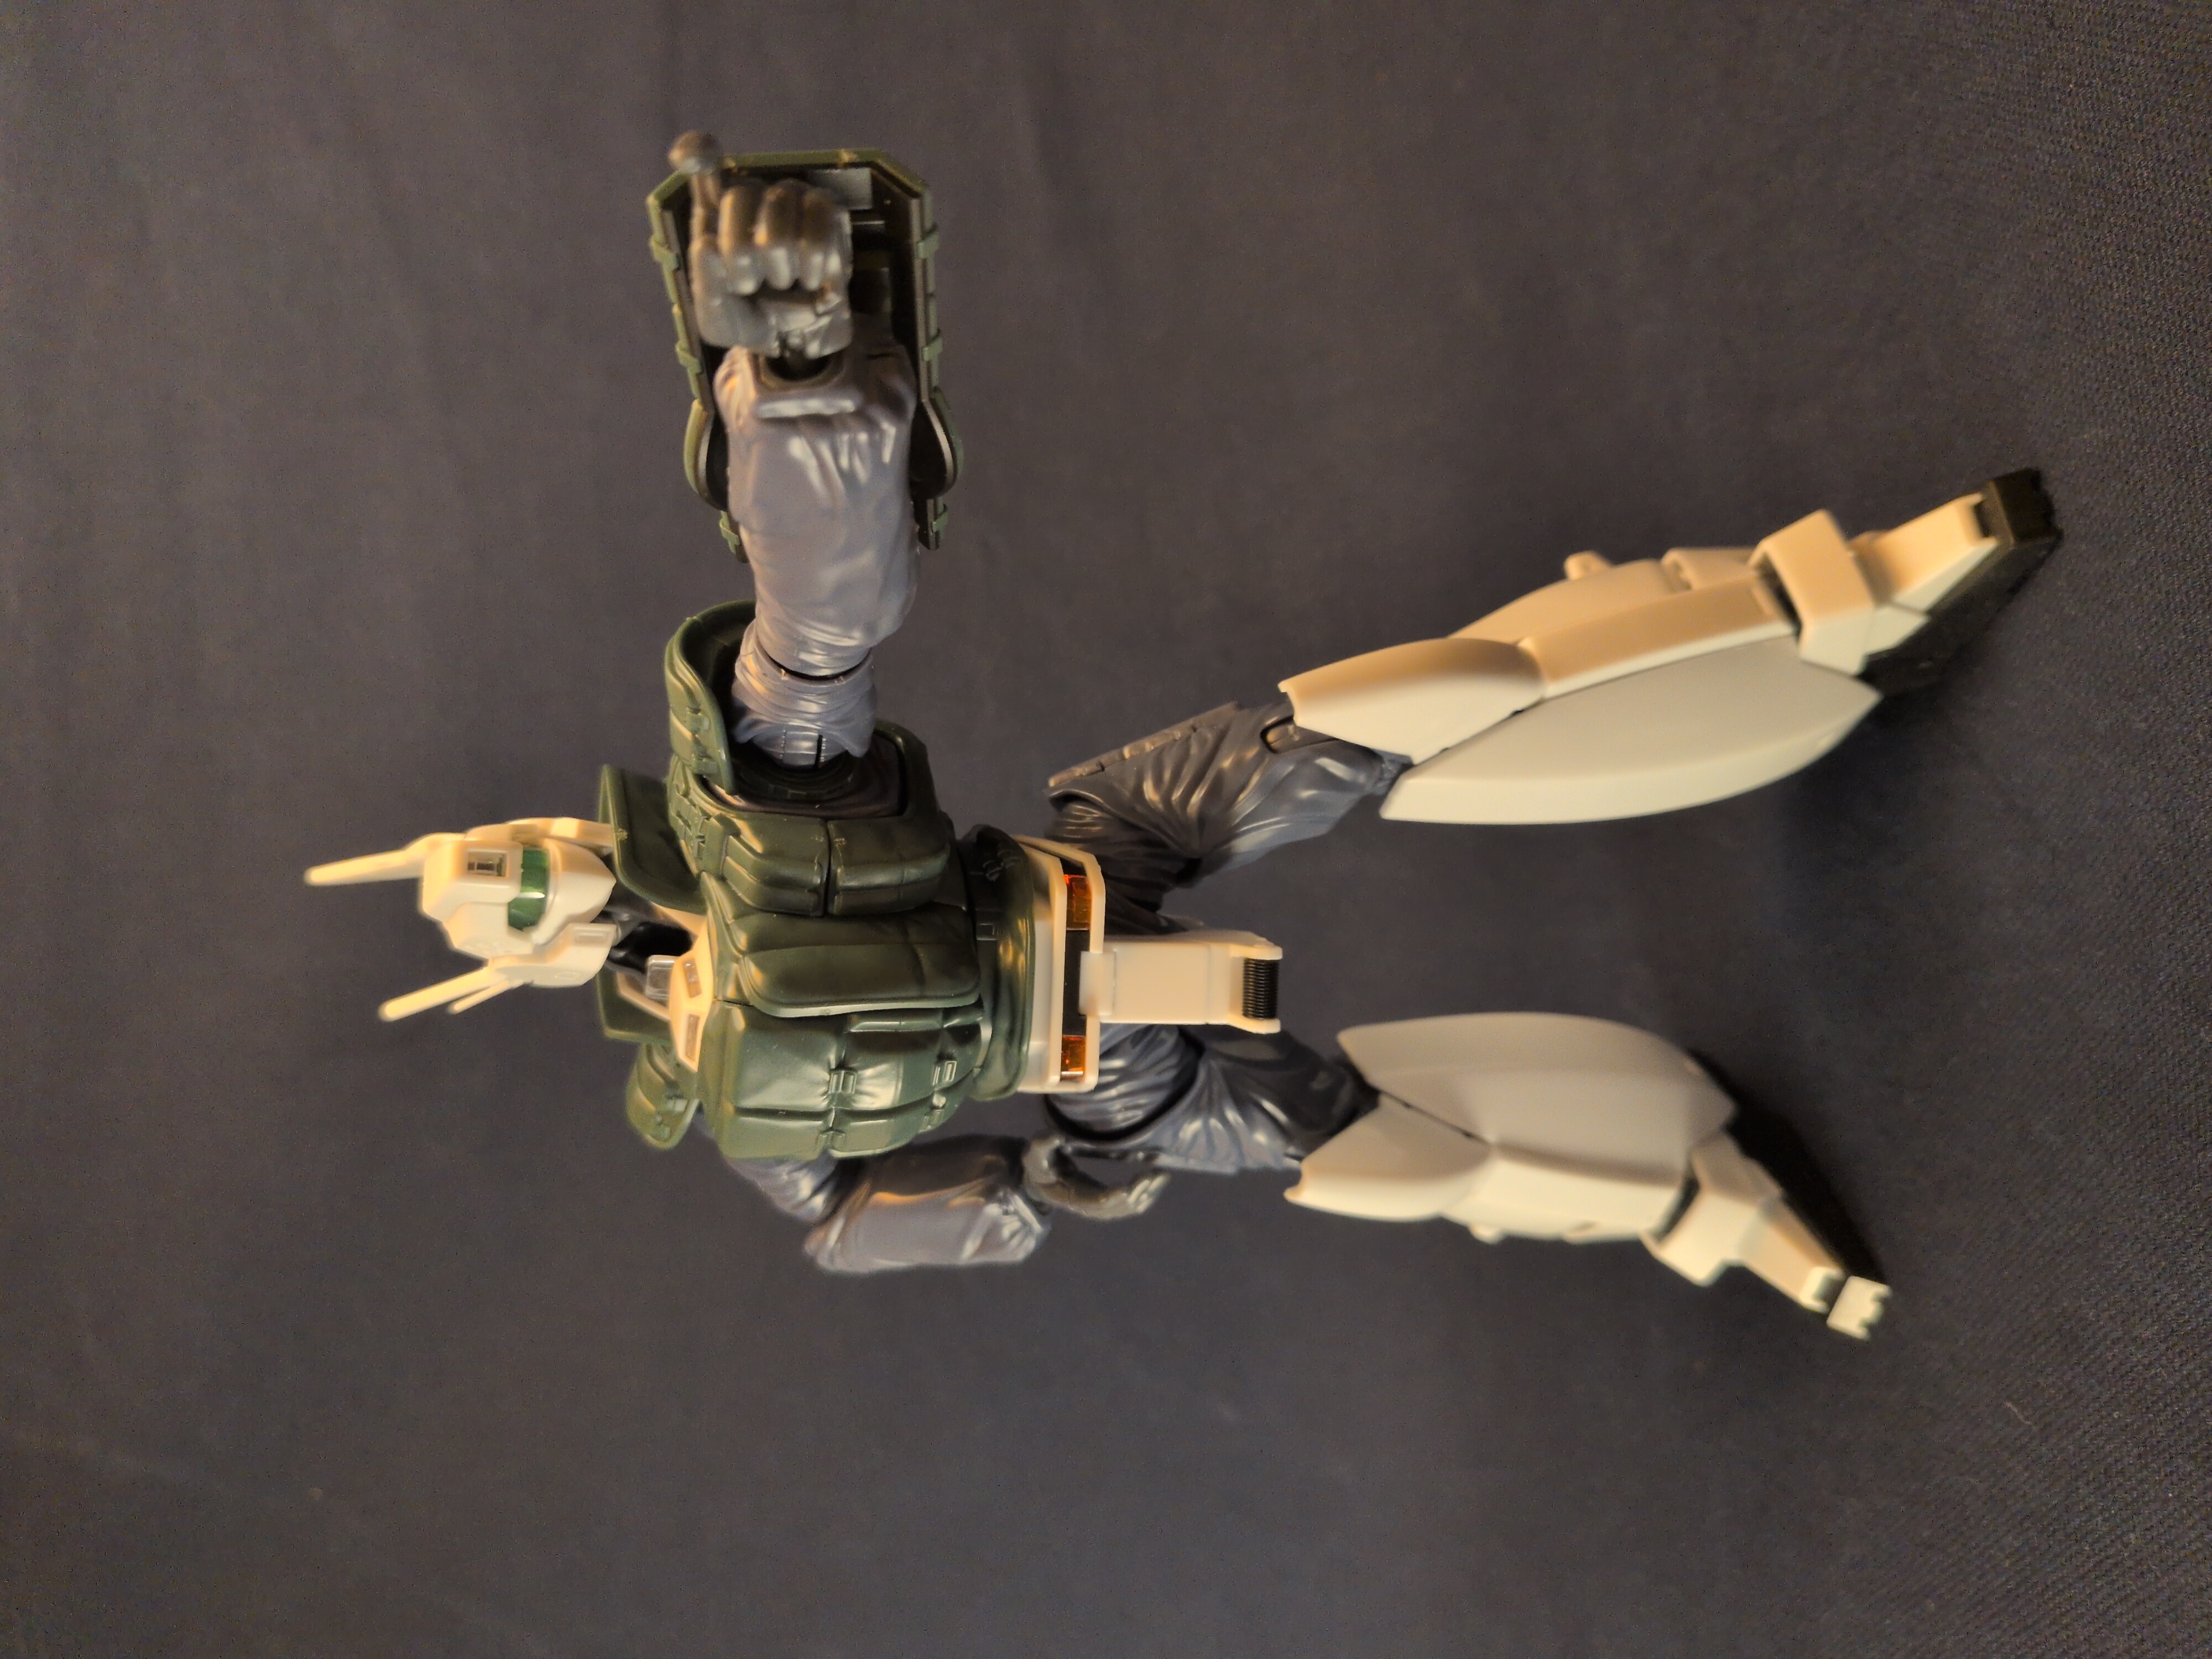
The model came with several accessories. Four different heads, six sets of hands, an extended baton, a stowed baton, a police revolver, and a riot gun. The riot gun looks very similar to the spas-12, which I know from the first Jurassic Park film. I chose this model specifically in part because it had the riot gun. Say what you want about firearms; I find something very compelling and aesthetically pleasing about shotguns and revolvers. This mech has both, which makes it the best. I’m sure if I had watched the show, I would know why there are four different heads and three different pilots, and would appreciate them more. But I haven’t watched the show, and I don’t know what they mean, so I picked what I liked the best.
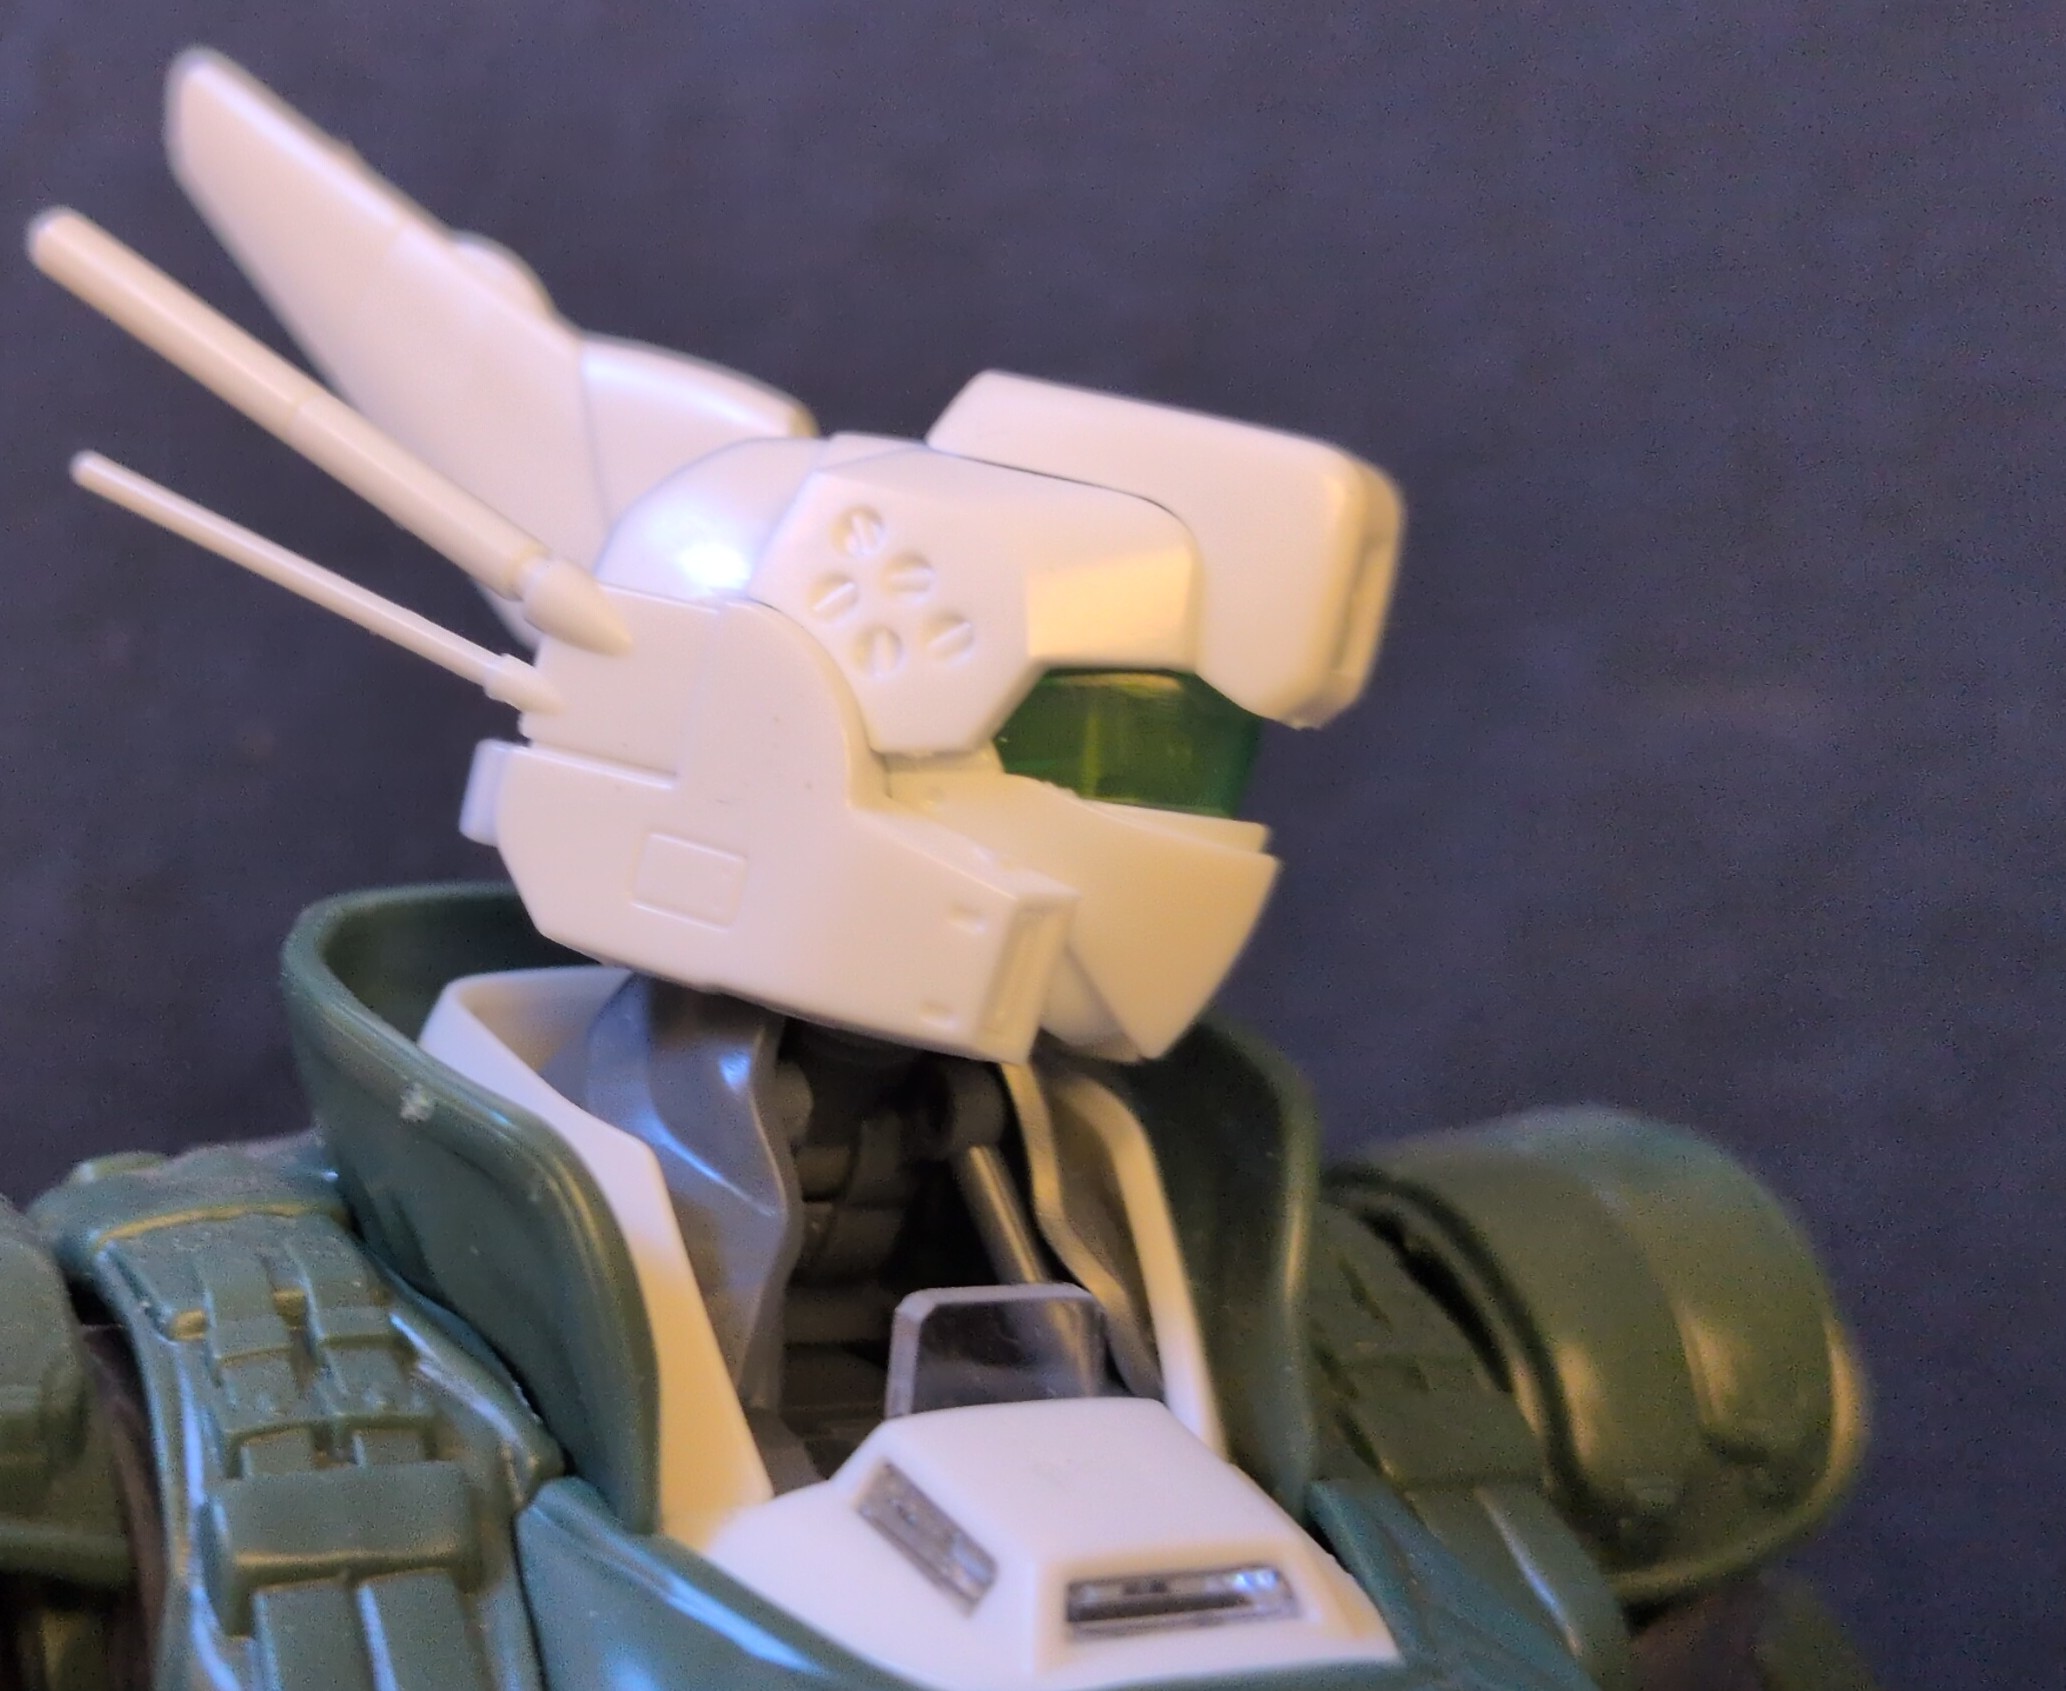
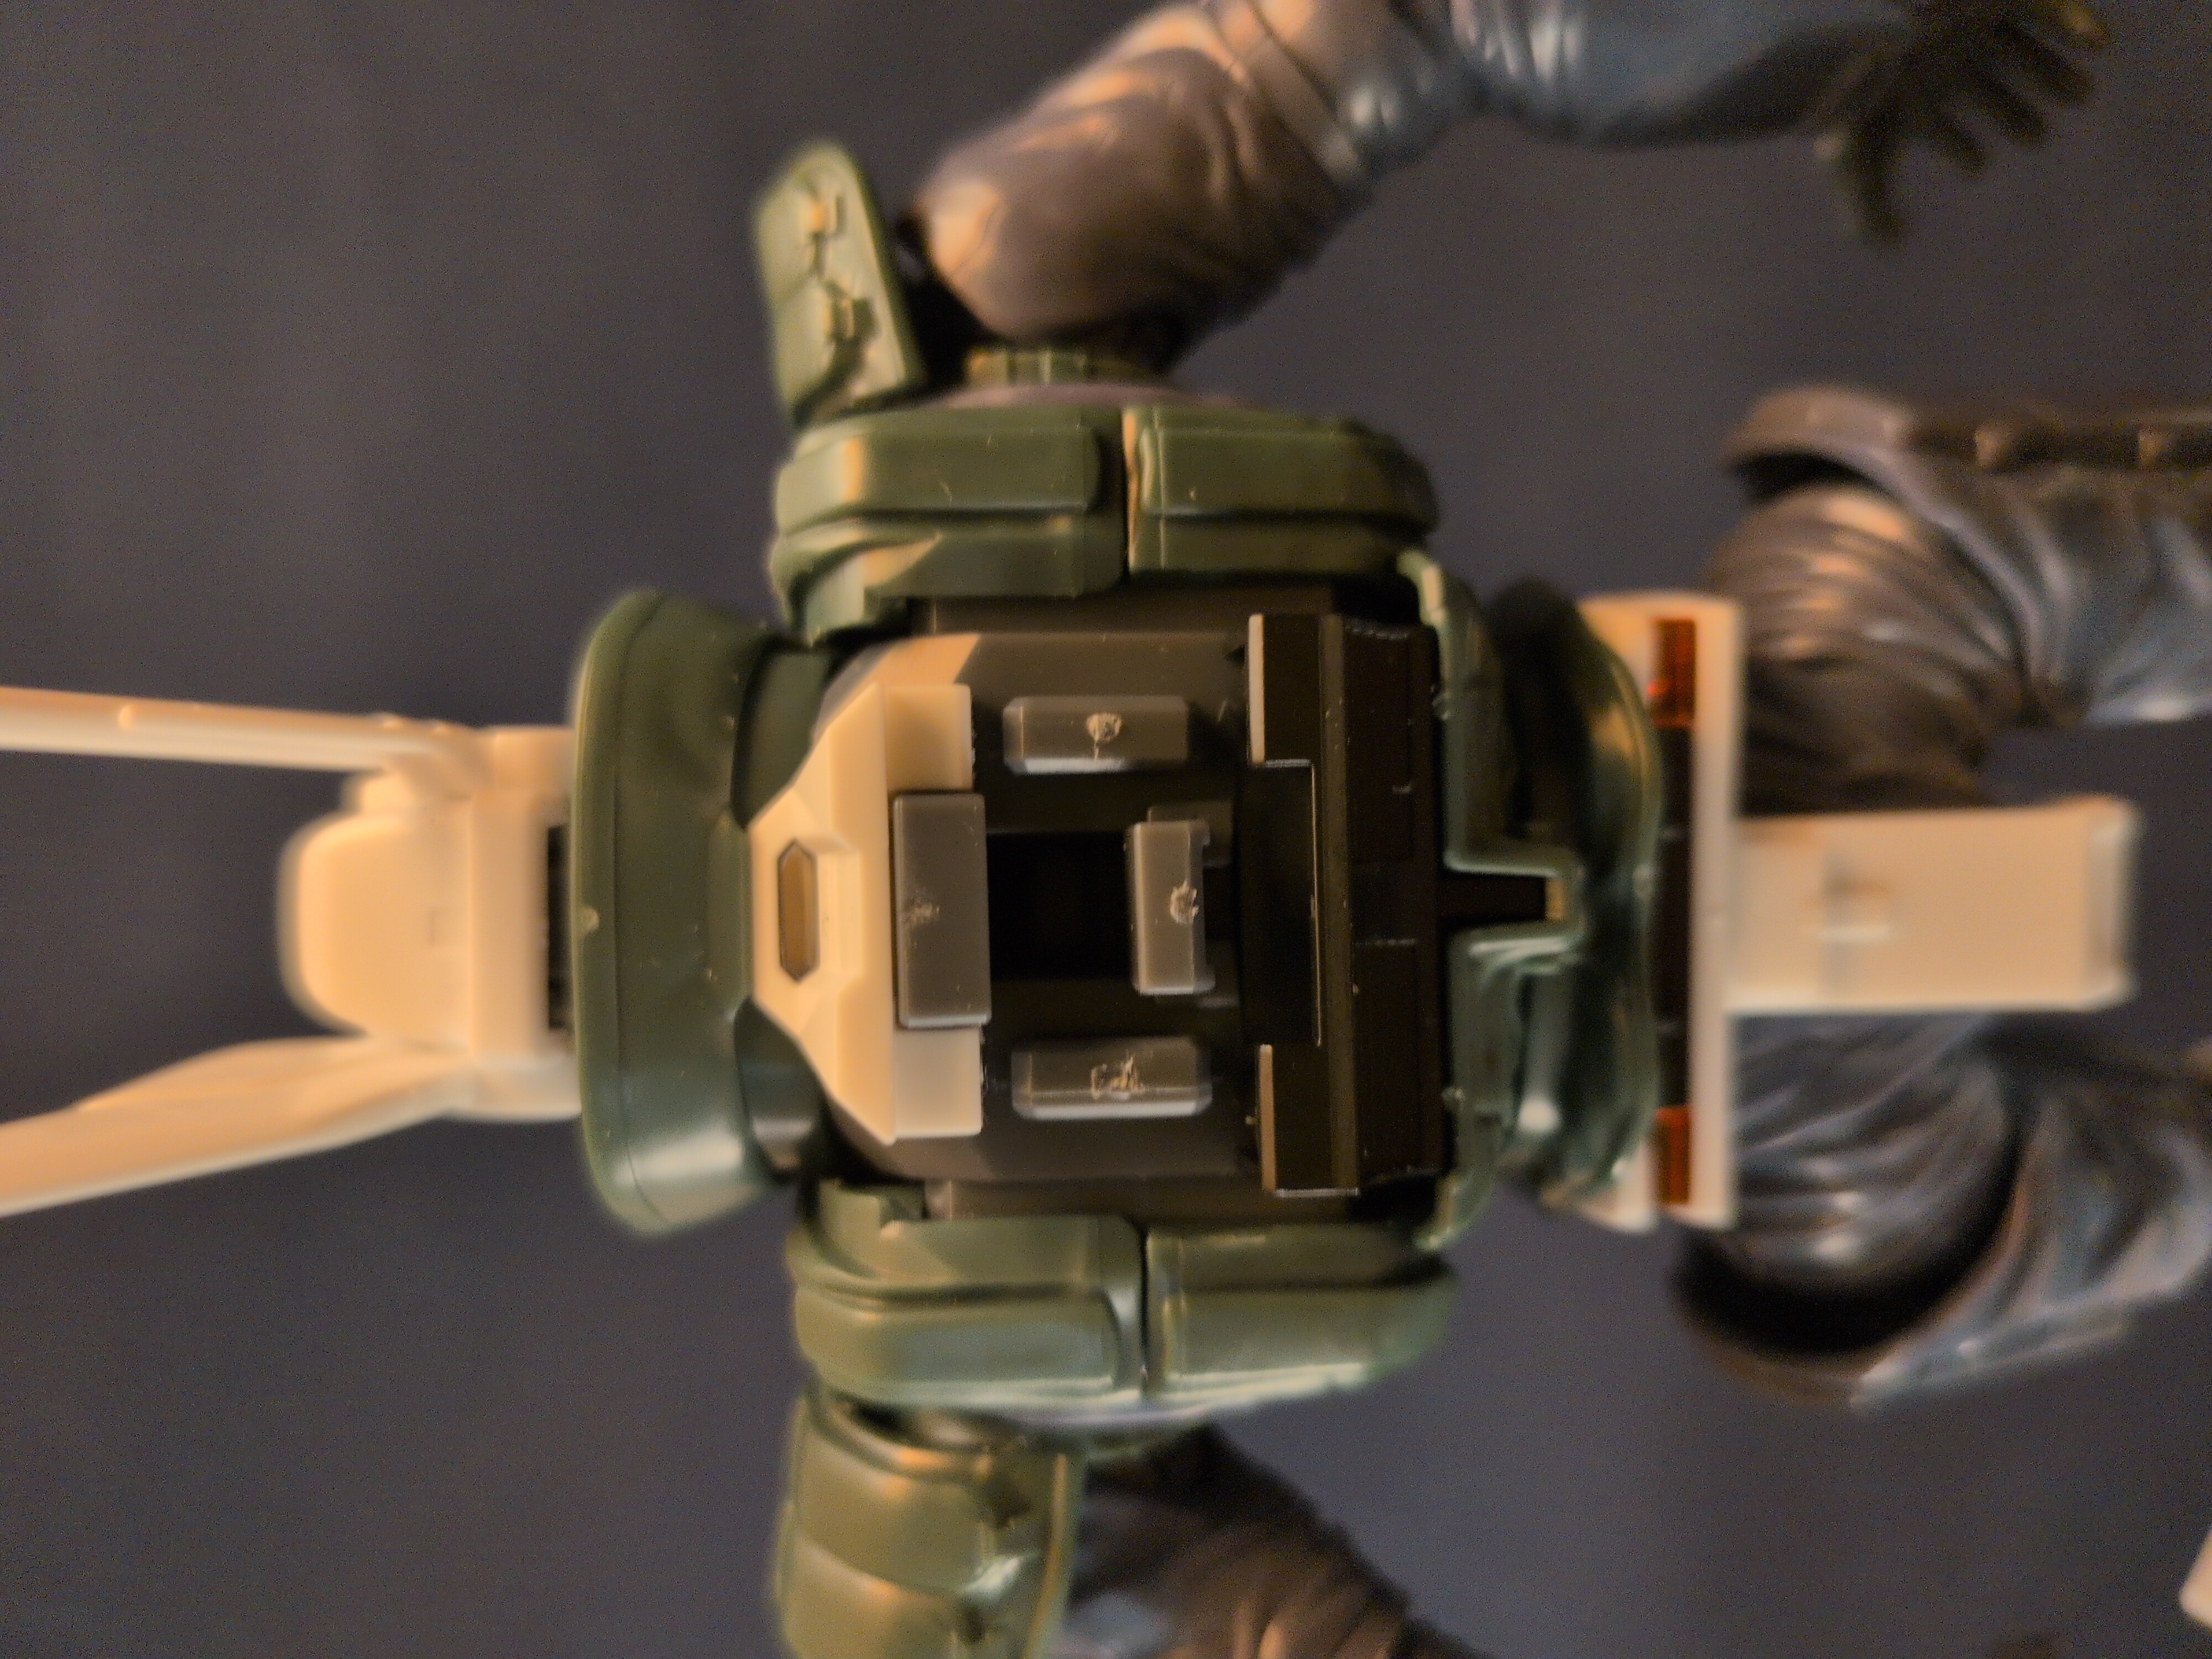
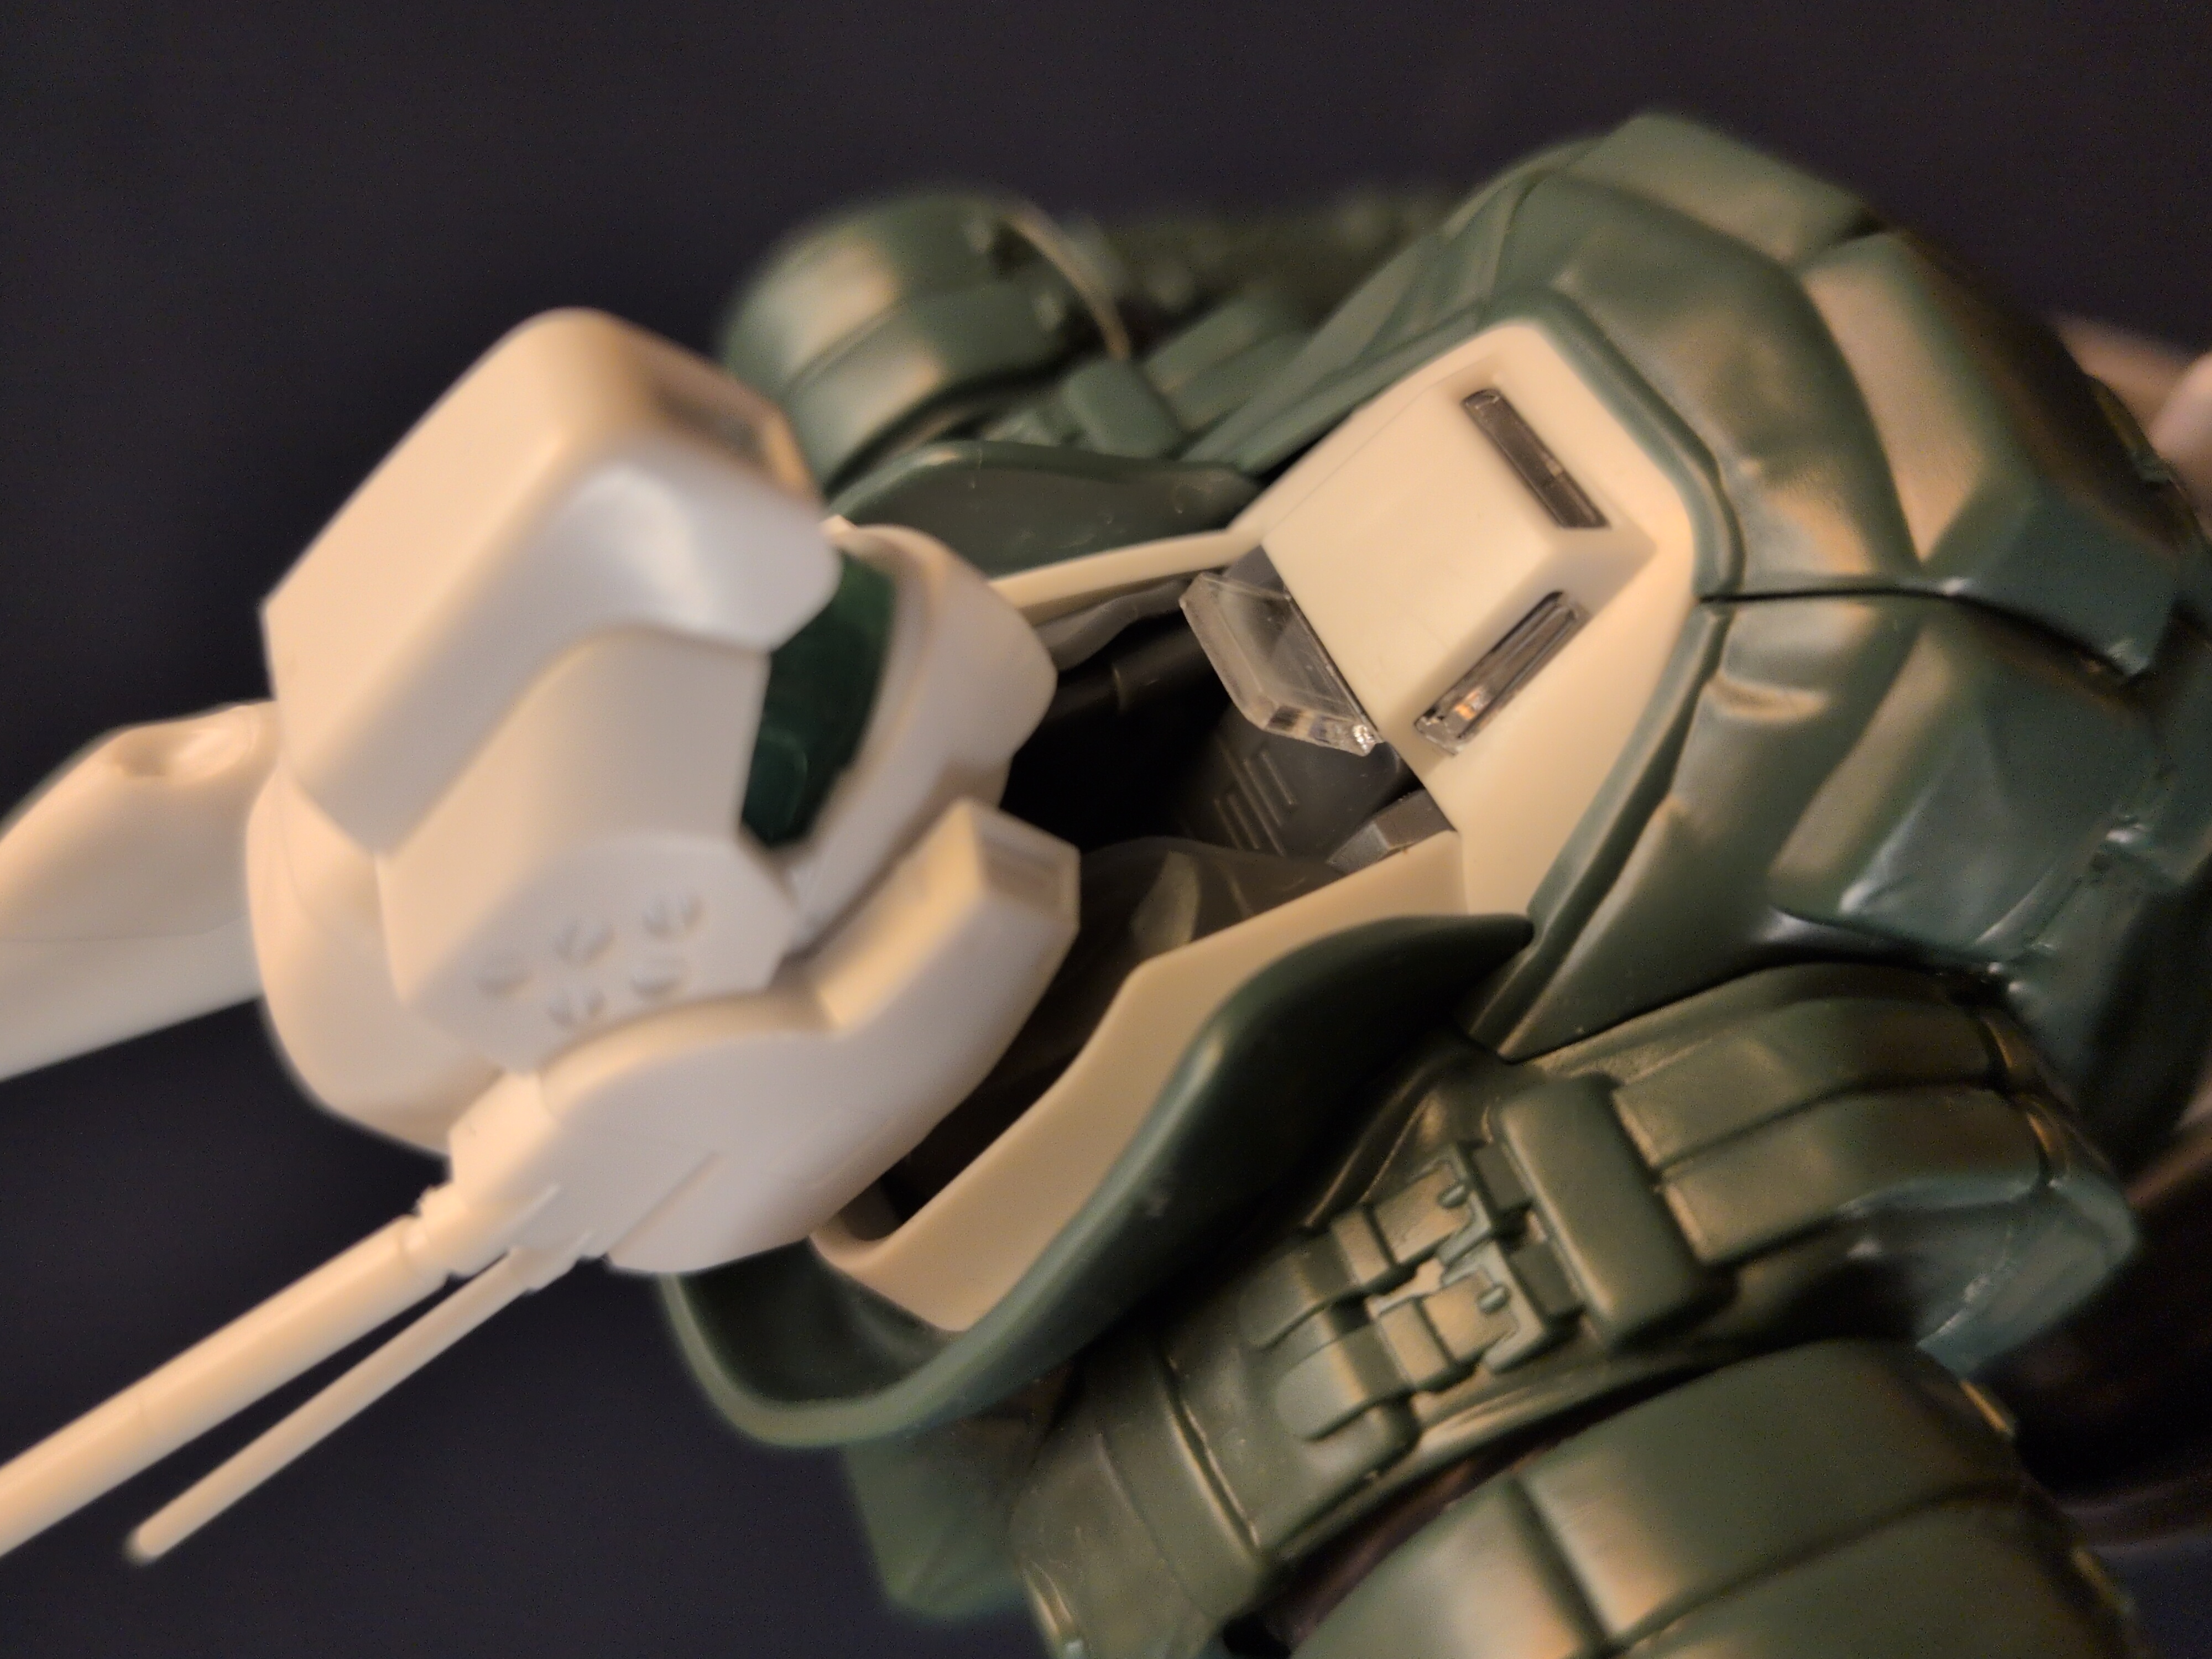
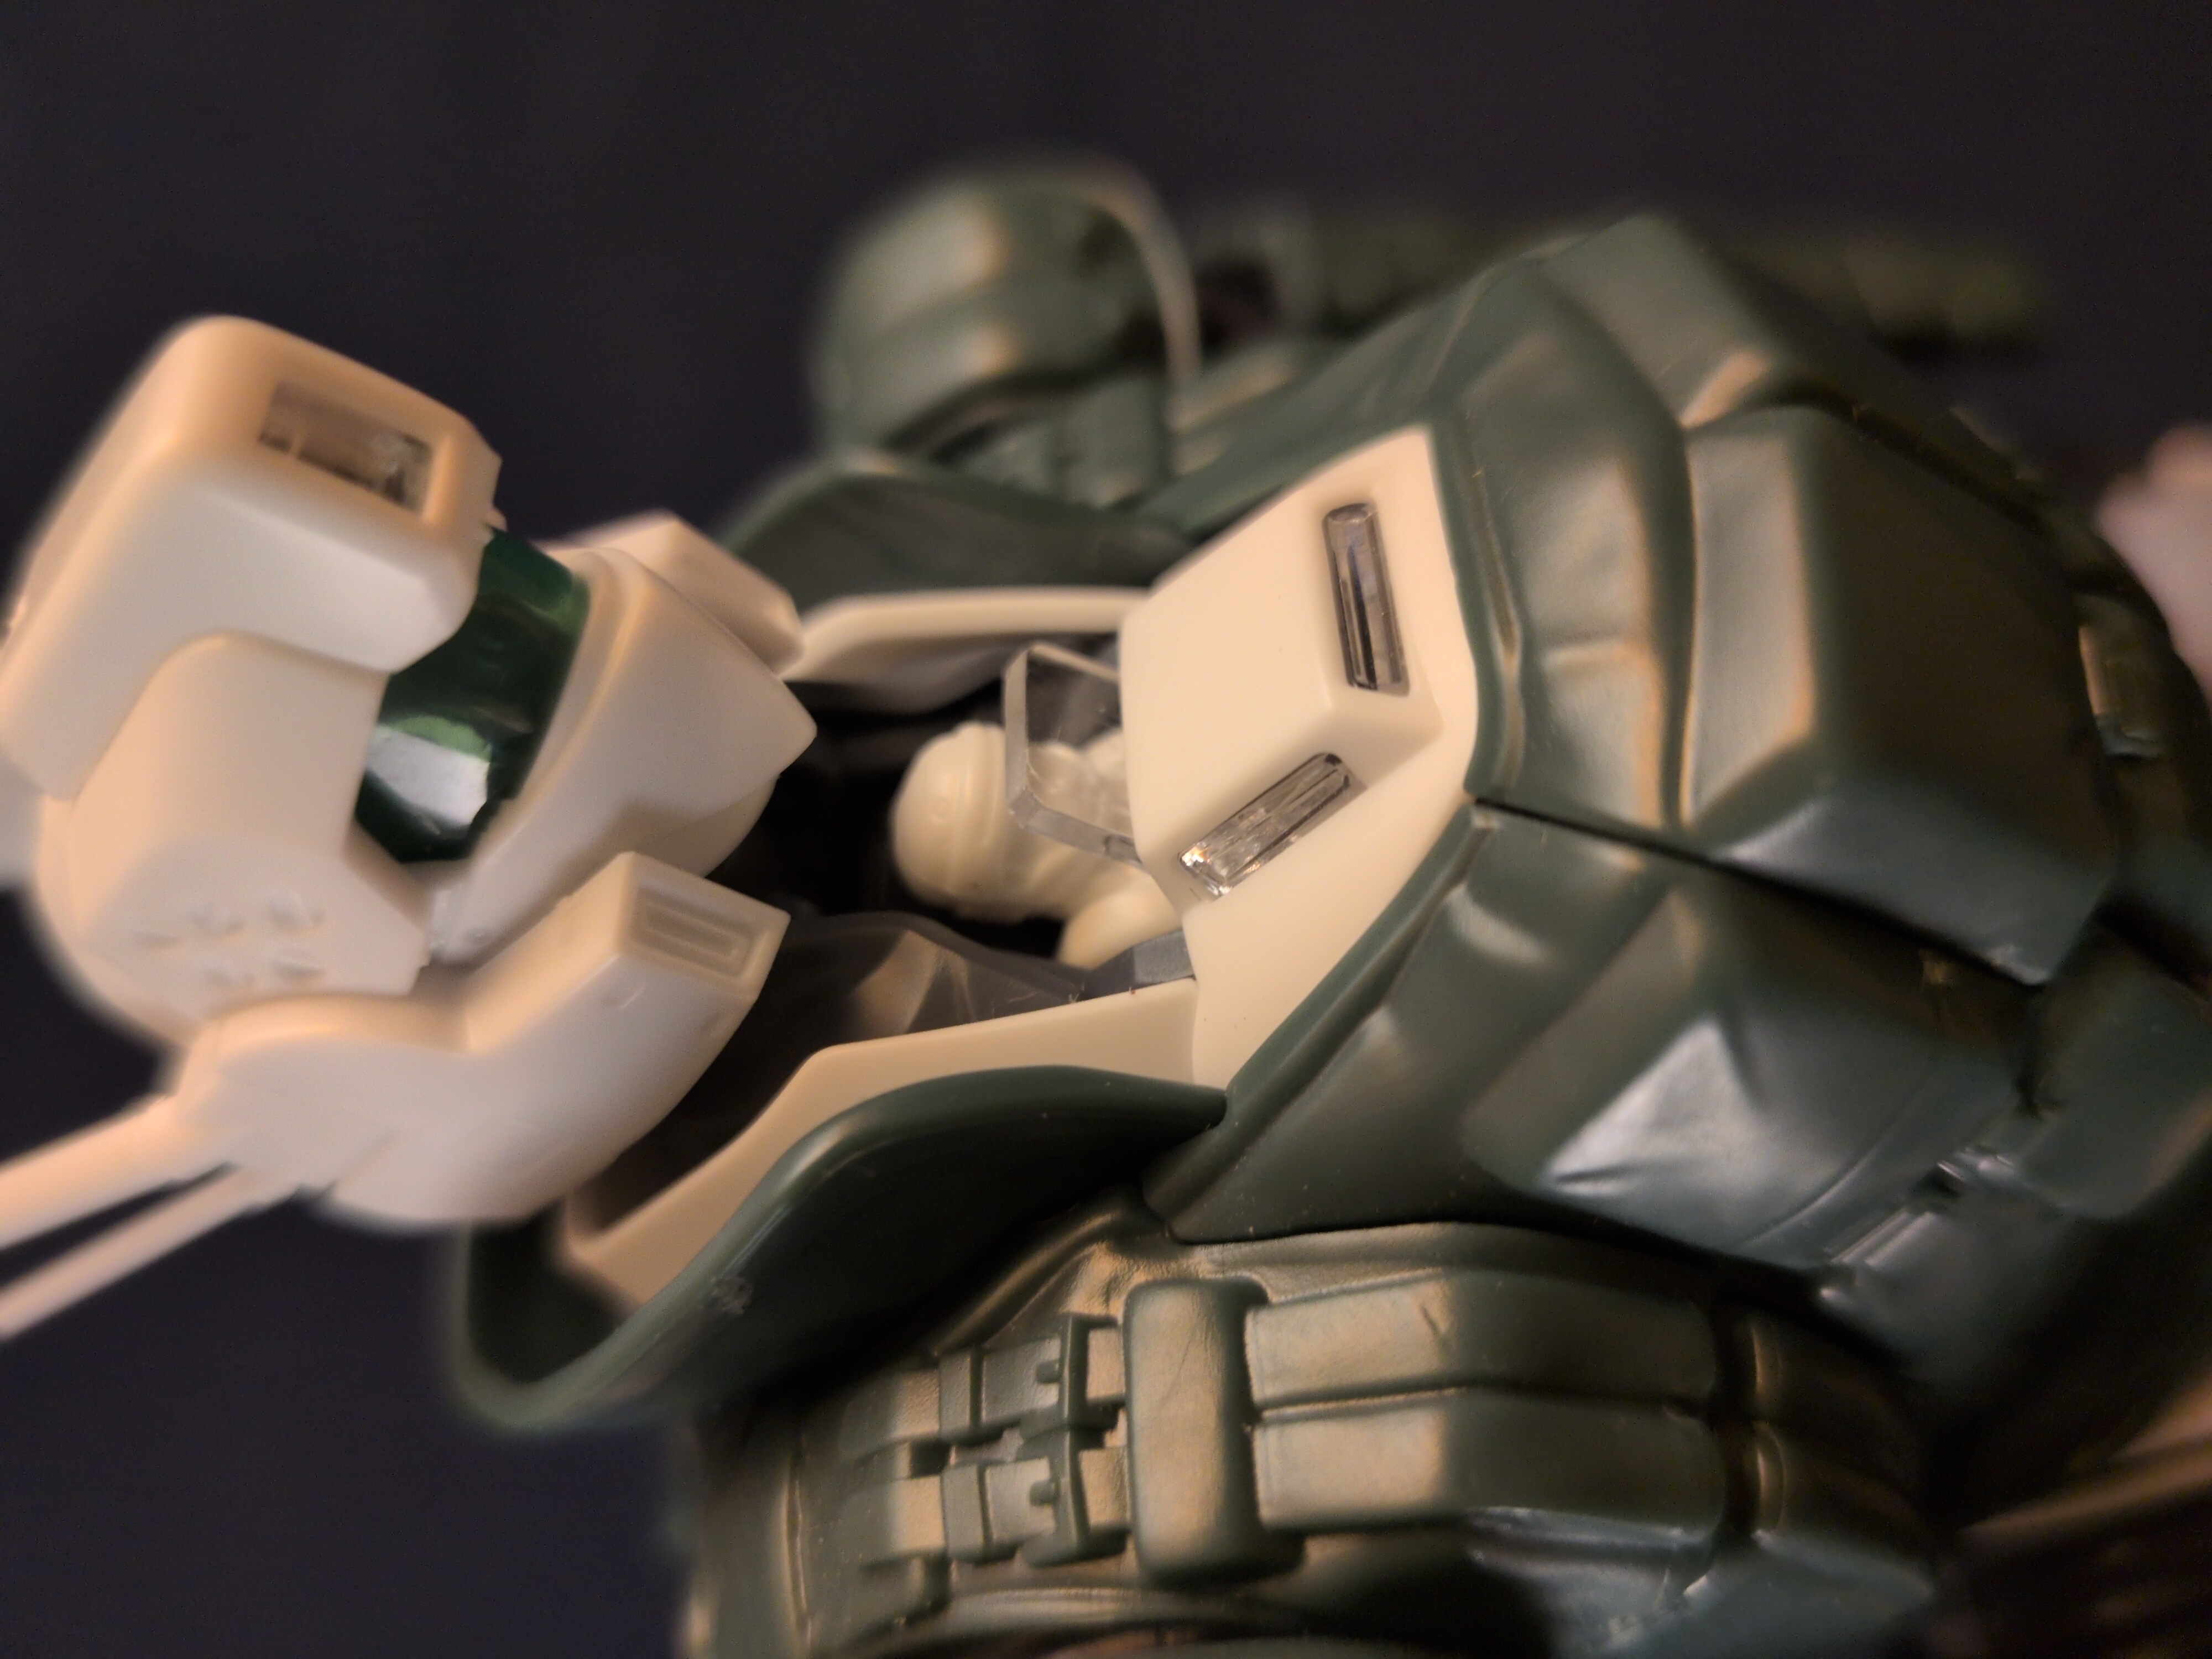
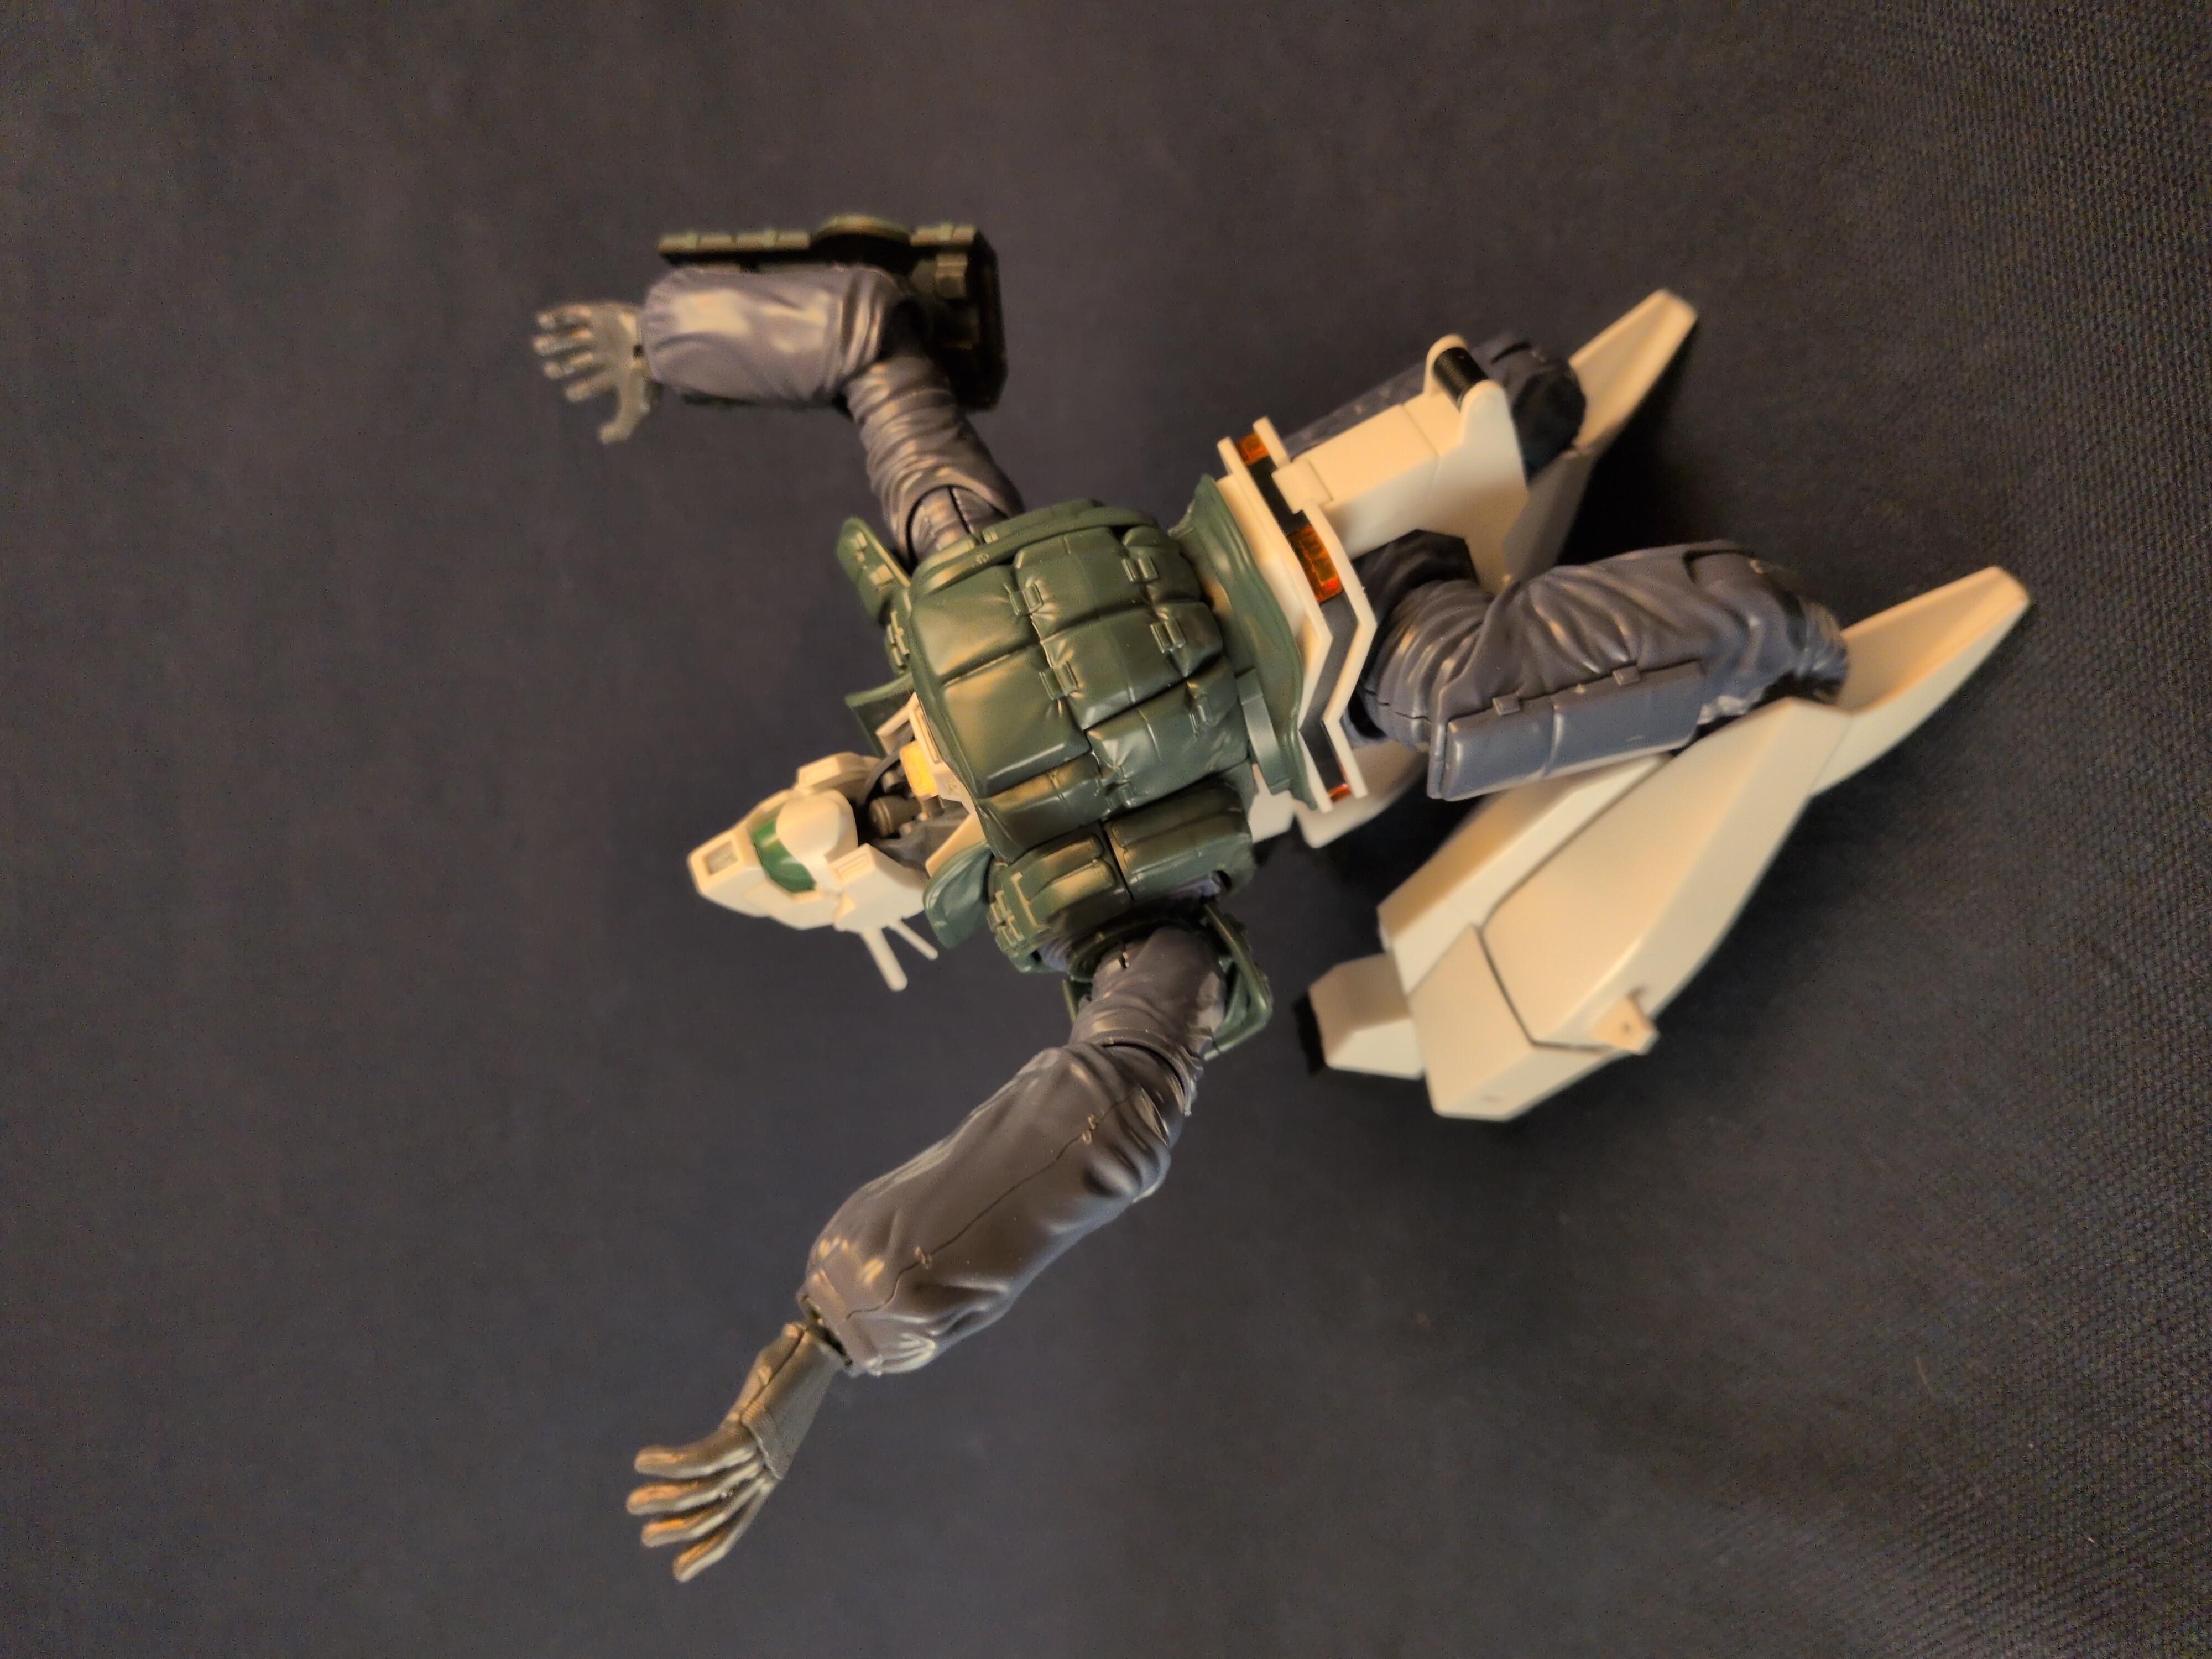
There’s this cool feature where the pilot can sit up and look out of the mech’s chest. I found it a pleasant surprise, as I didn’t see it advertised on the box at all. The back piece comes off to access the two relevant parts. One tab is attached to the pilot’s seat to move it up and down, and the second tab pulls out to uncover the hatch. The back piece is molded such to keep the pilot’s chair from falling down once it’s in position. A great example of the kind of mechanical details I just don’t get in Lego.
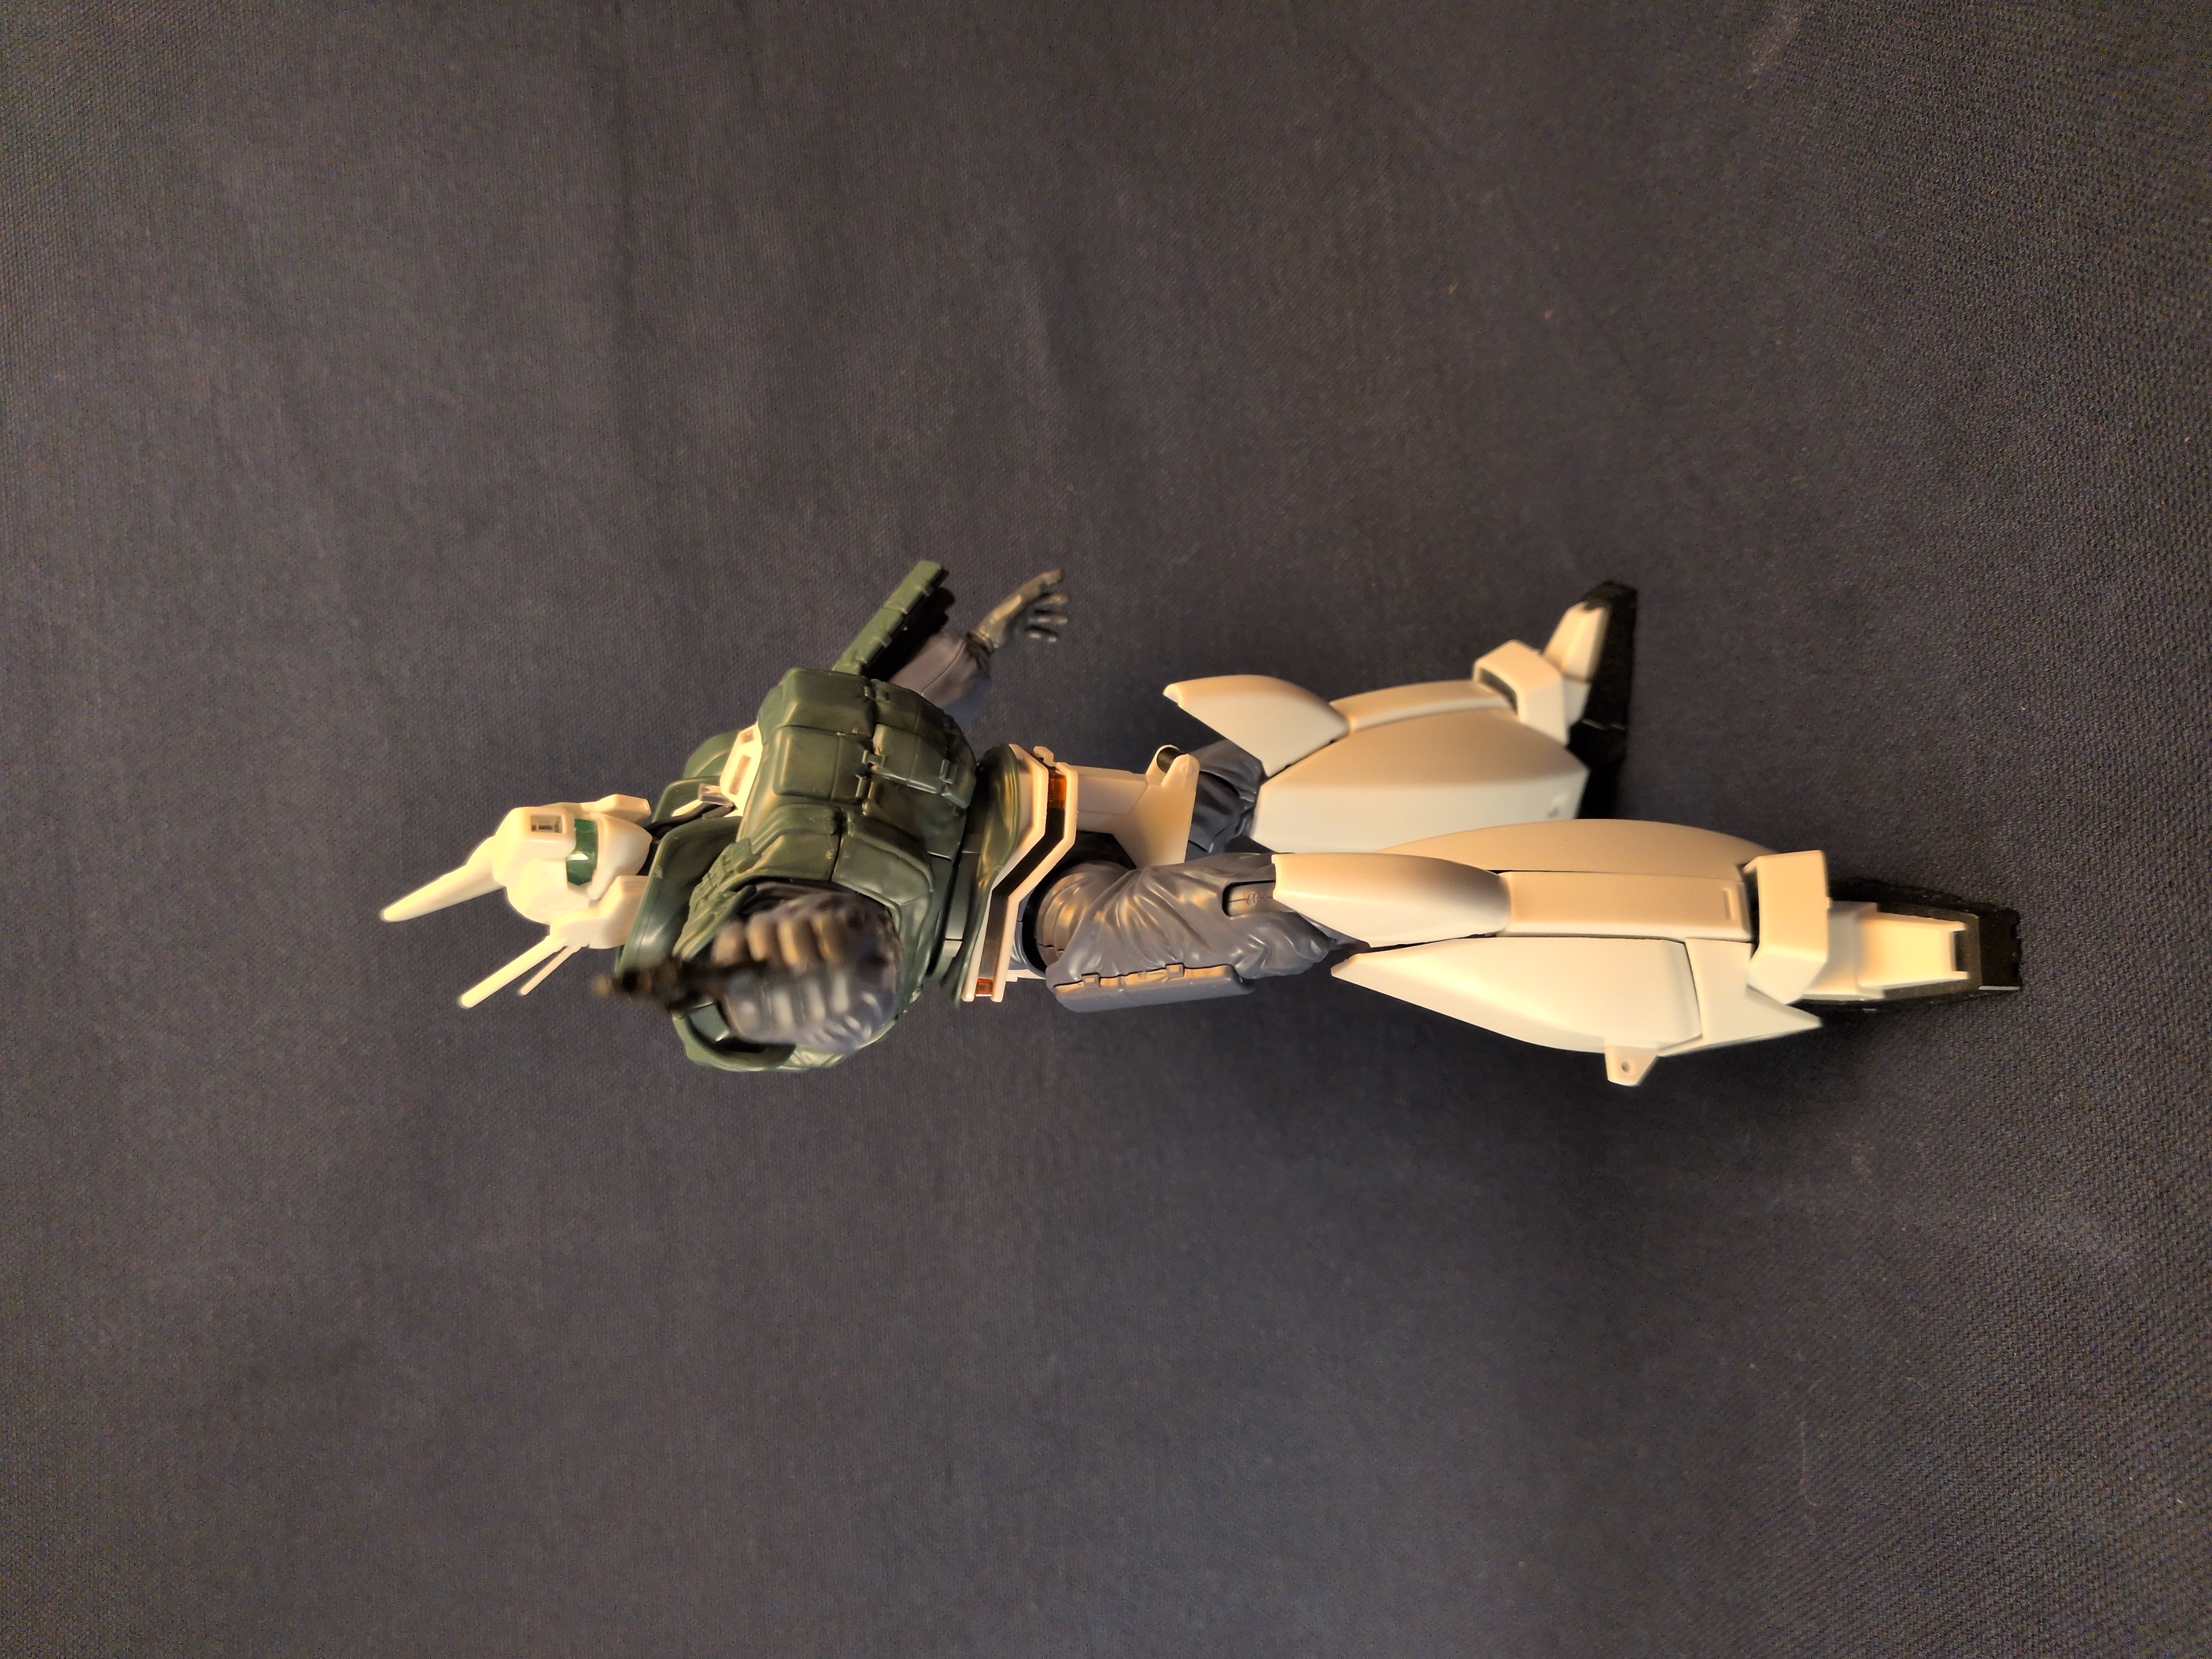
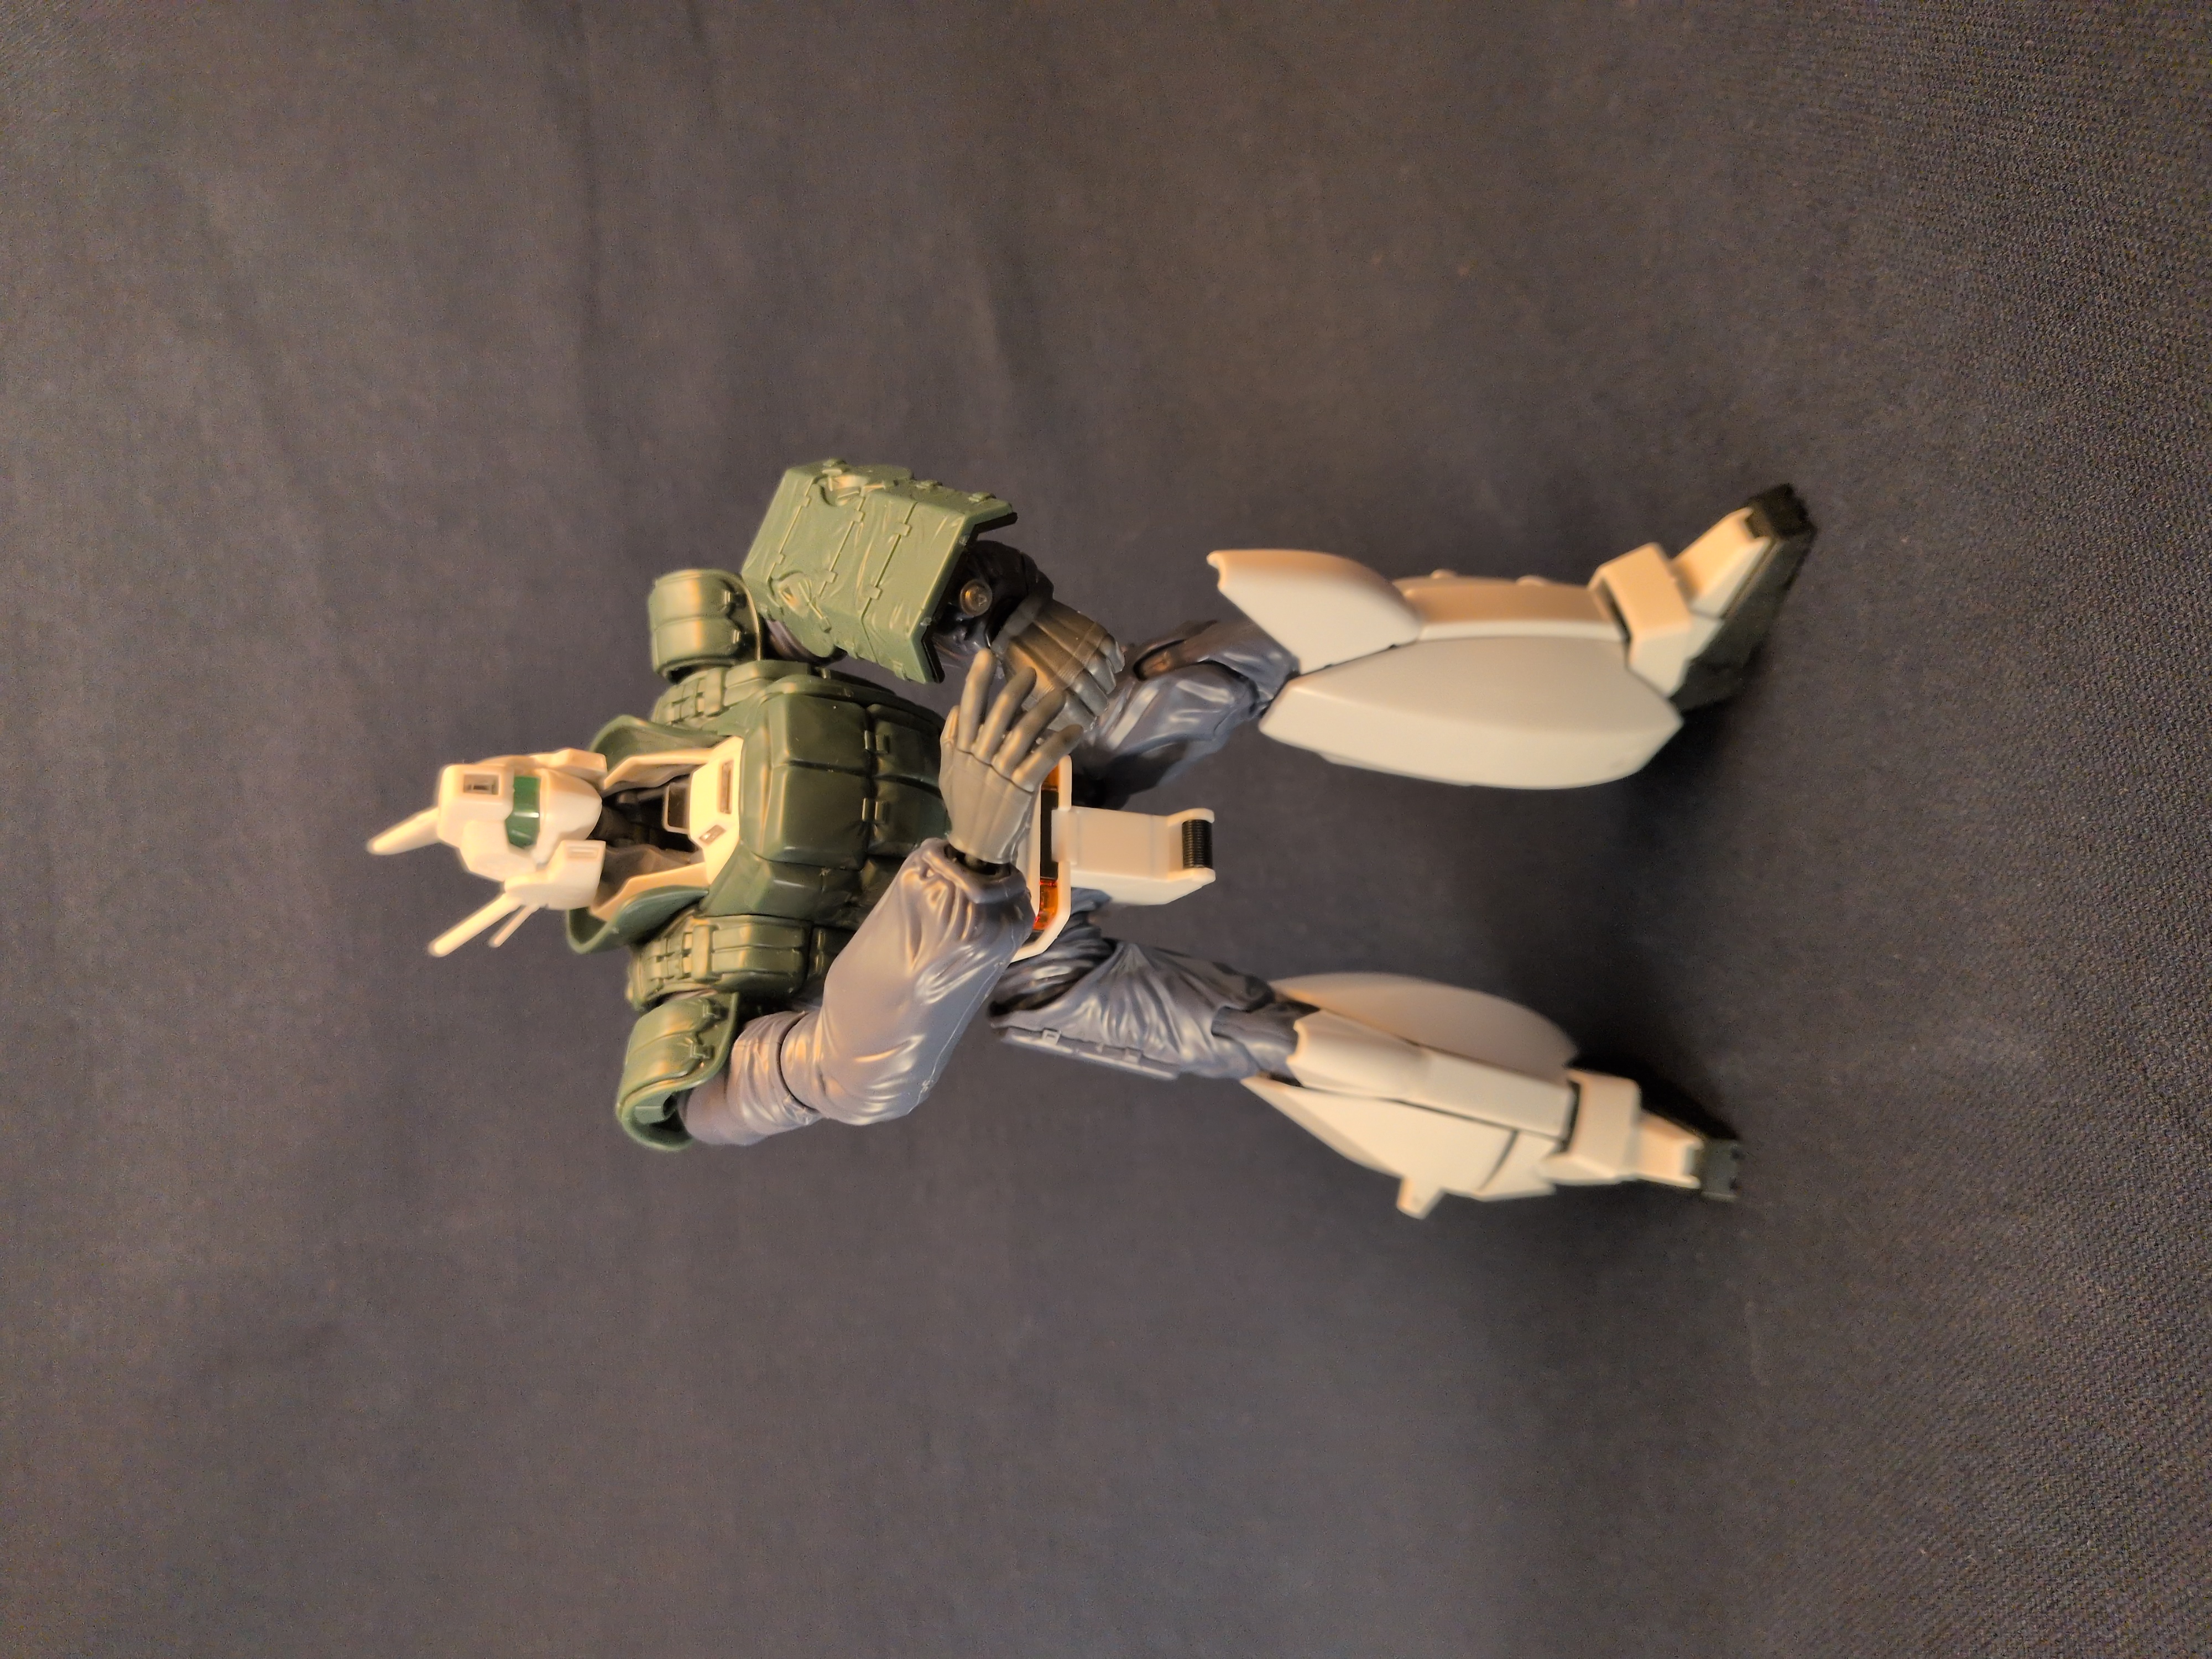
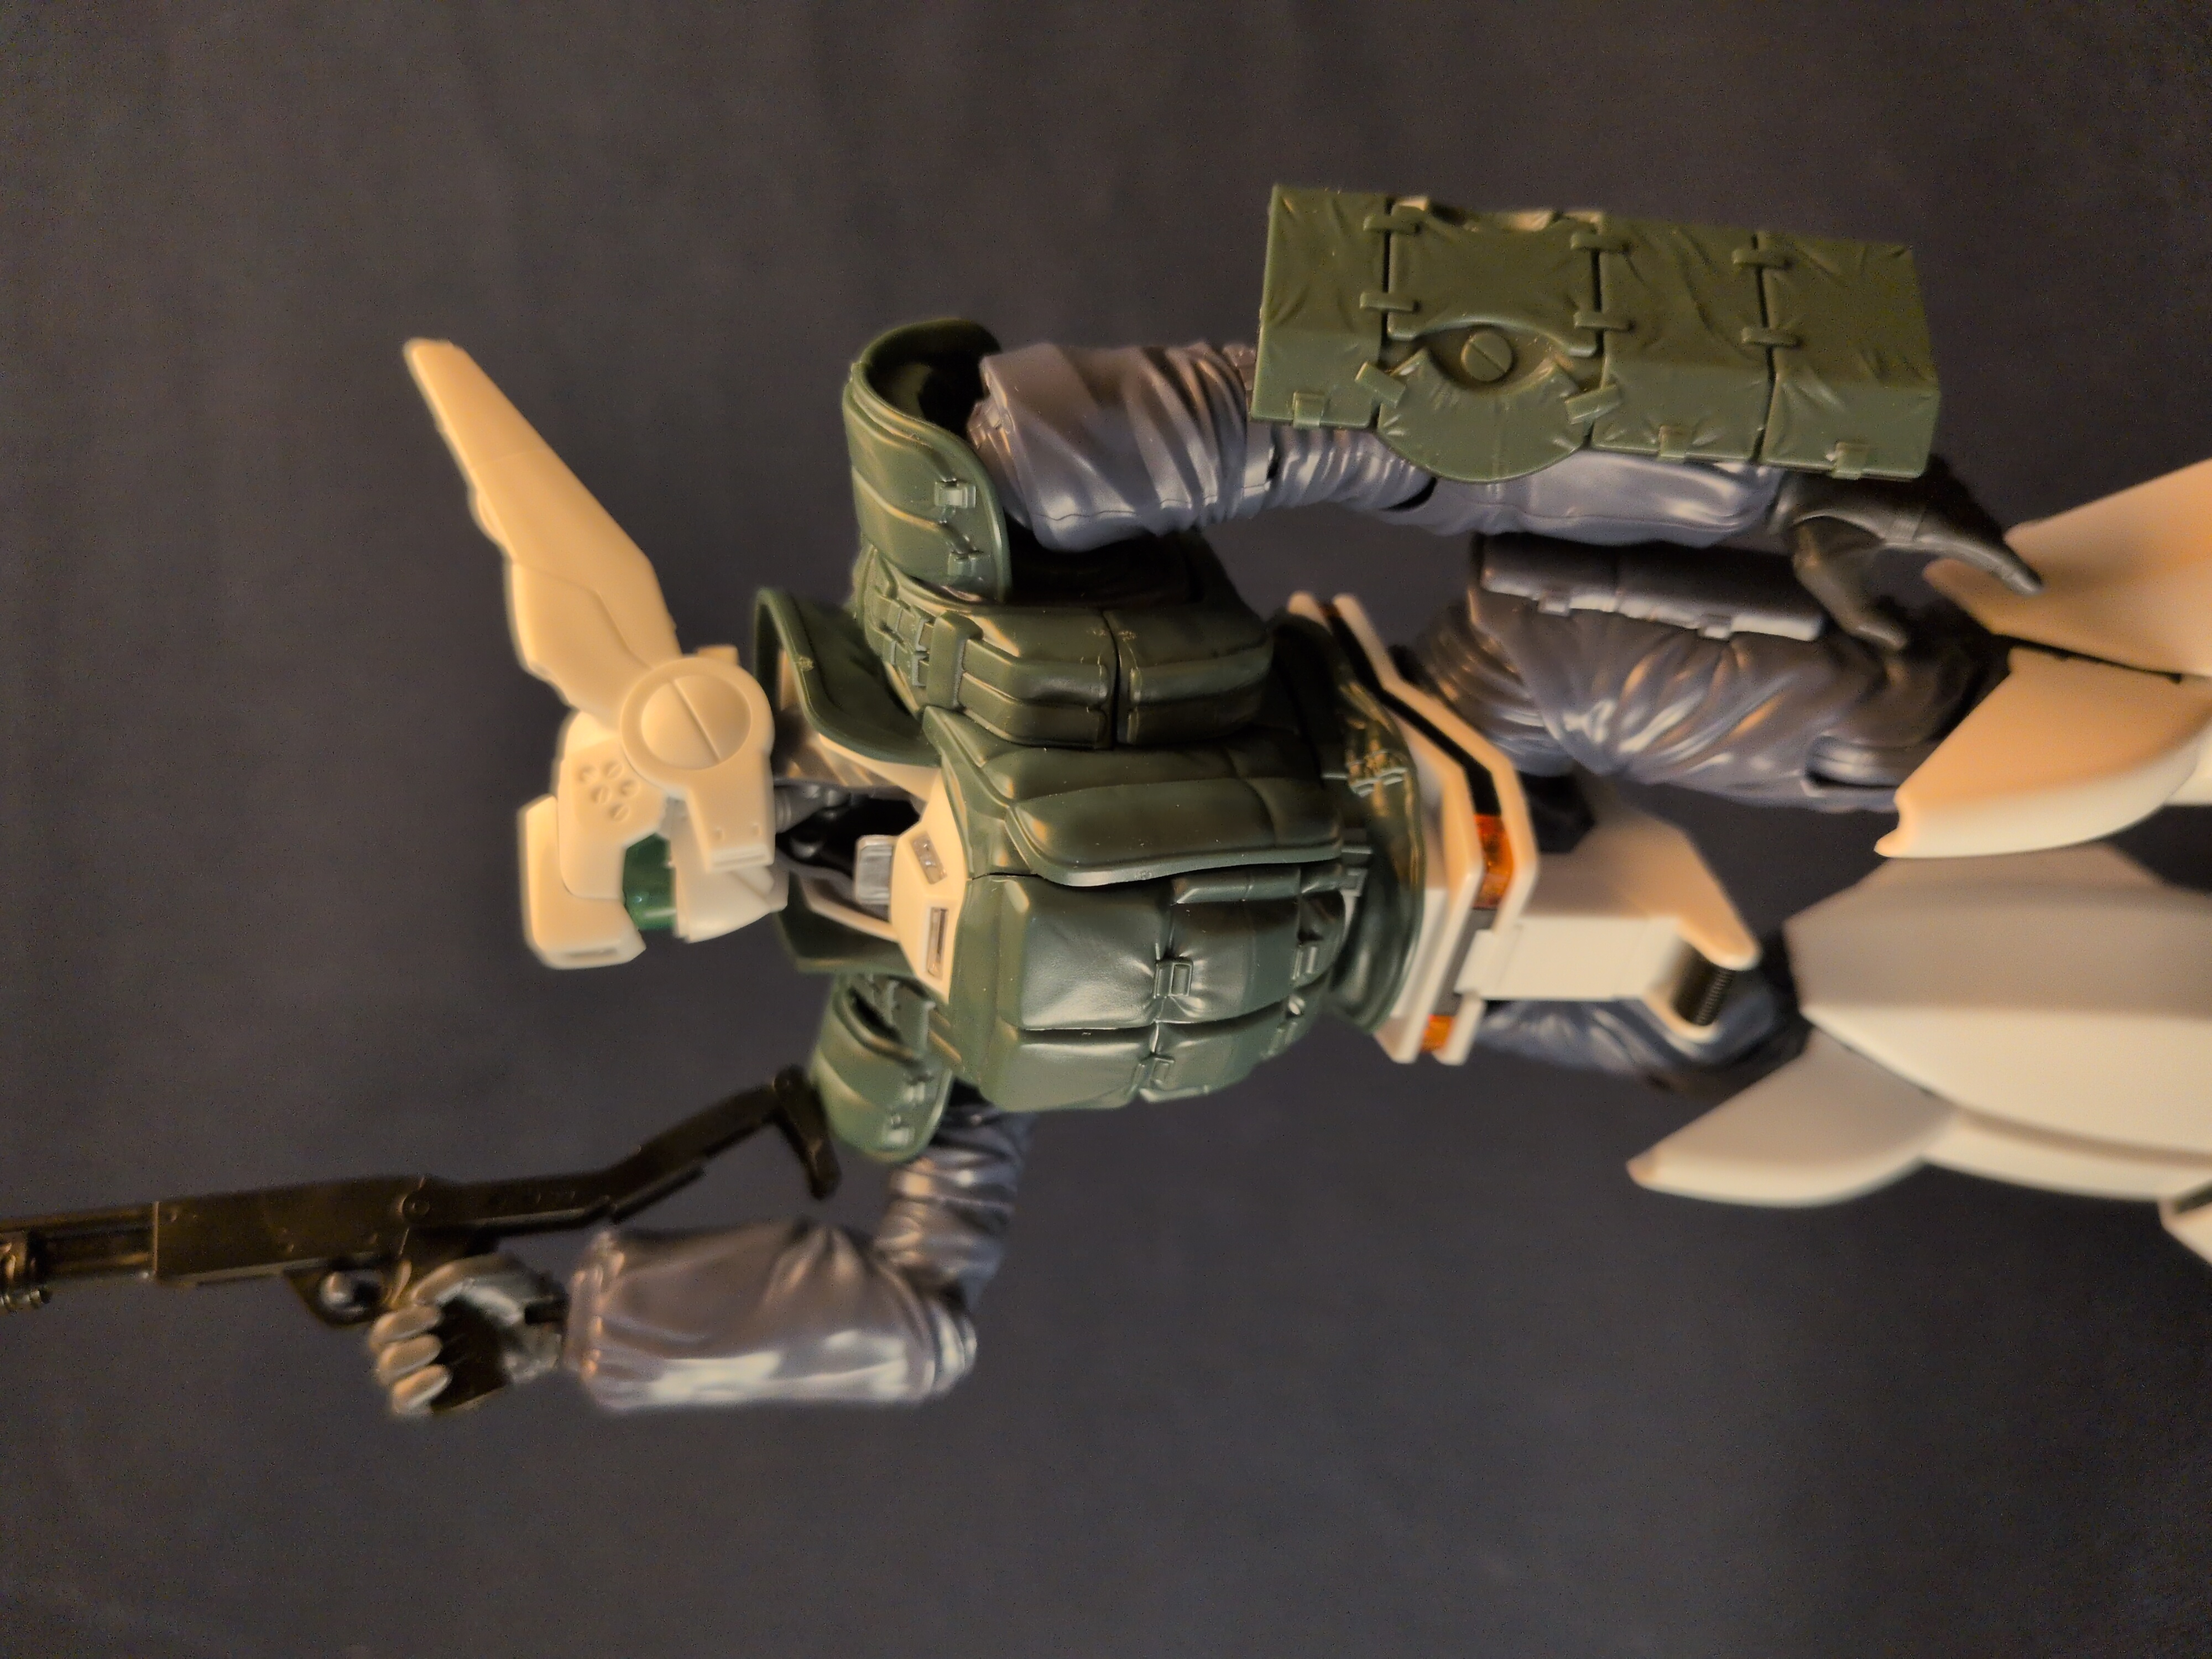
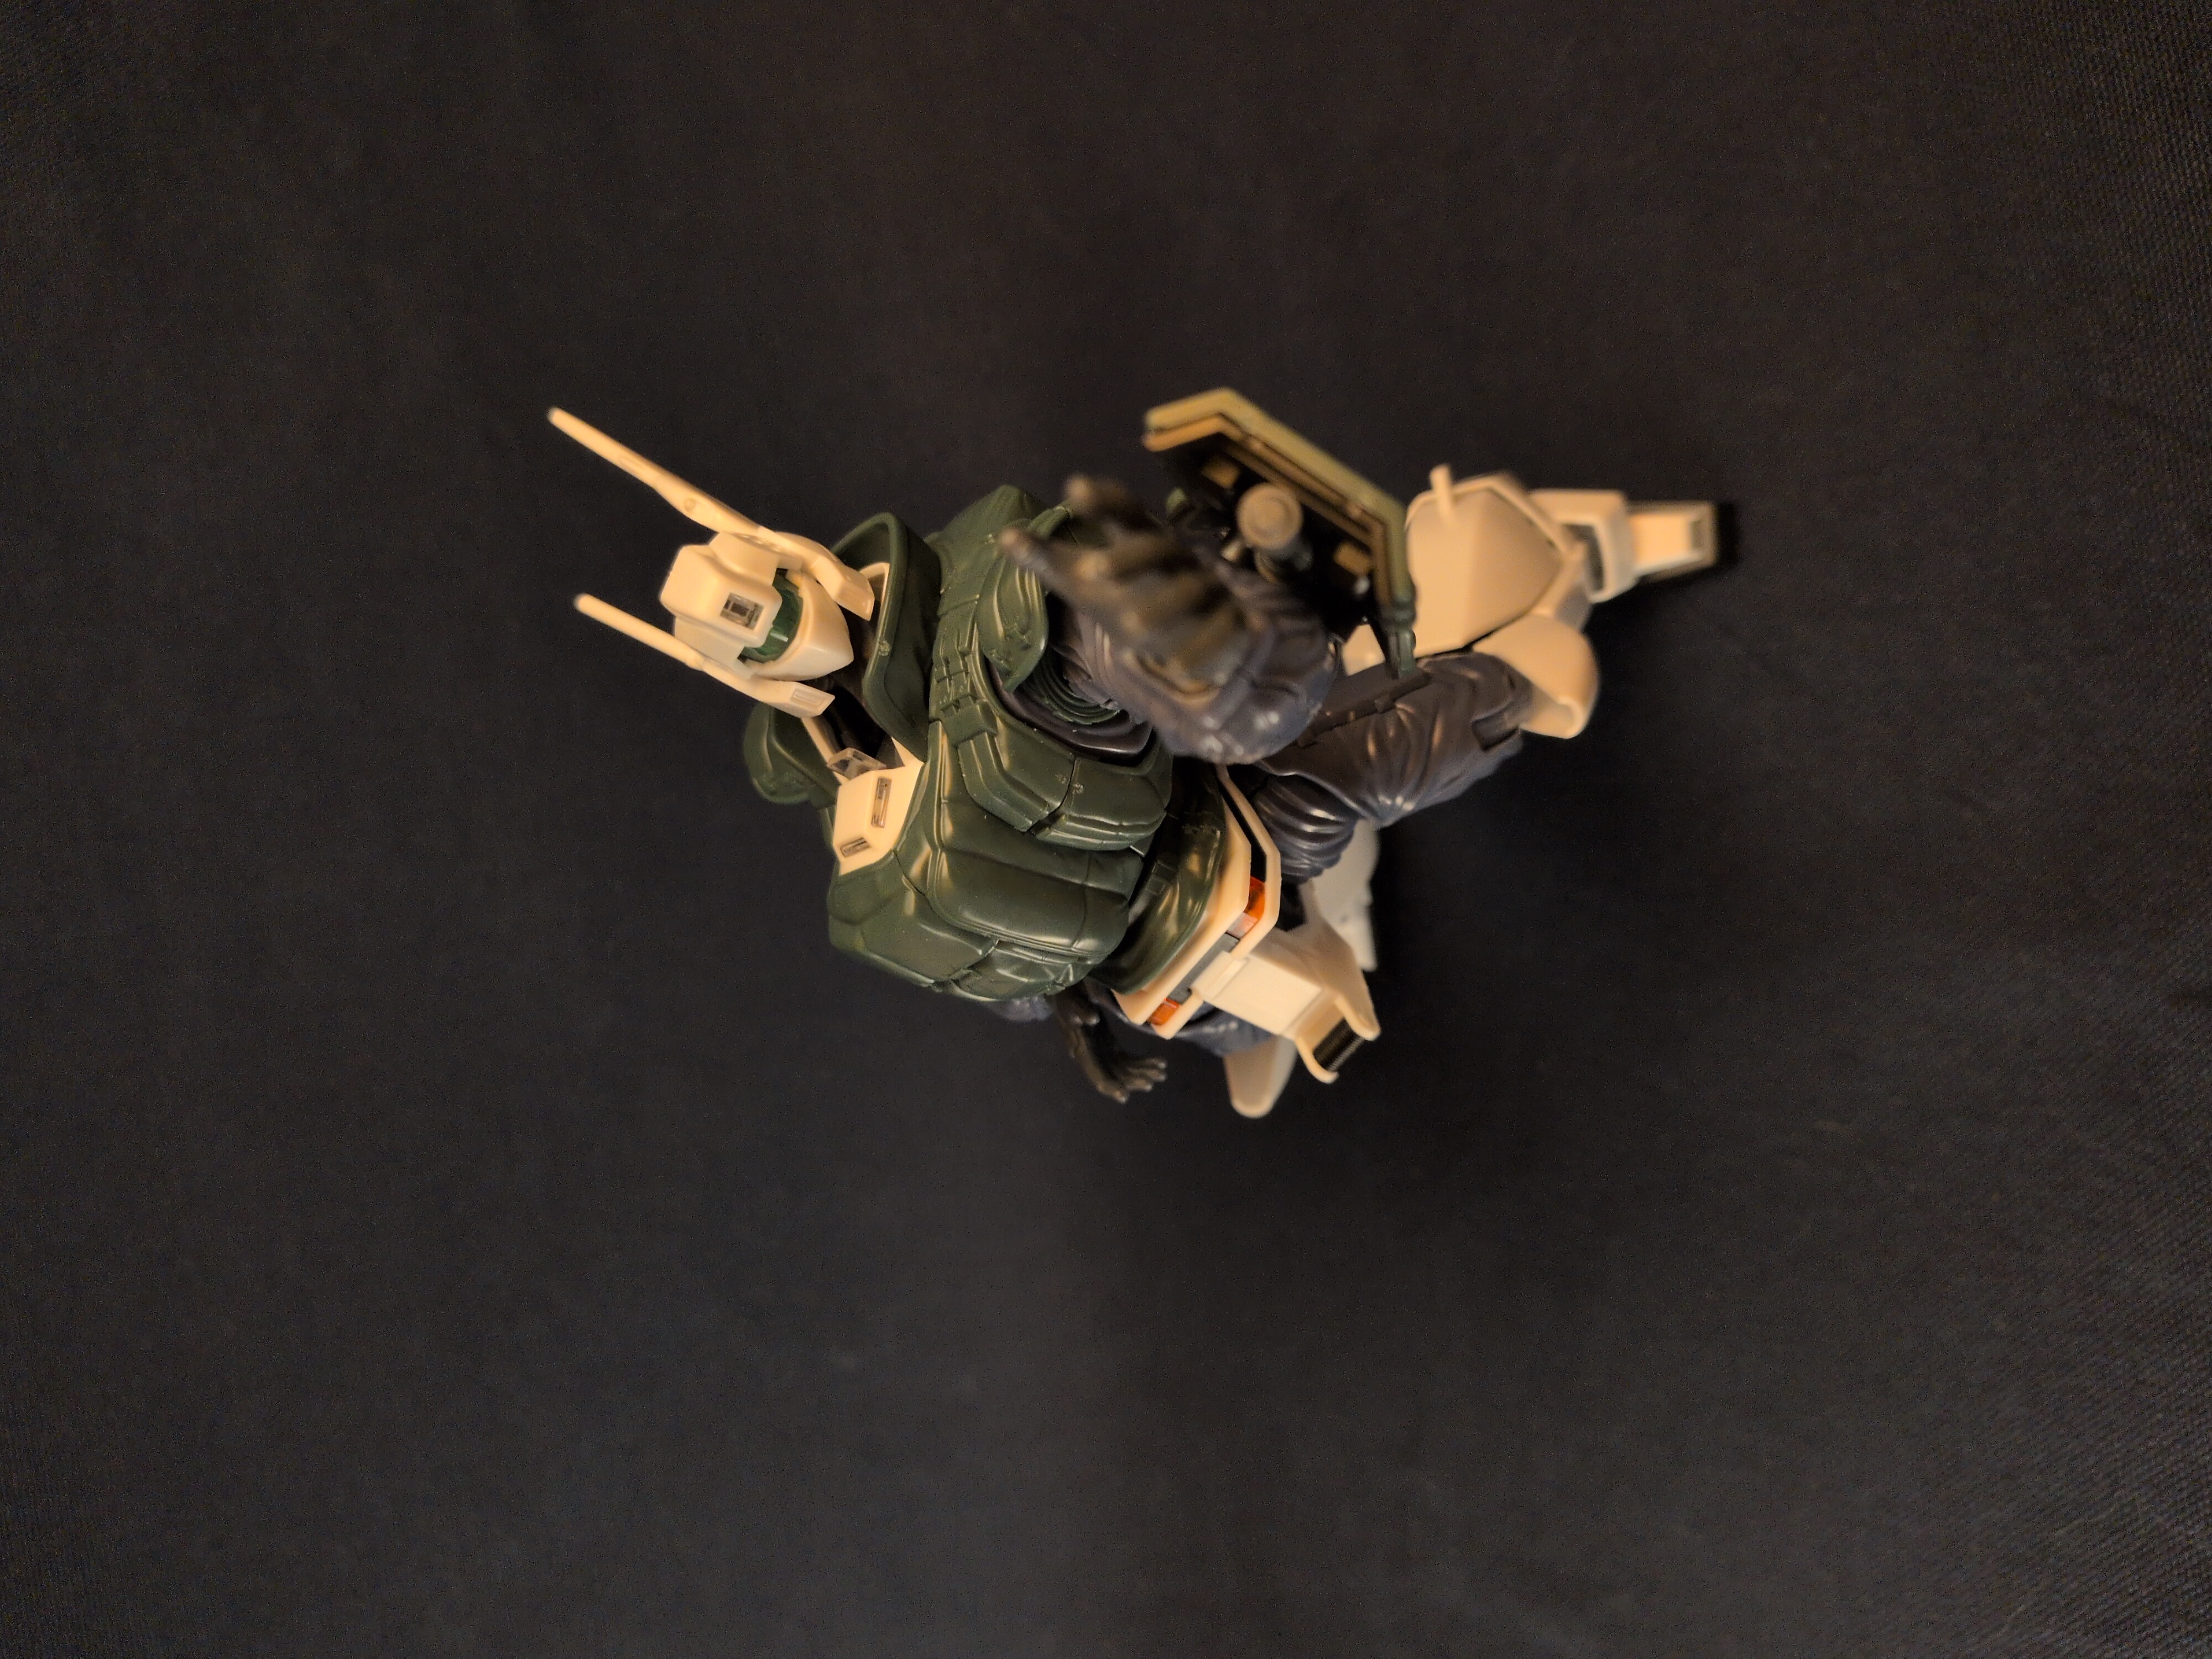
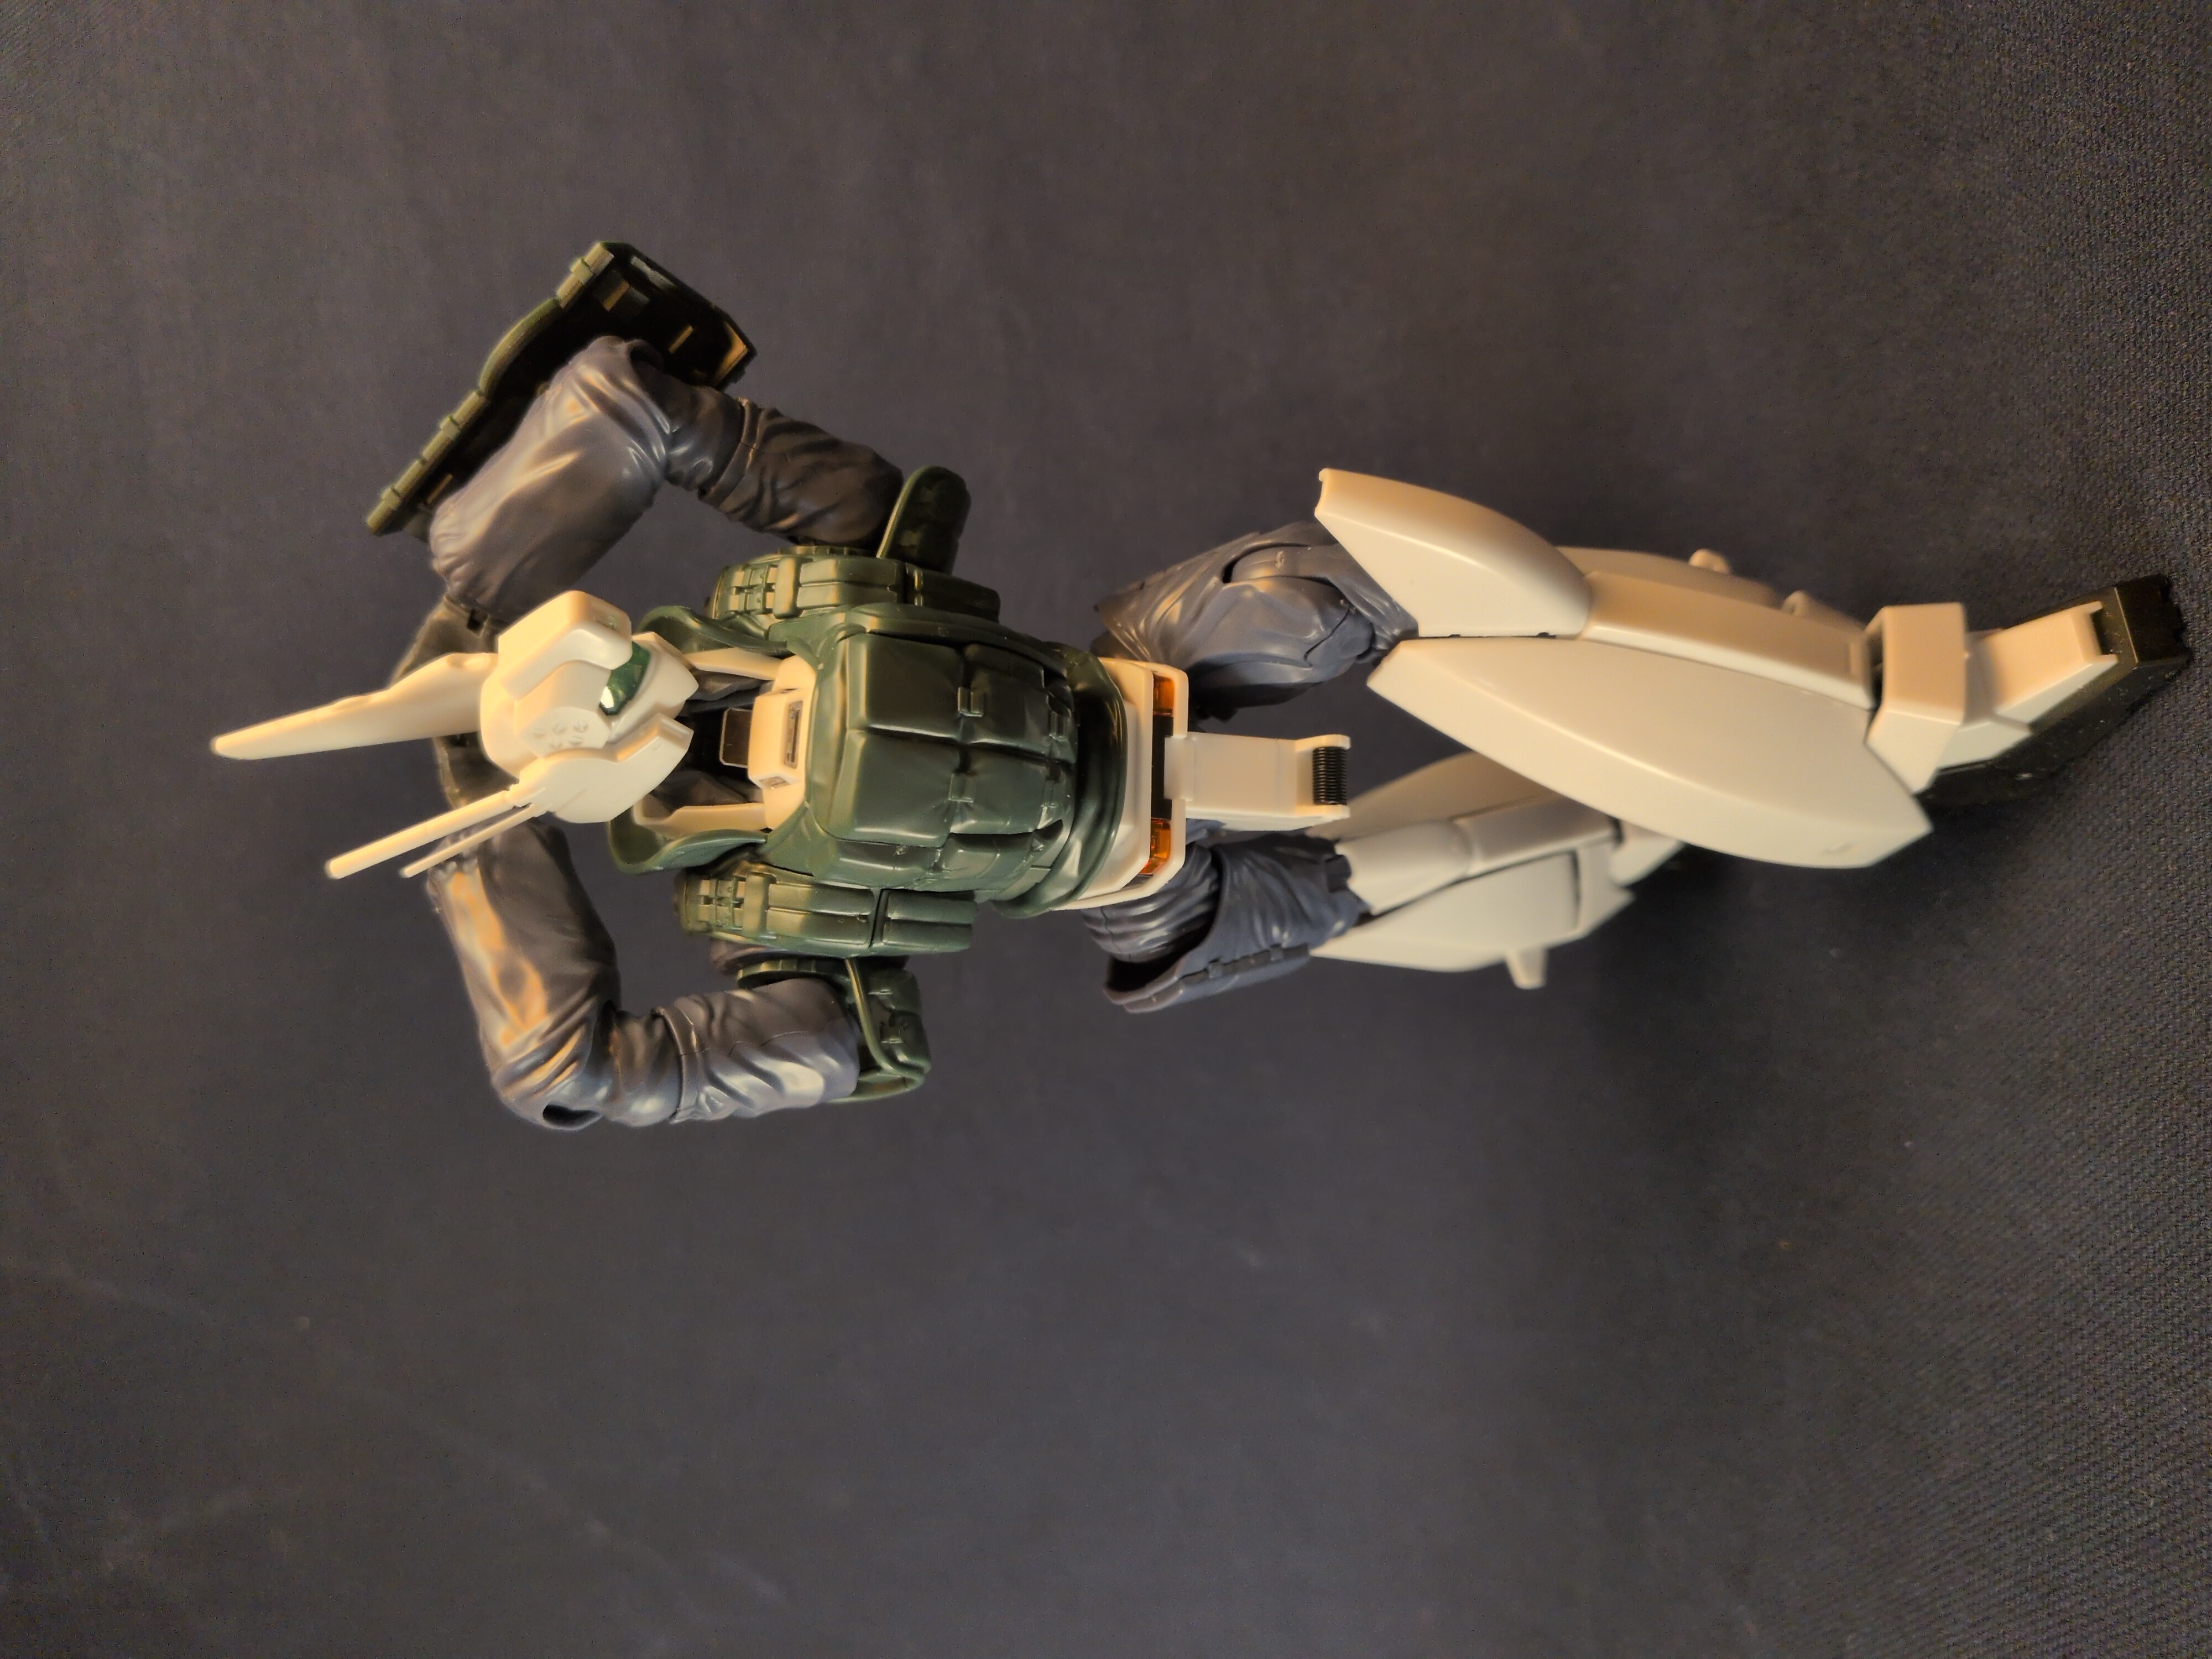
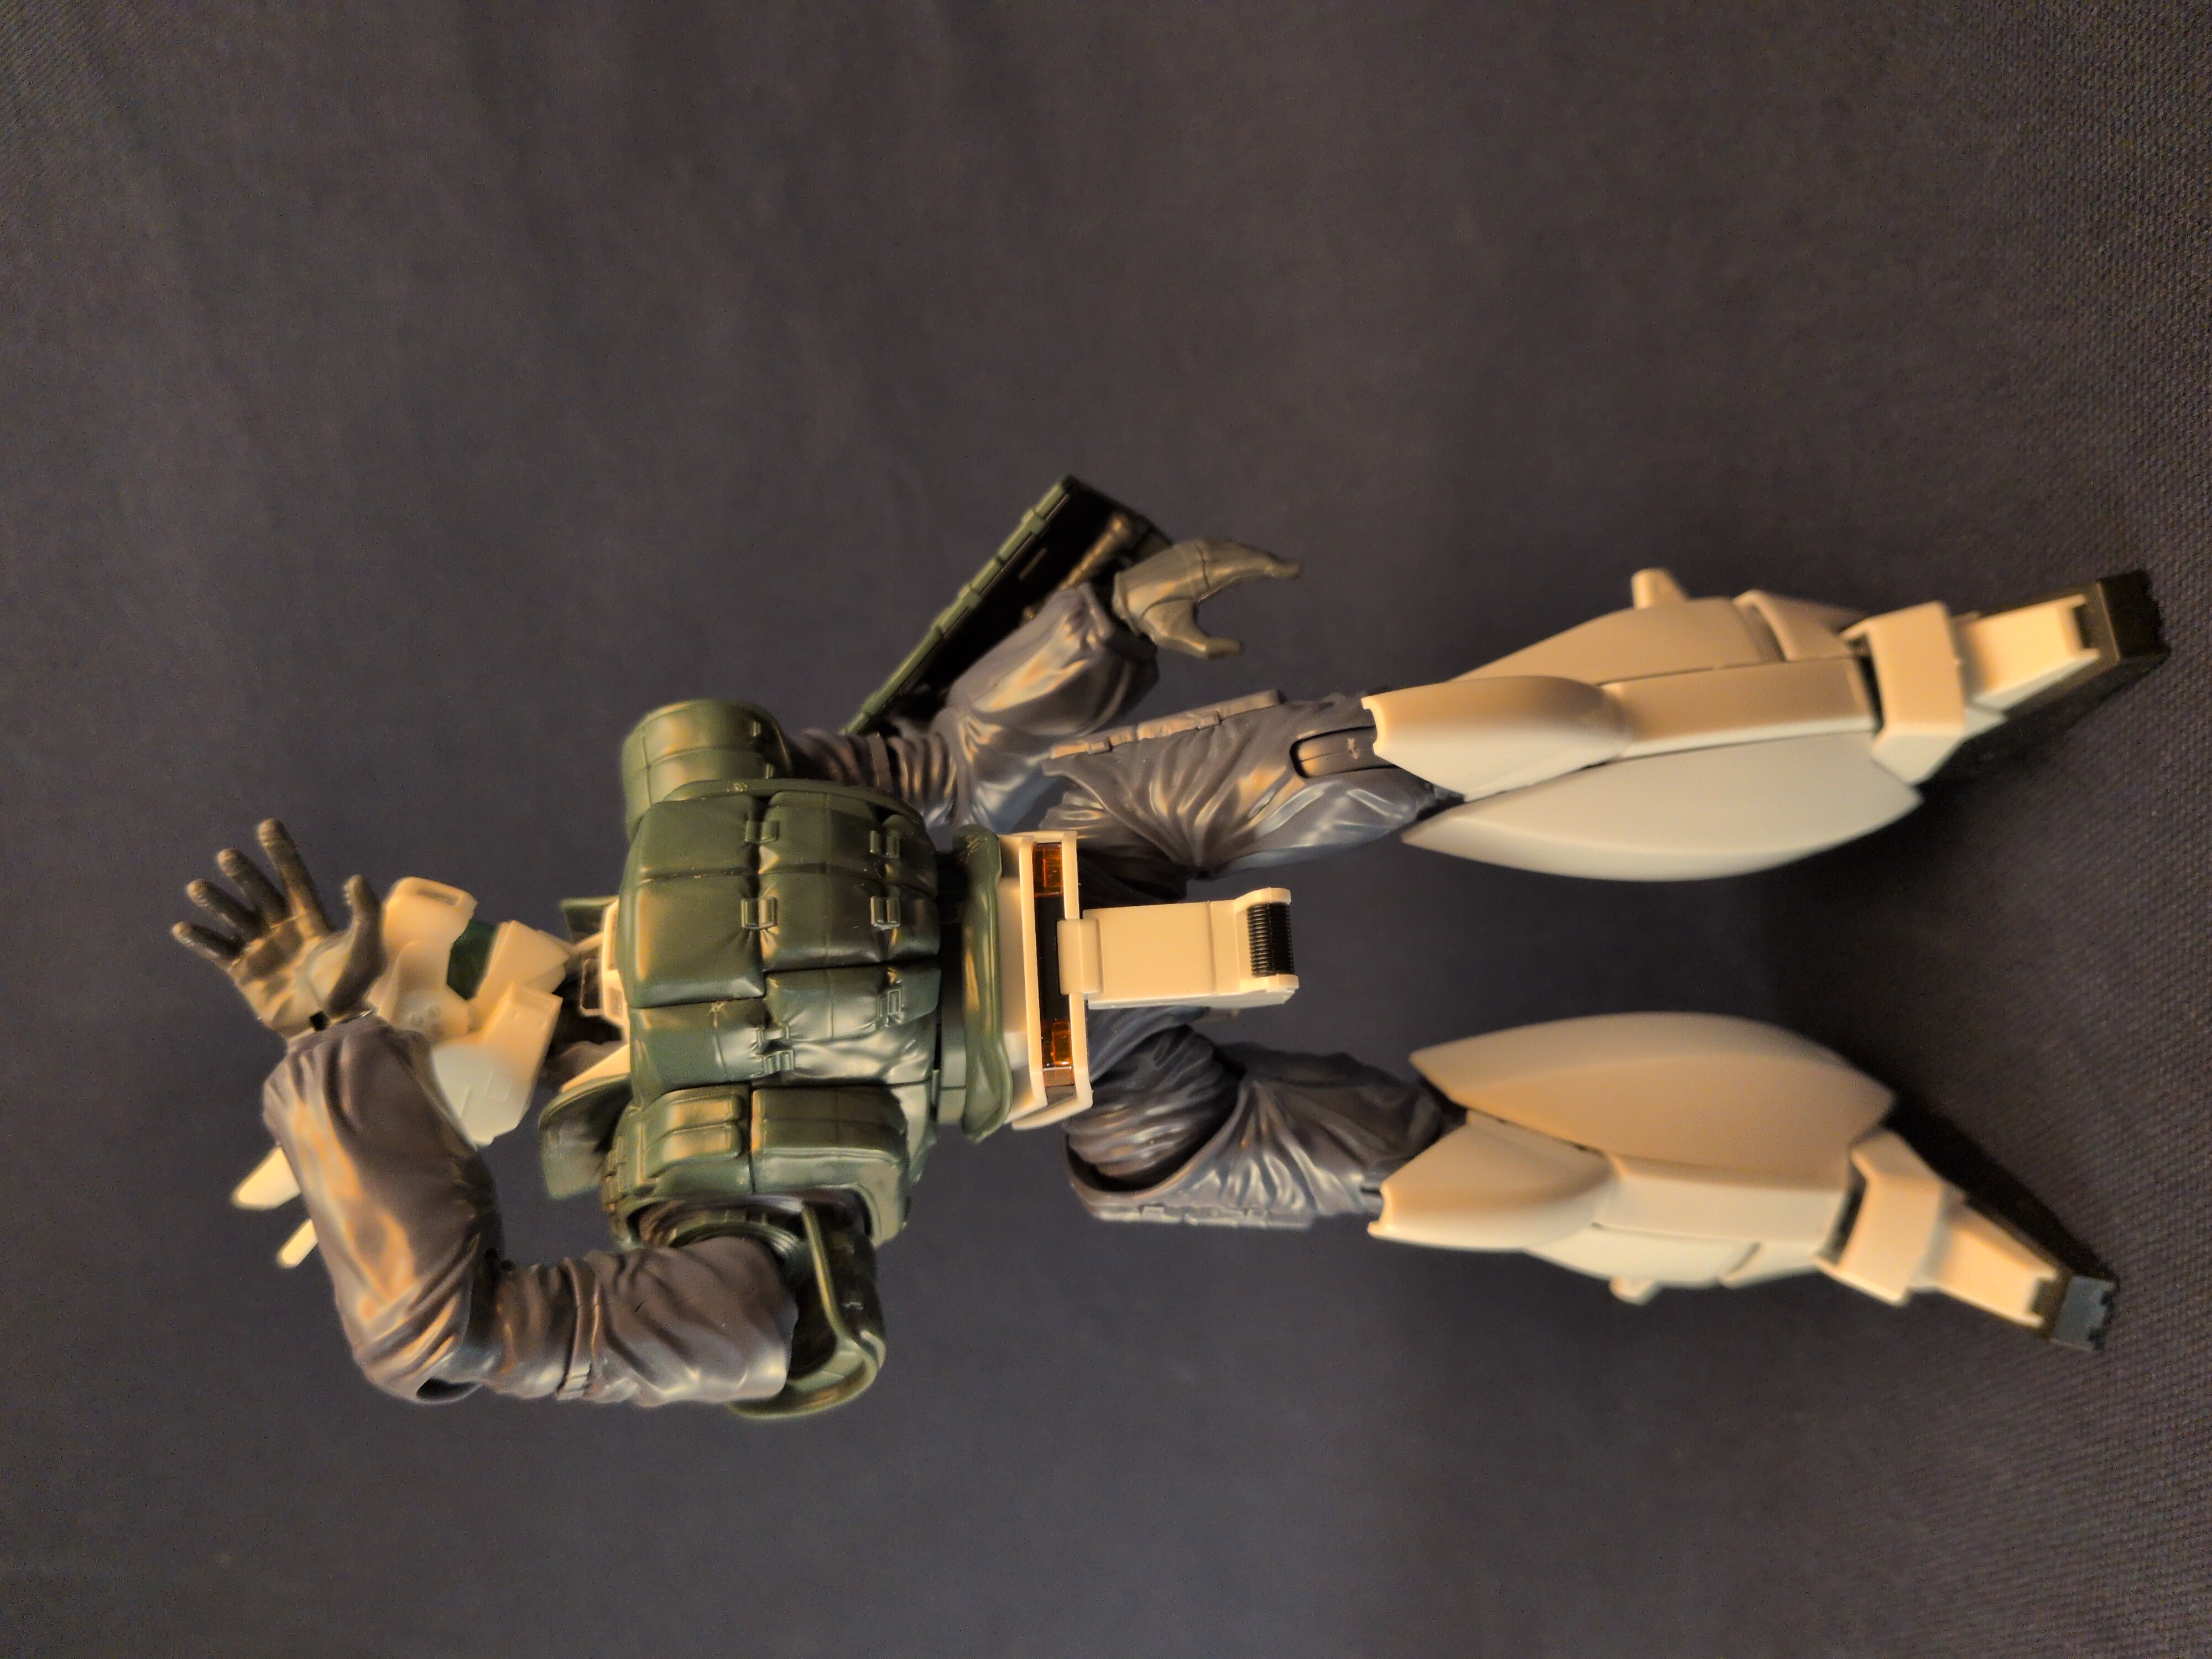
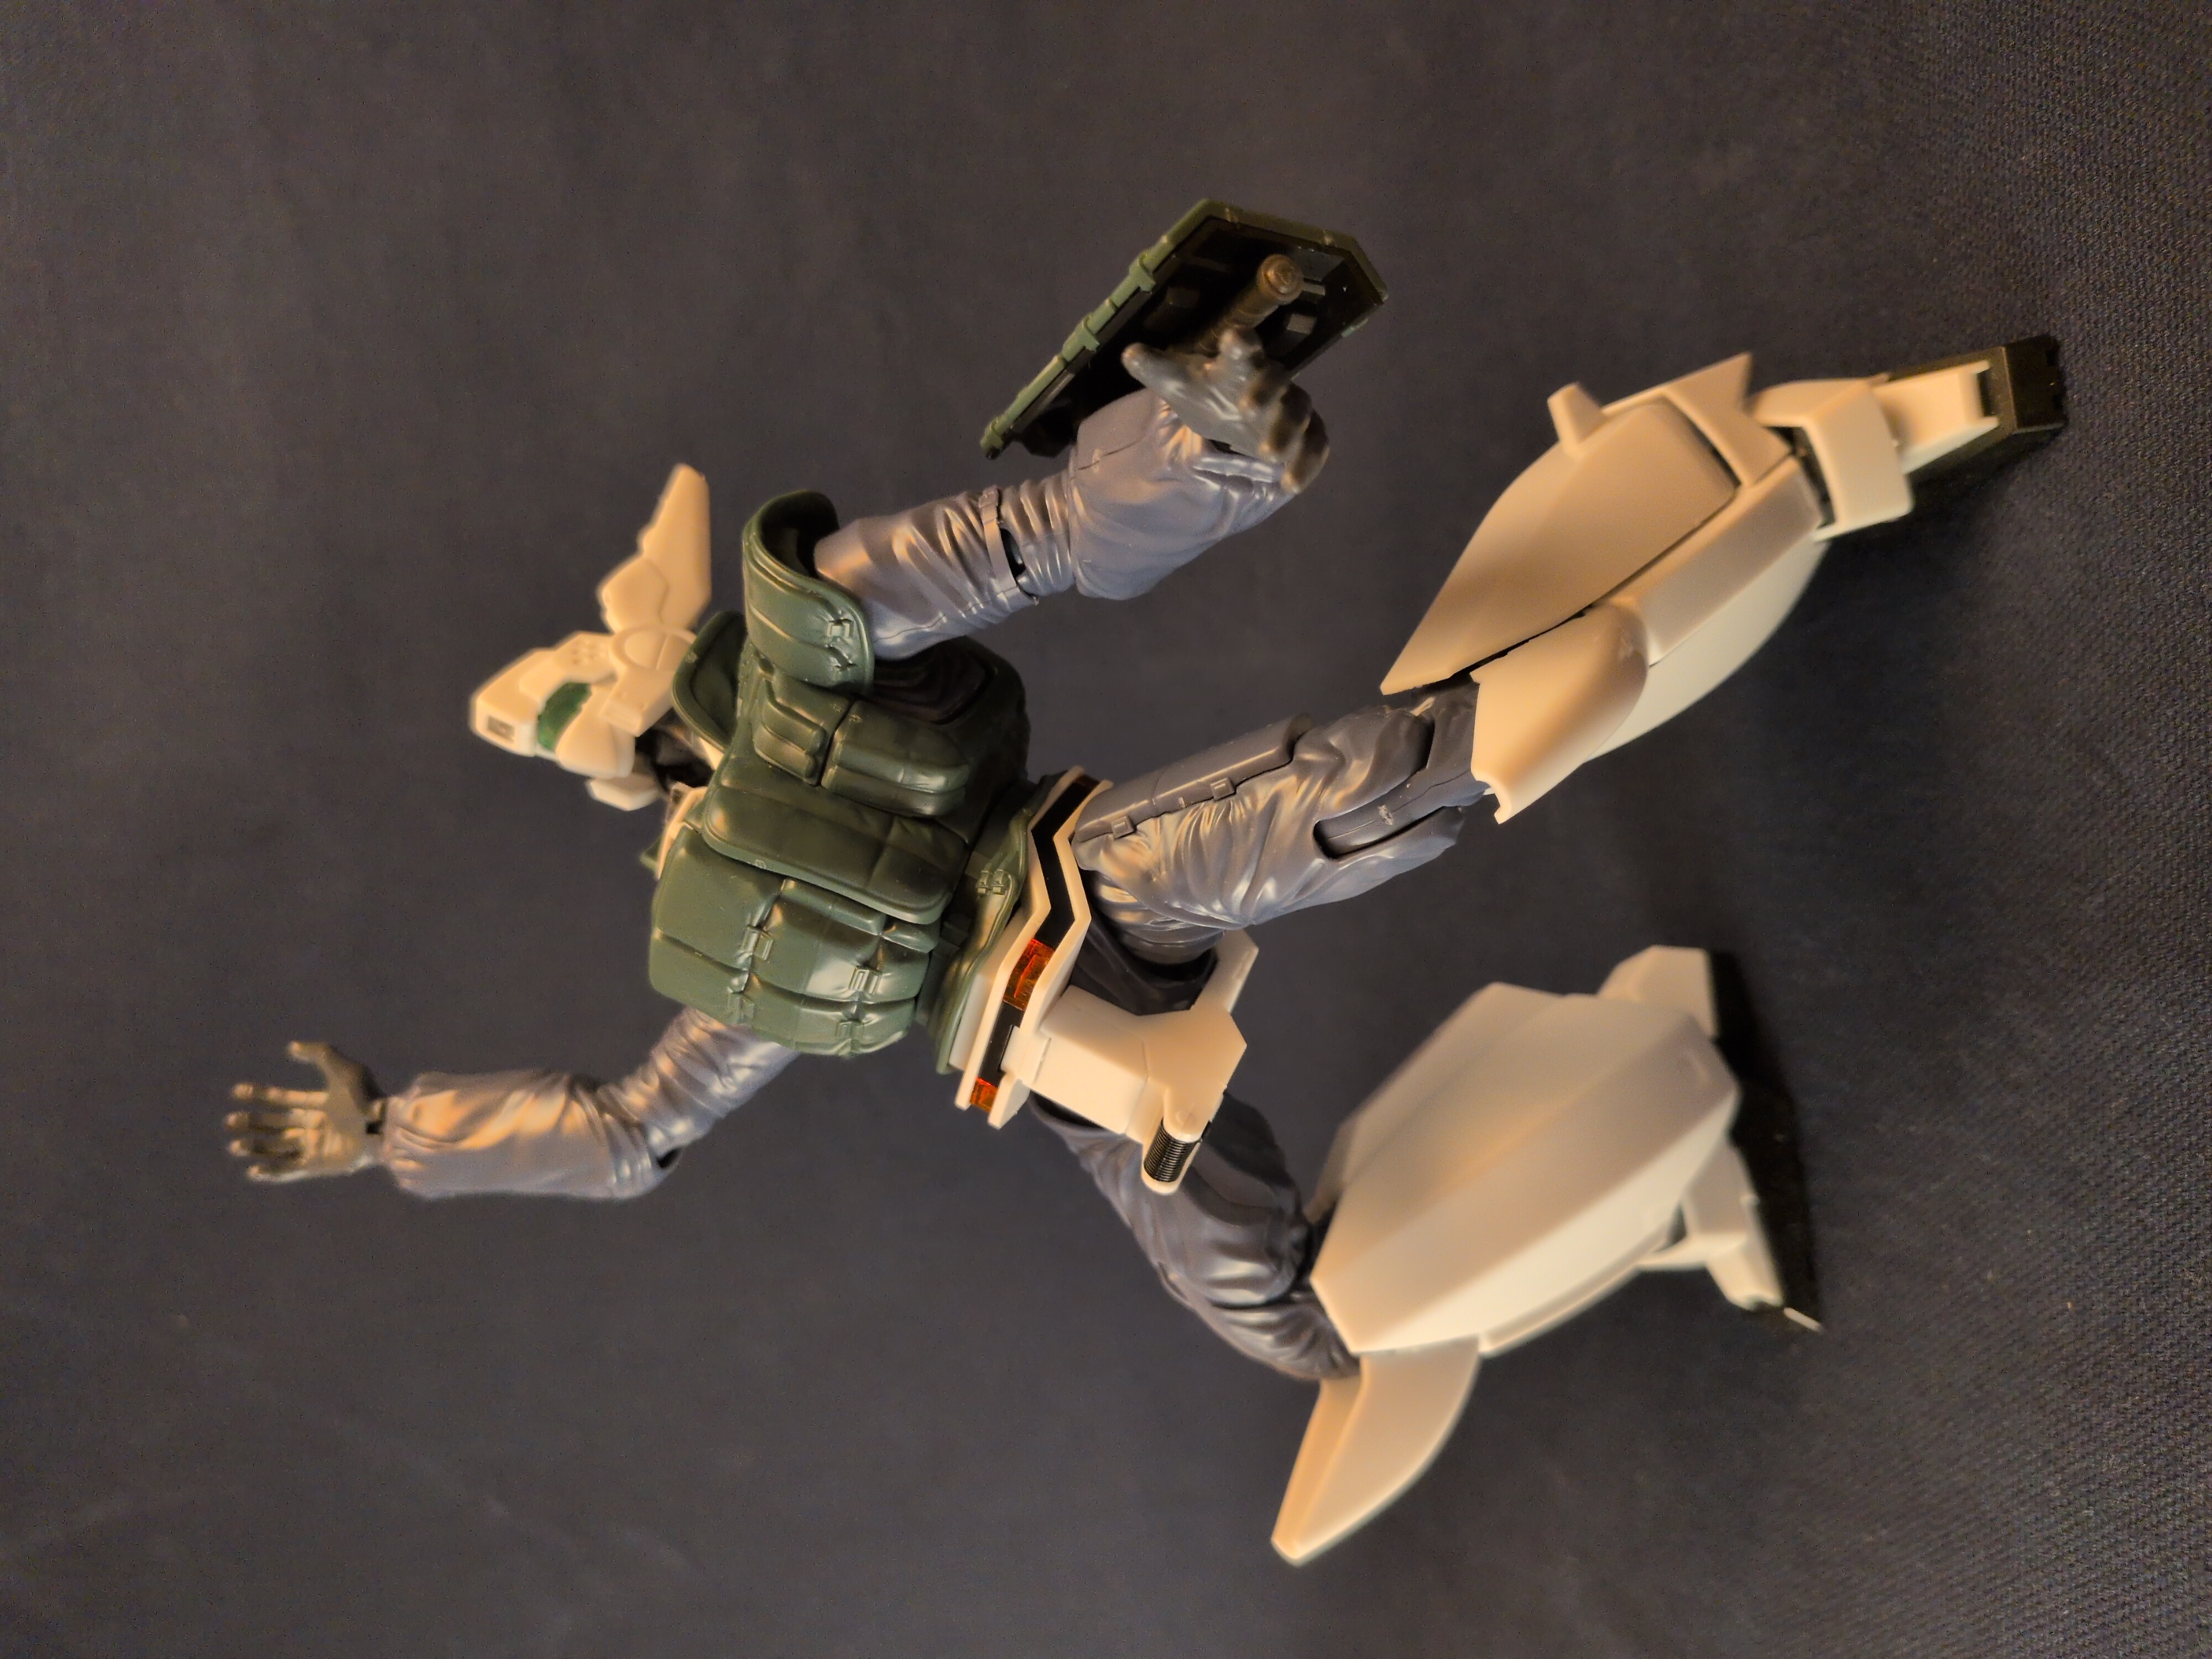
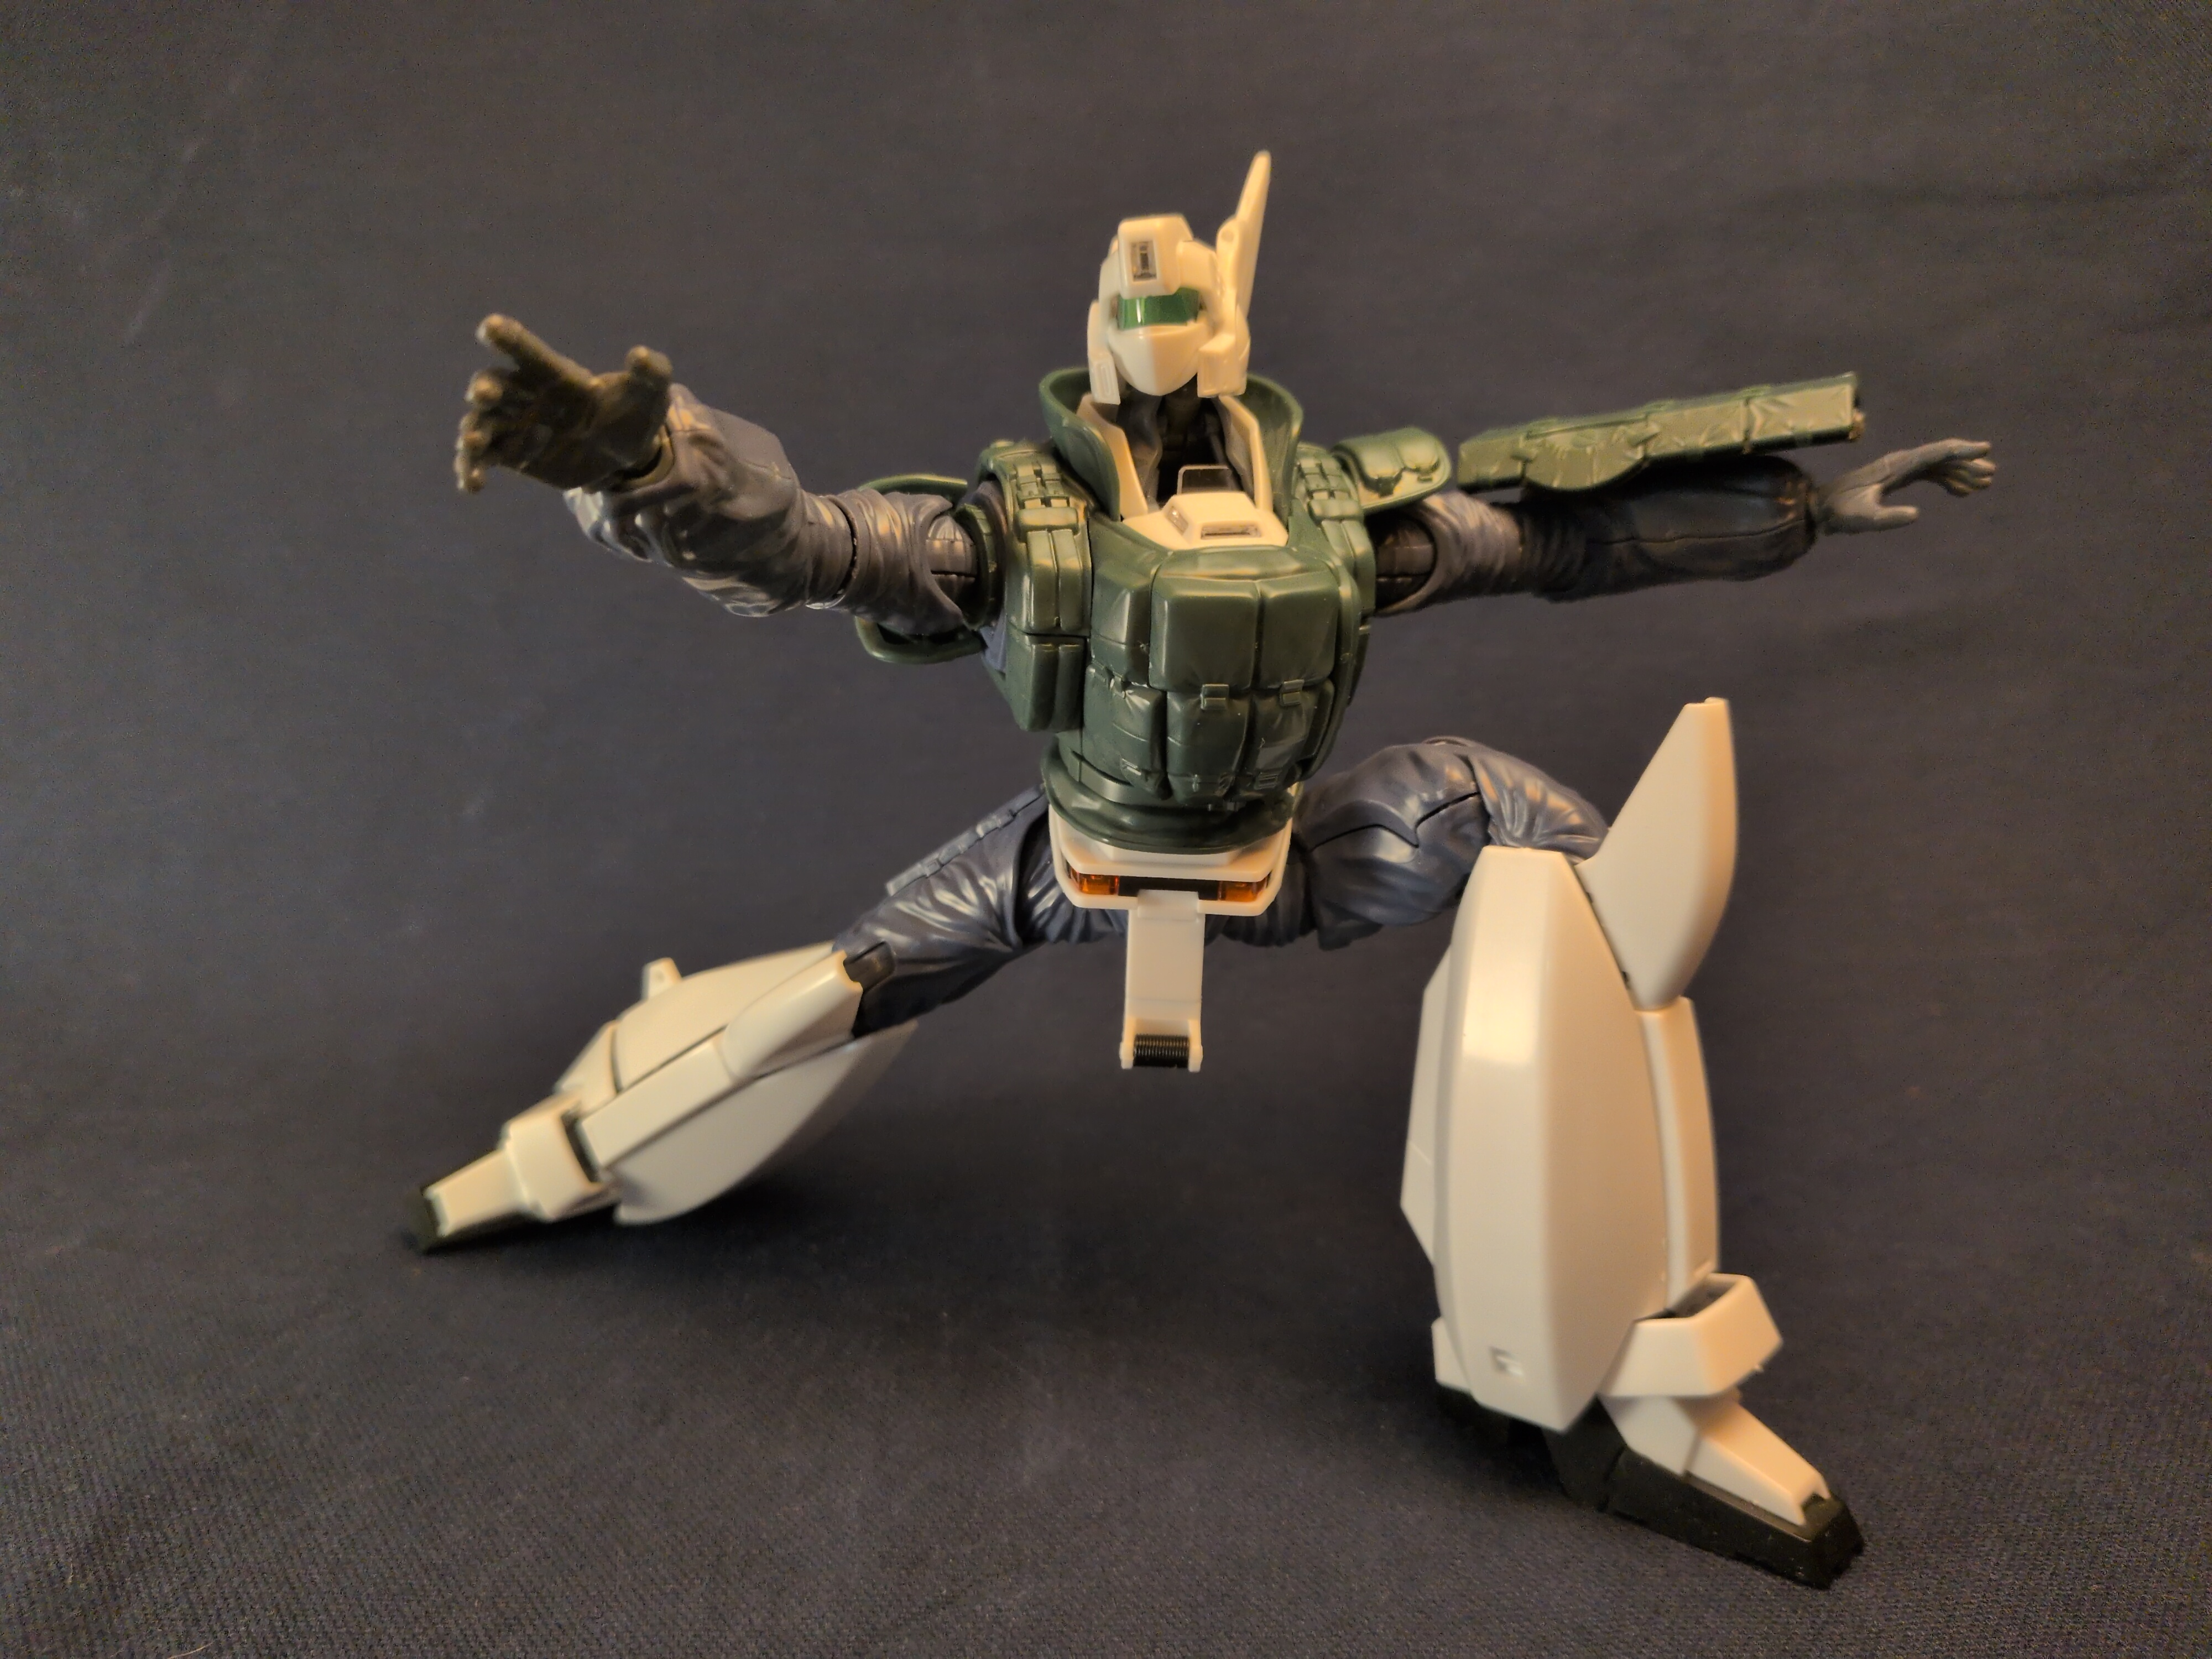
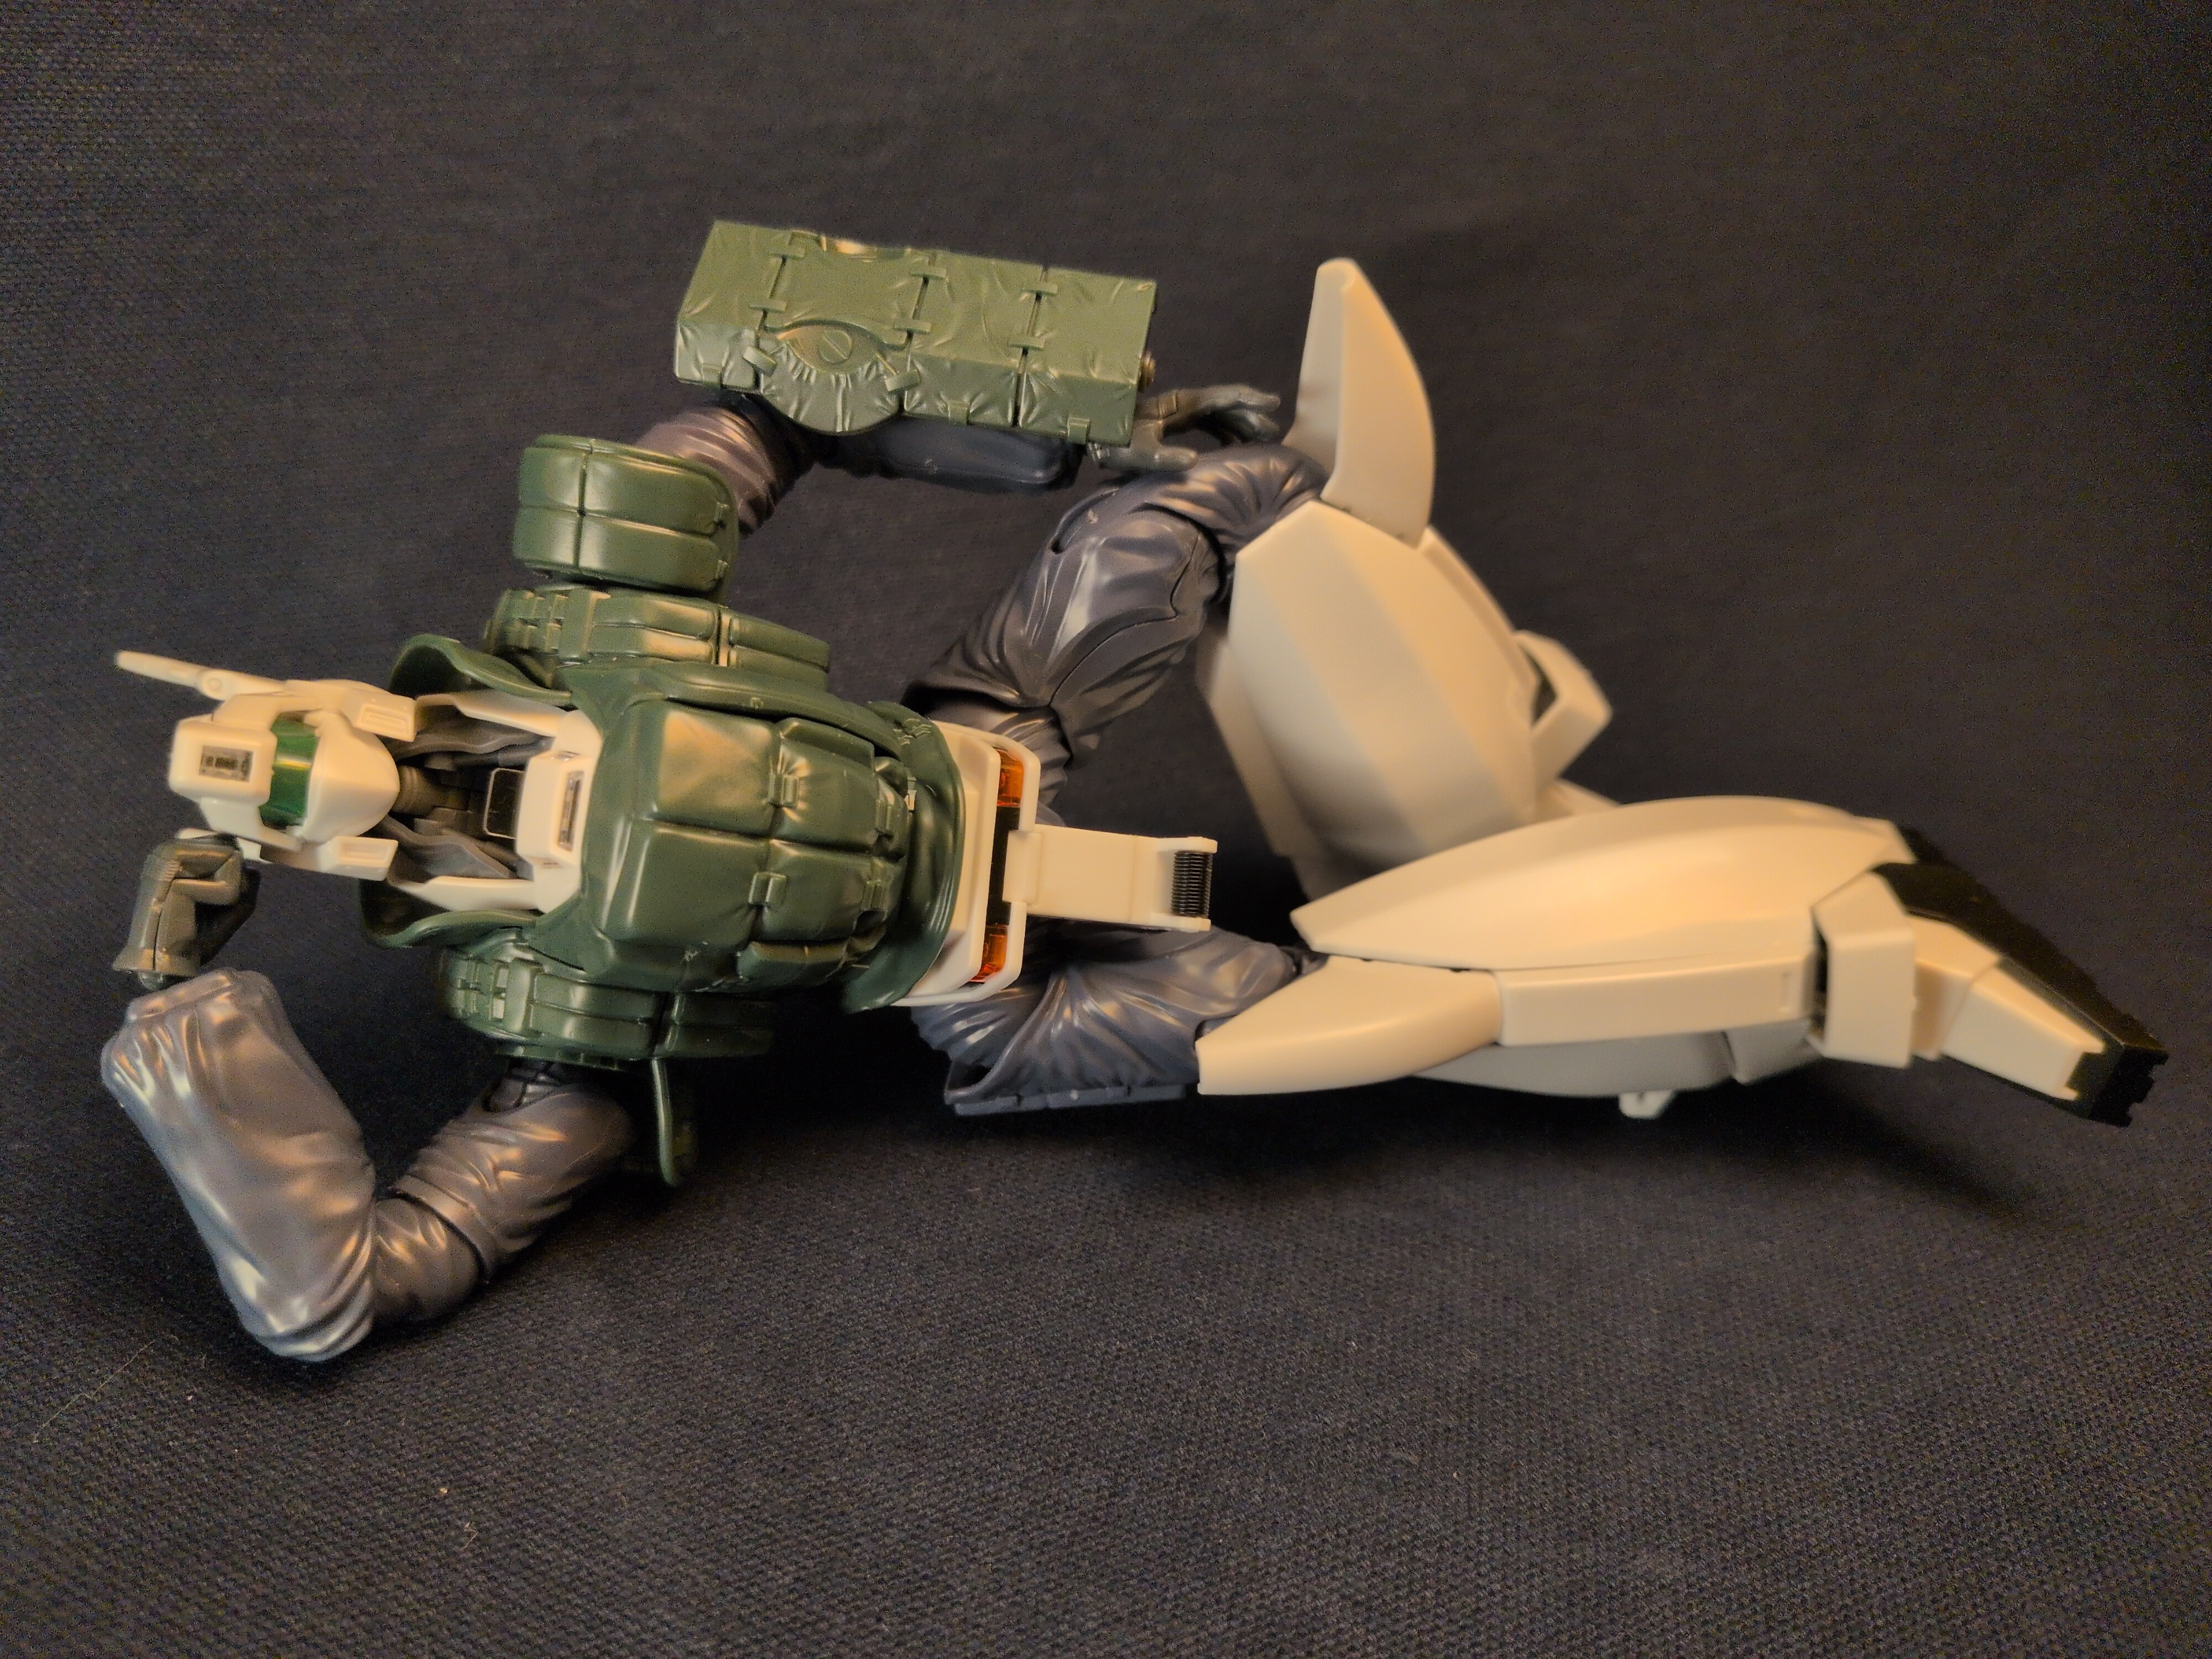
Dynamic Poses
Half the fun with figures like these is posing them. I took inspiration from Hirohiko Araki and his work Jojo’s Bizarre Adventure. Taking inspiration himself from Michelangelo’s sculptures, Araki has a distinctive style of posing his characters. I’m not really sure how to describe his style of posing other than compelling, energetic, and dynamic. I tried to pose the Patlabor mech in a similar way, or at least as best I could with the limited joint movement. Enjoy.
Behind the scenes
For the curious, here’s the behind the scenes on how I took my pictures. Whether you’ll want to critique or emulate the method I leave up to you. I found a video on how to photograph models and made do with what I had on hand. Is it perfect? No. Did I buy anything? Also no. Maybe in the future when I make more models and find myself taking photos regularly, I will care to invest in better equipment. But for a short off event, better to do what you can with what you have.

I’m almost as proud of myself for my makeshift photography studio as I am the model. I have the bad habit of buying things to solve my problems, which is a habit I am trying to break. This was a good exercise in looking for alternatives and good-enough solutions. The blue background is a piece of canvas cloth I use as whole-desk mouse pad. My wife was kind enough to help wash and iron it to make as even a background as possible. The lamps were all two of the desk lamps I could find in the house, and I taped a piece of printer paper to the underside of the cabinet to reflect and diffuse the light as best I could. I took the photos with whatever camera is built into my Pixel 9a. Not perfect, but for a first attempt certainly better than just setting it the model on a table.
That’s all, folks. Thank you for reading this far; I hope you have a nice day.